These steps will guide you through setting up single sign-on (SSO) for for Amazon Web Services (AWS) for a single role. If you want to set up SSO that supports multiple AWS roles or accounts, see Configuring SAML for Amazon Web Services (AWS) with Multiple Accounts and Roles.
Tip: In some cases, a field macro or custom user field can be used. This feature requires a OneLogin subscription with the Advanced Directory add-on.
-
Sign in to the OneLogin administrator dashboard and go to Apps > Add Apps.
-
Search for and select Amazon Web Services (AWS).
-
Edit the application's name and display information if desired, and click Save.
-
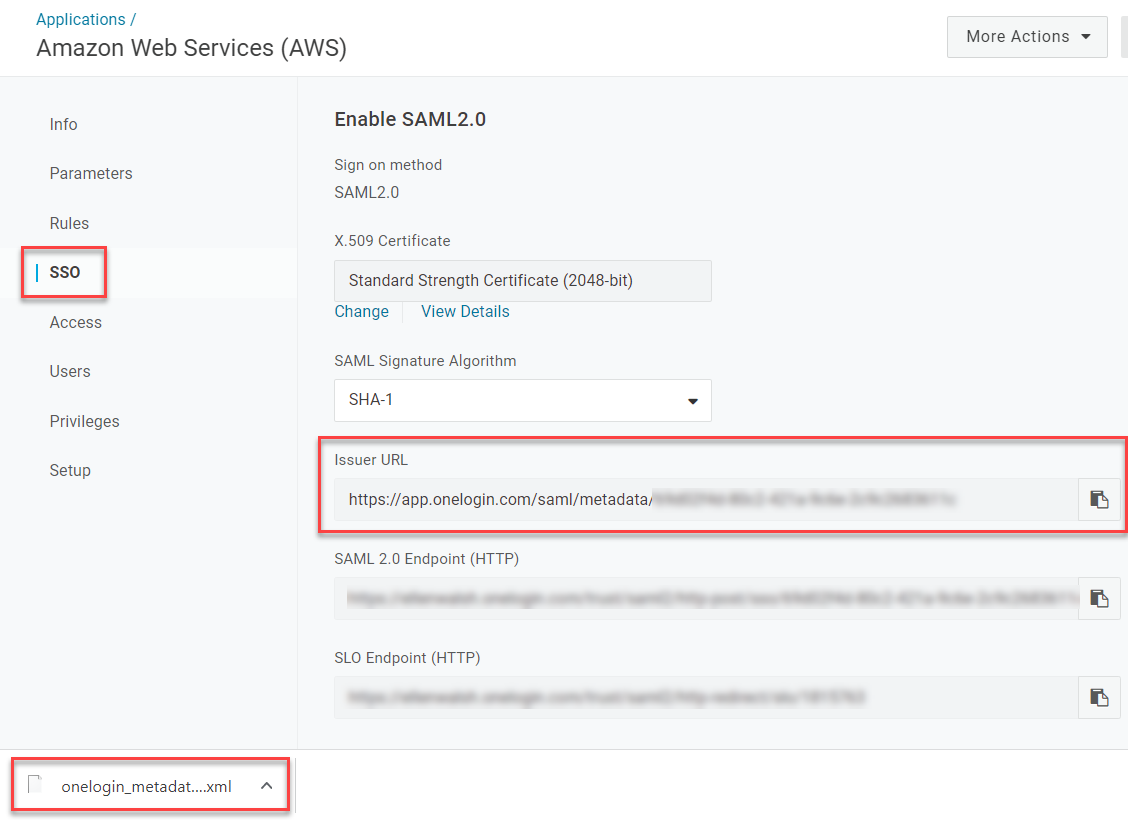
In the SSO tab, copy and paste the Issuer URL into your browser's address bar to download the metadata XML document for use in a later step.
-
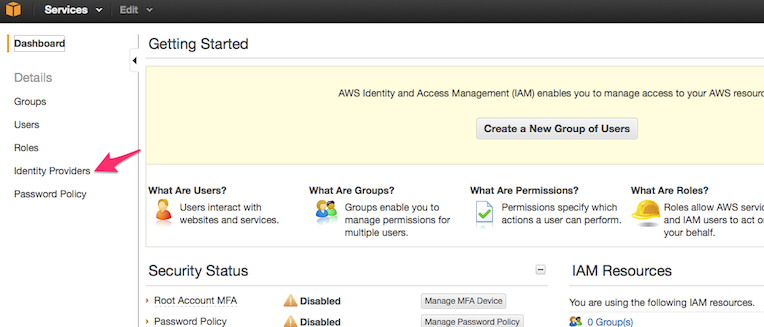
Open a new browser tab and sign in to your AWS Management Console. Go to IAM, then Identity Providers.
-
Select Create SAML Provider. In the prompt that appears, provide a name for the Identity Provider, such as
OneLogin. -
Upload the metadata XML document you previously downloaded from the SSO tab in OneLogin.
-
For the Provider, select OneLogin.
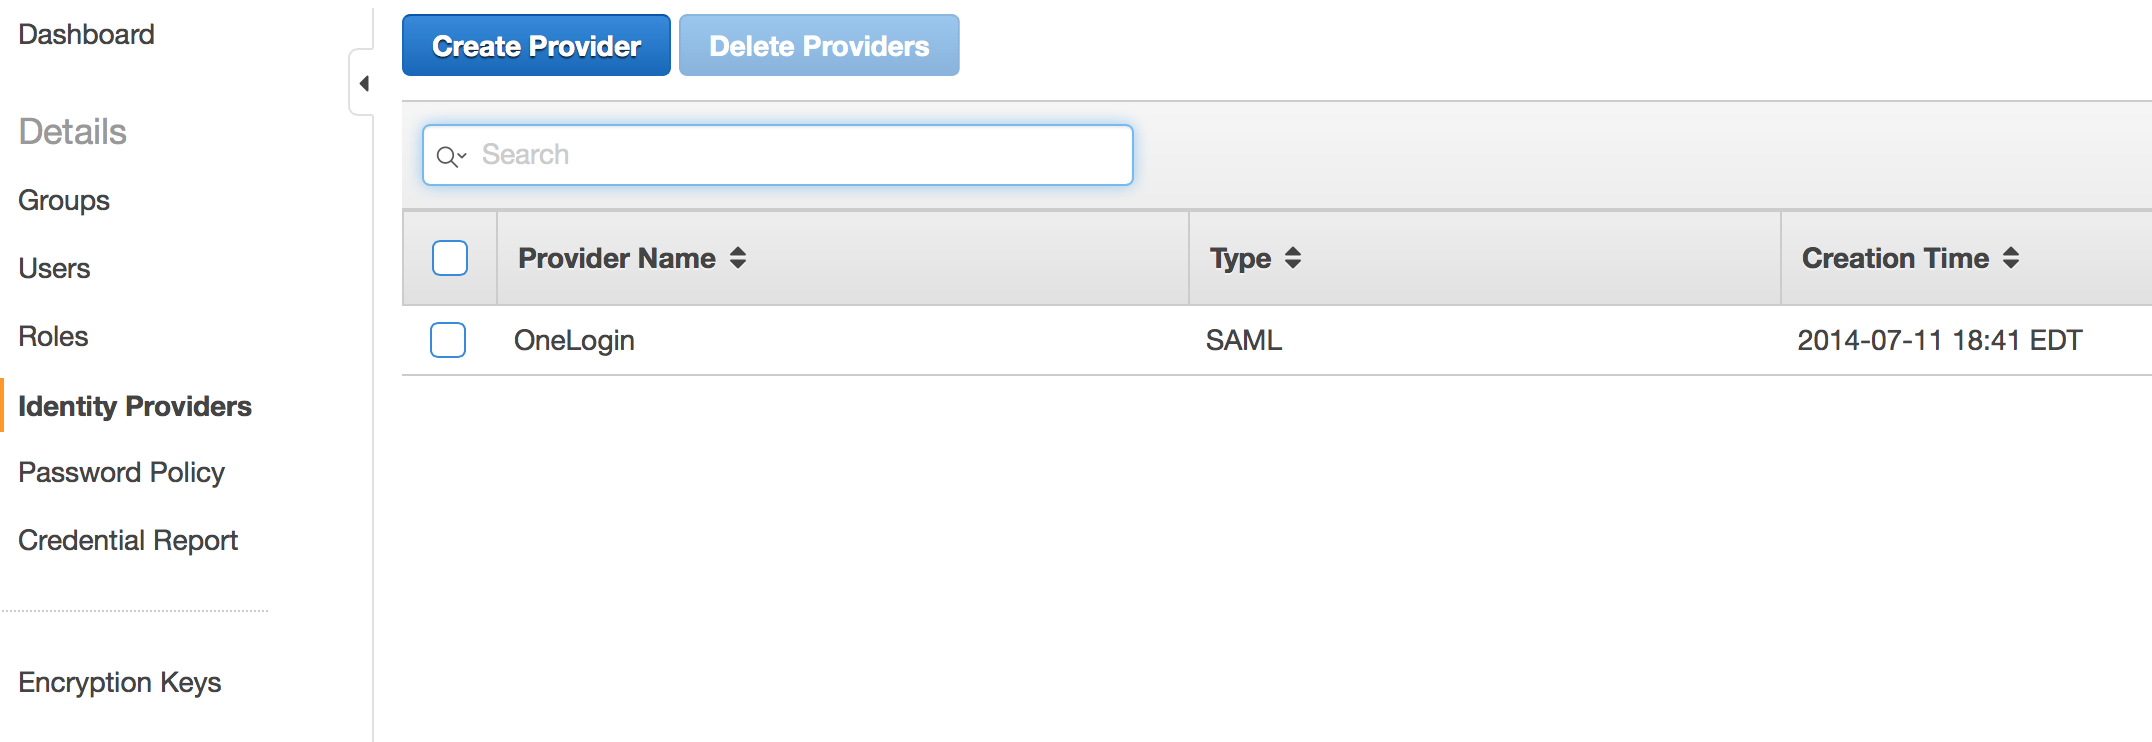
- Open your new provider and go to the Summary tab to make note of the Provider ARN for use in a later step.

-
Go to Roles and click Create New Role.
-
Give your role a user-friendly name, then for Role Type, choose Role For Identity Provider Access.
-
Click Grant Web Single Sign-On (Web SSO) access to SAML Providers and choose the SAML provider you created above.
- Set at least one condition for the role; there are a variety of SAML attributes you can match it against.
Note: WebSSO defaults to the SAML:aud condition and cannot be changed to another :aud value.
-
Choose the permissions that federated users will inherit when using this role and review your settings to complete the role creation.
- Open your new role and go to the Summary tab to make note of the Role ARN for later use alongside the Provider ARN that you copied earlier.

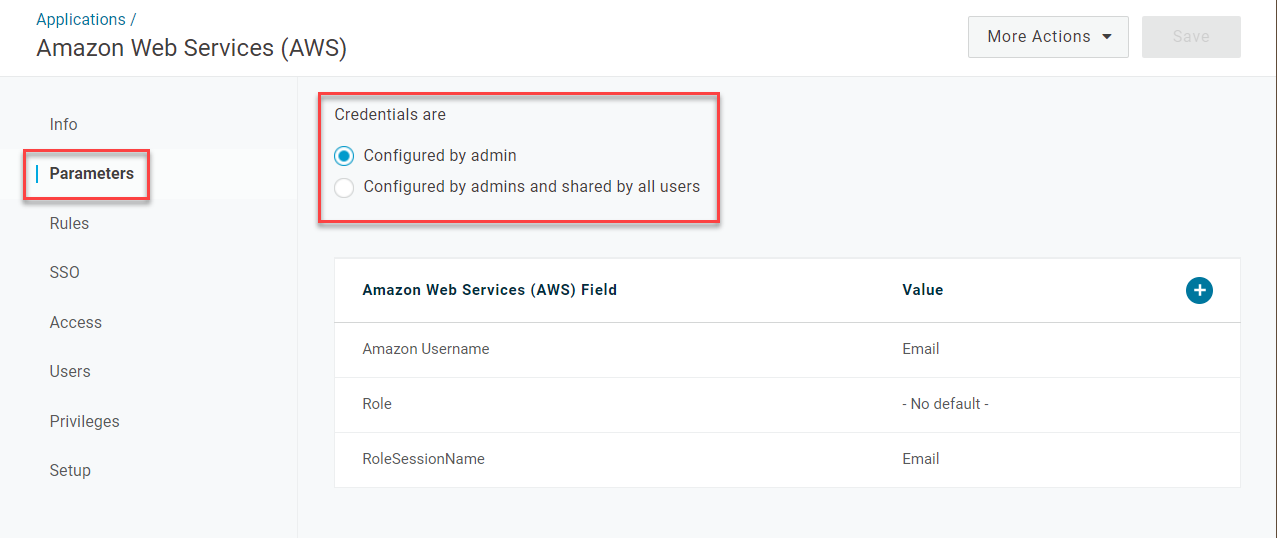
- Return to your OneLogin browser tab and go to your new app's Parameters. Verify that the Credentials are Configured by admin.
- Open the Role field and set the Value to - Macro -. In the text box that appears under the dropdown field, paste the ARNs that you copied previously, separated by a comma:
role-arn,provider-arn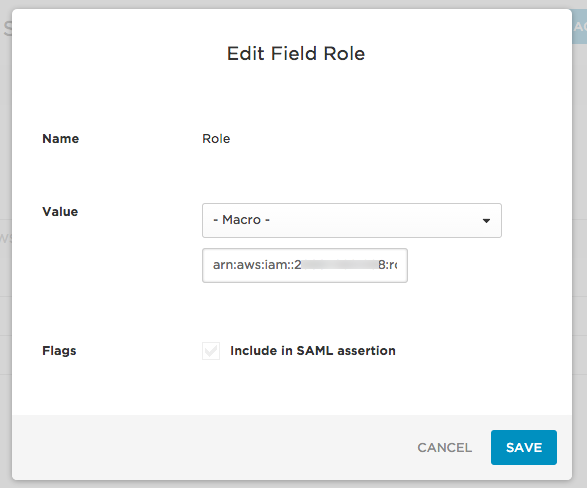
E.g., arn:aws:iam::222222222222:role/sso,arn:aws:iam::222222222222:saml-provider/OneLogin - Click Save to finish mapping the Role parameter to AWS and review the other parameters.
By default, the Amazon Username (the username displayed in the AWS interface) and RoleSessionName (the user identifier while the session is active) are both set to Email and have a limit of 32 characters. If your users have emails longer than that character limit, we recommend changing them to userPrincipleName and AD ID respectively. Whatever values you choose, they must be between 2 and 32 characters long, and can contain only letters, numbers, and the following special characters (no spaces):
+=,.@-_ -
Click Save again. Your SAML connection is complete!