This article details how to configure OneLogin to sign in users into Sumo Logic using SAML.
In OneLogin, do the following:
- In OneLogin, navigate to Applications > Applications, then click Add App and search for Sumo Logic. Click Add.
If you are using a different datacenter from US1 (https://service.sumologic.com) please use the connector Sumo Logic Multi and select the right datacenter for your company. You can find your datacenter by viewing the Sumo URL in the address bar.
Example: US2 = service.us2.sumologic.com, etc.. - In the Add Sumo Logic screen select for the app to be used by the Organization. Press Continue.
- Type your Sumo Logic Configuration ID into the Configuration ID field within the Configuration tab. For now, just enter a random value. Once you have created the SAML configuration in Sumo Logic, you will have to grap this ID from the end of the Authentication Request URL provided by Sumo Logic.
- Under the Single Sign-on tab copy the HTTP Endpoint under SAML Endpoints and the Issuer URL to the clipboard for use in Sumo Logic later, then click View Details under the X.509 certificate, copy the value, and store it in a safe place. Set the credentials to Configured by admin and select a default Email value of email or something equivalent to email to use as the Sumo Logic credential. Select First Name and Last Name for the First and Last Name fields.
- Under the Access Control tab choose which roles will have access to Sumo Logic.
In Sumo Logic, do the following:
- Go to Administration > Security > SAML, then click the plus (+) icon to create a new configuration.

- On the Add Configuration page, enter your Configuration URL, then select the Debug Mode option if you'd like to view additional details if an error occurs when a user attempts to authenticate.
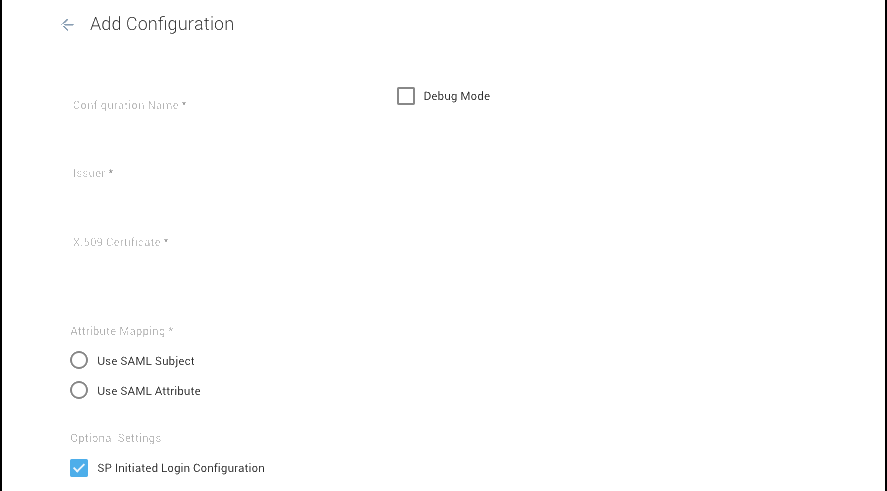
- Enter the Issuer URL you copied earlier into the Issuer field.
- Go to Security>SAML and paste the X.509 Certificate you copied earlier into the text box.
- Move on to Attribute Mapping and select Use SAML subject.
- Under Roles select Do not modify if you do not want to use Just In Time Provisioning, otherwise select default roles for users when signing in for the first time.
- Leave SP Initiated unchecked.
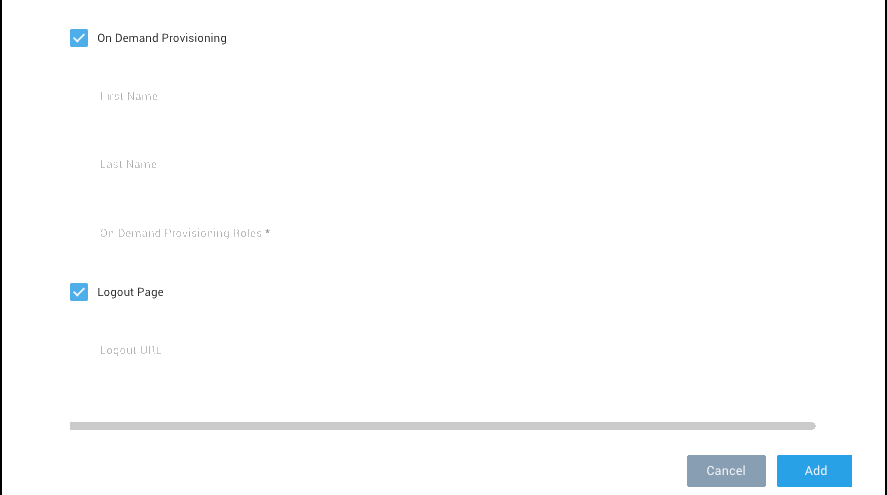
- To enable Just In Time Provisioning select On Demand provisioning with First Name Attribute of firstname and Last Name Attribute of lastname.
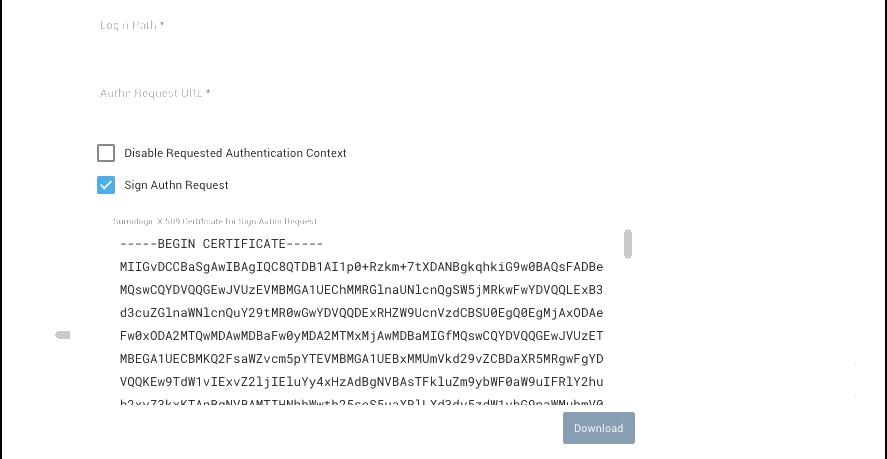
- Enter https://app.onelogin.com/client/apps into the Logout Page field.
- Click Save to save the SAML configuration.
- Once saved, select SAML in Sumo Logic again and copy the number at the end of the Authentication Request field, then switch back to OneLogin. This is the Configuration ID in step 3 of the OneLogin configuration.
Optional configurations: For instructions for configuring optional SAML behaviors, see see Set Up SAML for Single Sign-On in Sumo help. Options include:
- Configure SP-initiated Login. In this configuration, when a Sumo user logs in, Sumo redirects the user to OneLogin with a SAML AuthnRequest. The request contains the information that your IdP needs to authenticate the user. Your IdP replies to Sumo with a SAML Assertion (SAMLResponse).
- Configure roles attribute. If you enable the Roles Attribute option, Sumo Logic assigns roles to a user every time the user logs in. Roles must be configured on OneLogin and assigned as part of the SAML assertion.
- Configure on-demand provisioning. If you configure on-demand provisioning, Sumo Logic automatically creates a user account the first time a user logs on to Sumo. To complete this procedure, you need to supply the First Name and Last Name attributes your IdP uses to identify users. For First Name Attribute, enter firstname. For Last Name Attribute, enter lastname.
- Configure logout page. Configure a logout page if you would like to point all Sumo users to a particular URL where users after logging out of Sumo Logic or after their session has timed out.
To test do the following:
- Login to OneLogin.
- Make sure you are logged out of Sumo Logic.
- Click the Sumo Logic icon on your dashboard. This logs you into Sumo Logic.
If you're not using the same Email in Sumo Logic as in OneLogin, do the following:
- Click Apps, then Company Apps.
- Edit the Sumo Logic application.
- Navigate to the Logins tab.
- Locate your user and click Edit.
- Type a new email into the Email field and click Update.
- Navigate to the portal and re-test by clicking the Sumo Logic icon.
Sumo Logic also support Just in Time Provisioning, which will allow you to create users on the fly. Whenever a user is given access to Sumo Logic in the portal of OneLogin via Access Control that user can be created if he or she doesn't already have a Sumo Logic Account. Select First Name and Last Name credentials for JIT Provisioning. Enter Default Roles within Sumo Logic.
Important Security Note! Access Keys are NOT controlled by SAML. This means that if a user has been turned off on the OneLogin side, their Sumo Logic Access Keys would still be valid. For this reason, administrators should audit users regularly and disable Access Keys when necessary.
By default, administrators can create new Sumo Logic forms-based logins in addition to SAML-provisioned users. This creates the need to either audit your accounts or ask Sumo Logic Support to enable SAML Lock Down. SAML Lock Down disables the ability for users to log in directly to Sumo Logic using username and password.
There are also a few minor changes to user management behavior, such as not sending an email when a user’s email account is modified. File a Sumo Logic Support request to enable this feature.