Prerequisites:
Configuring SAML for Remedy OnDemand.
The Basics
Ensure you're running Remedy 9.1 with the APIs enabled and that the API endpoints are visible either via FQDN or a static IP address. Choose a single form in Remedy to associate with the Remedy application in OneLogin to avoid changing user IDs.
Configure SAML
- Find the BMC Remedy v 9.1 (Helix Provisioning) connector in the OneLogin connector catalog and add it to your applications.
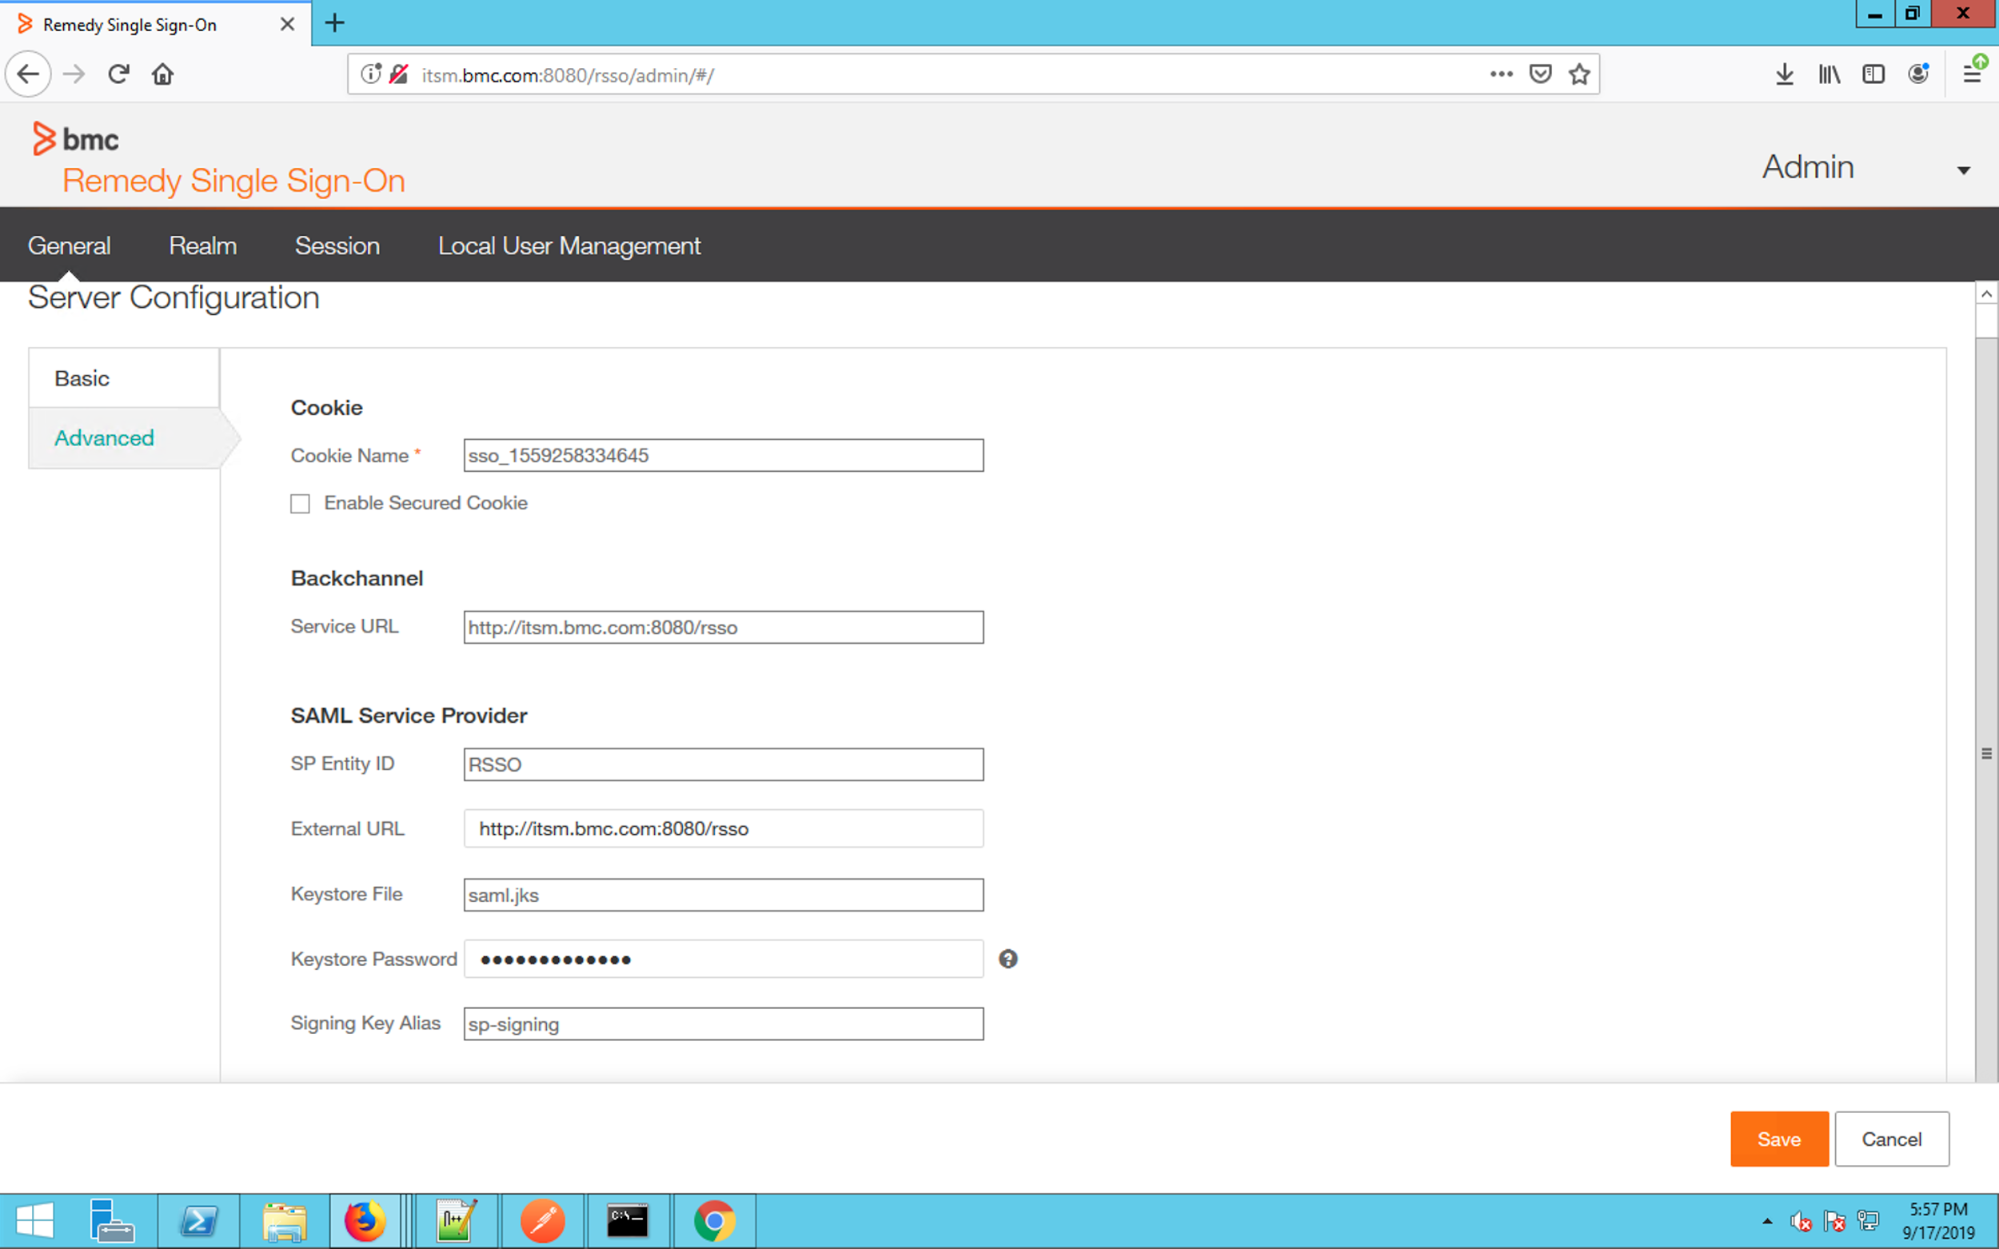
- In BMC Remedy SSO Admin, go to General > Advanced and copy the SP Entity ID and External URL.
BMC Remedy SSO Realms
Realms allow SAML to apply to specific areas of the product, while disabled for other parts. Refer to the BMC Remedy documentation for additional information on how to set up BMC Remedy Realms.
- In BMC Remedy SSO Admin, enable SAML for the specific realm you want to associate with OneLogin. This will typically be the realm that governs access to the entire BMC Remedy instance.
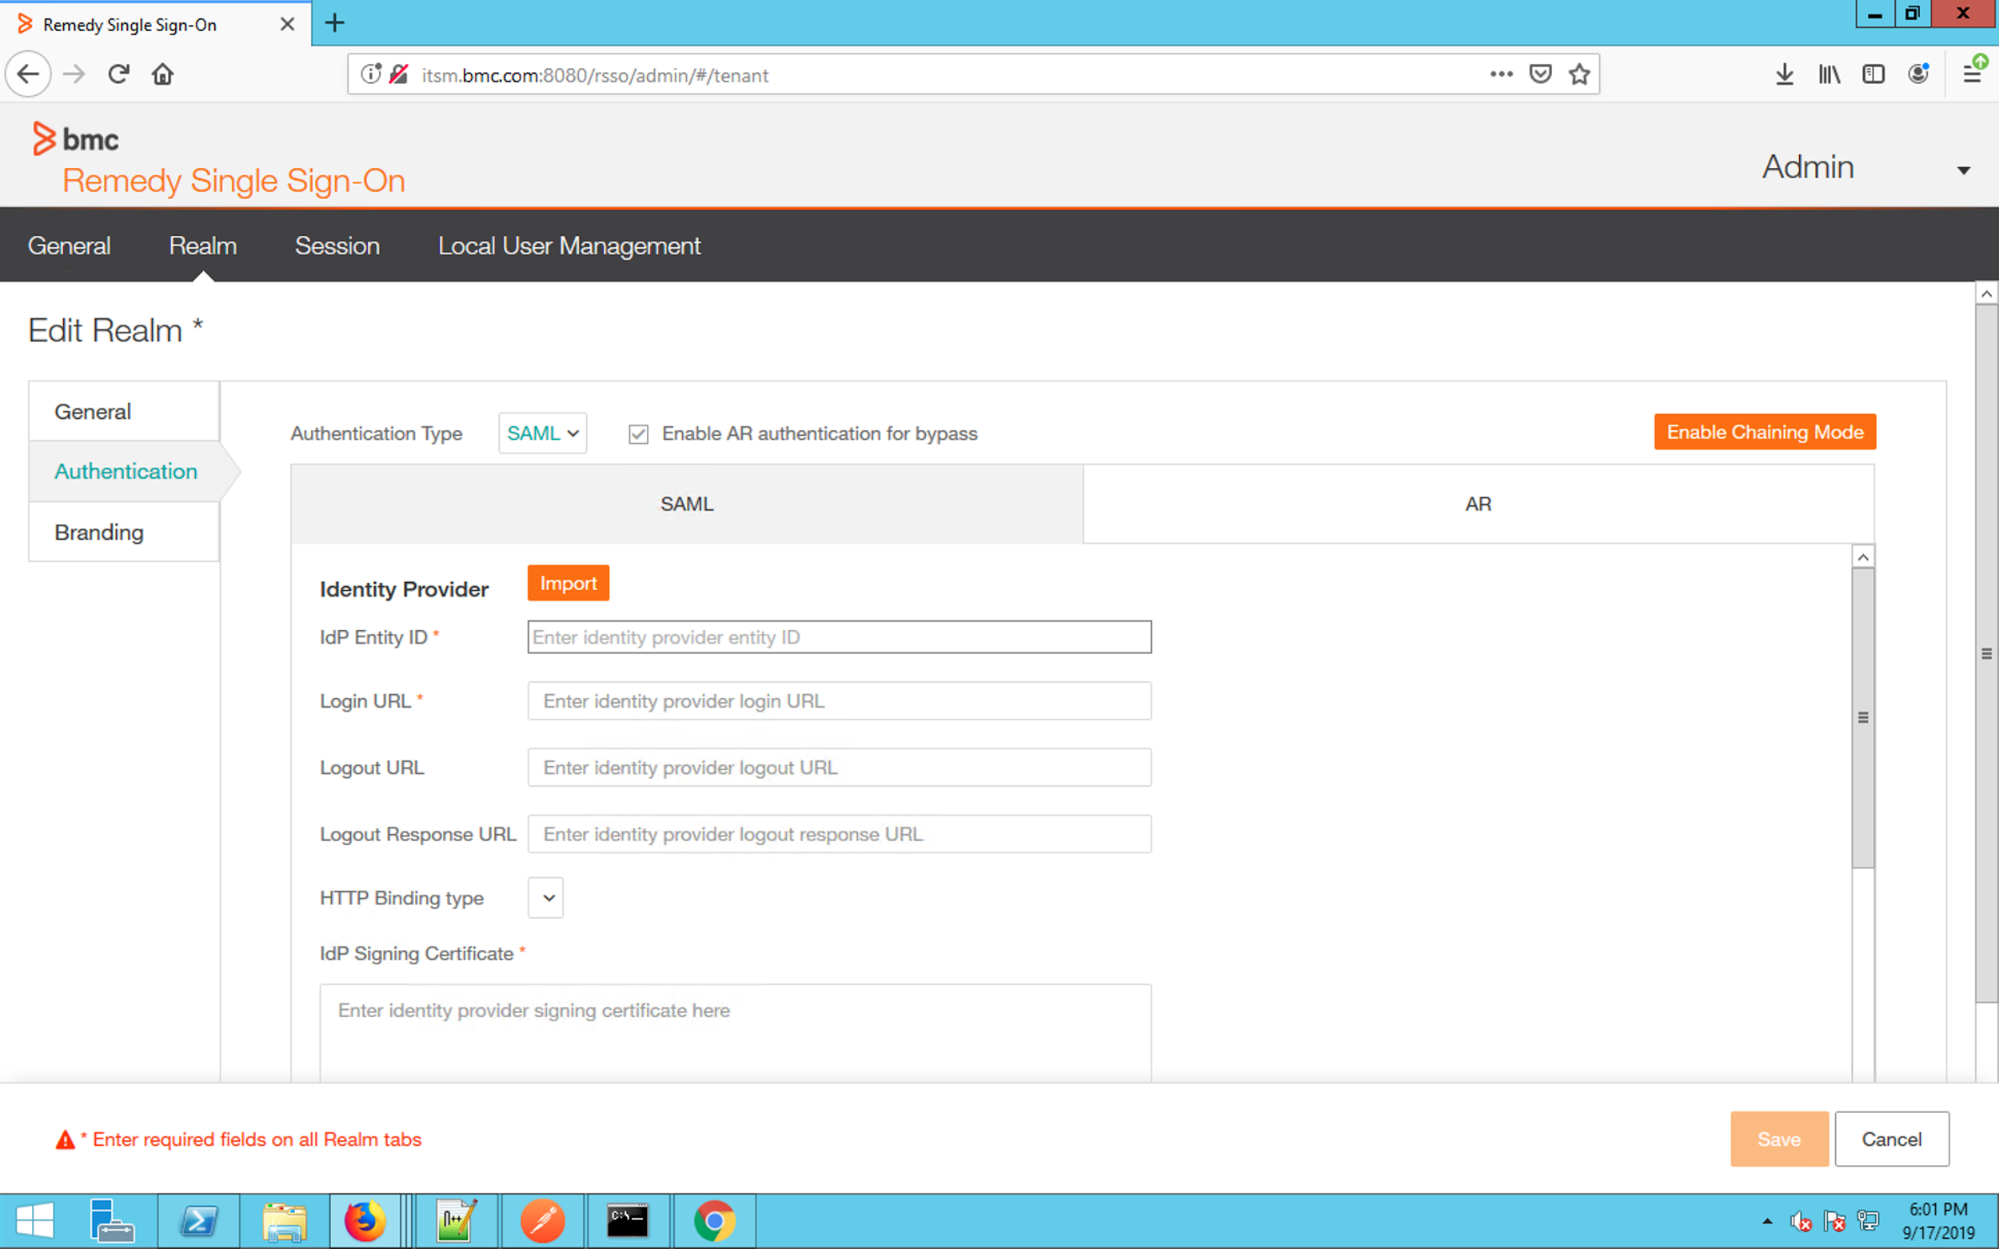
- In the Realm, navigate to Authentication and change the Authentication Type to SAML. OneLogin recommends checking the Enable AR authentication for Bypass option for Administrator login.
- Use the values found in the OneLogin Administrator to populate the fields, including the IdP Entity ID (SAML Issuer URL), Login URL (SAML 2.0 HTTP Endpoint), and IdP Signing Certificate (x.509 Certificate)
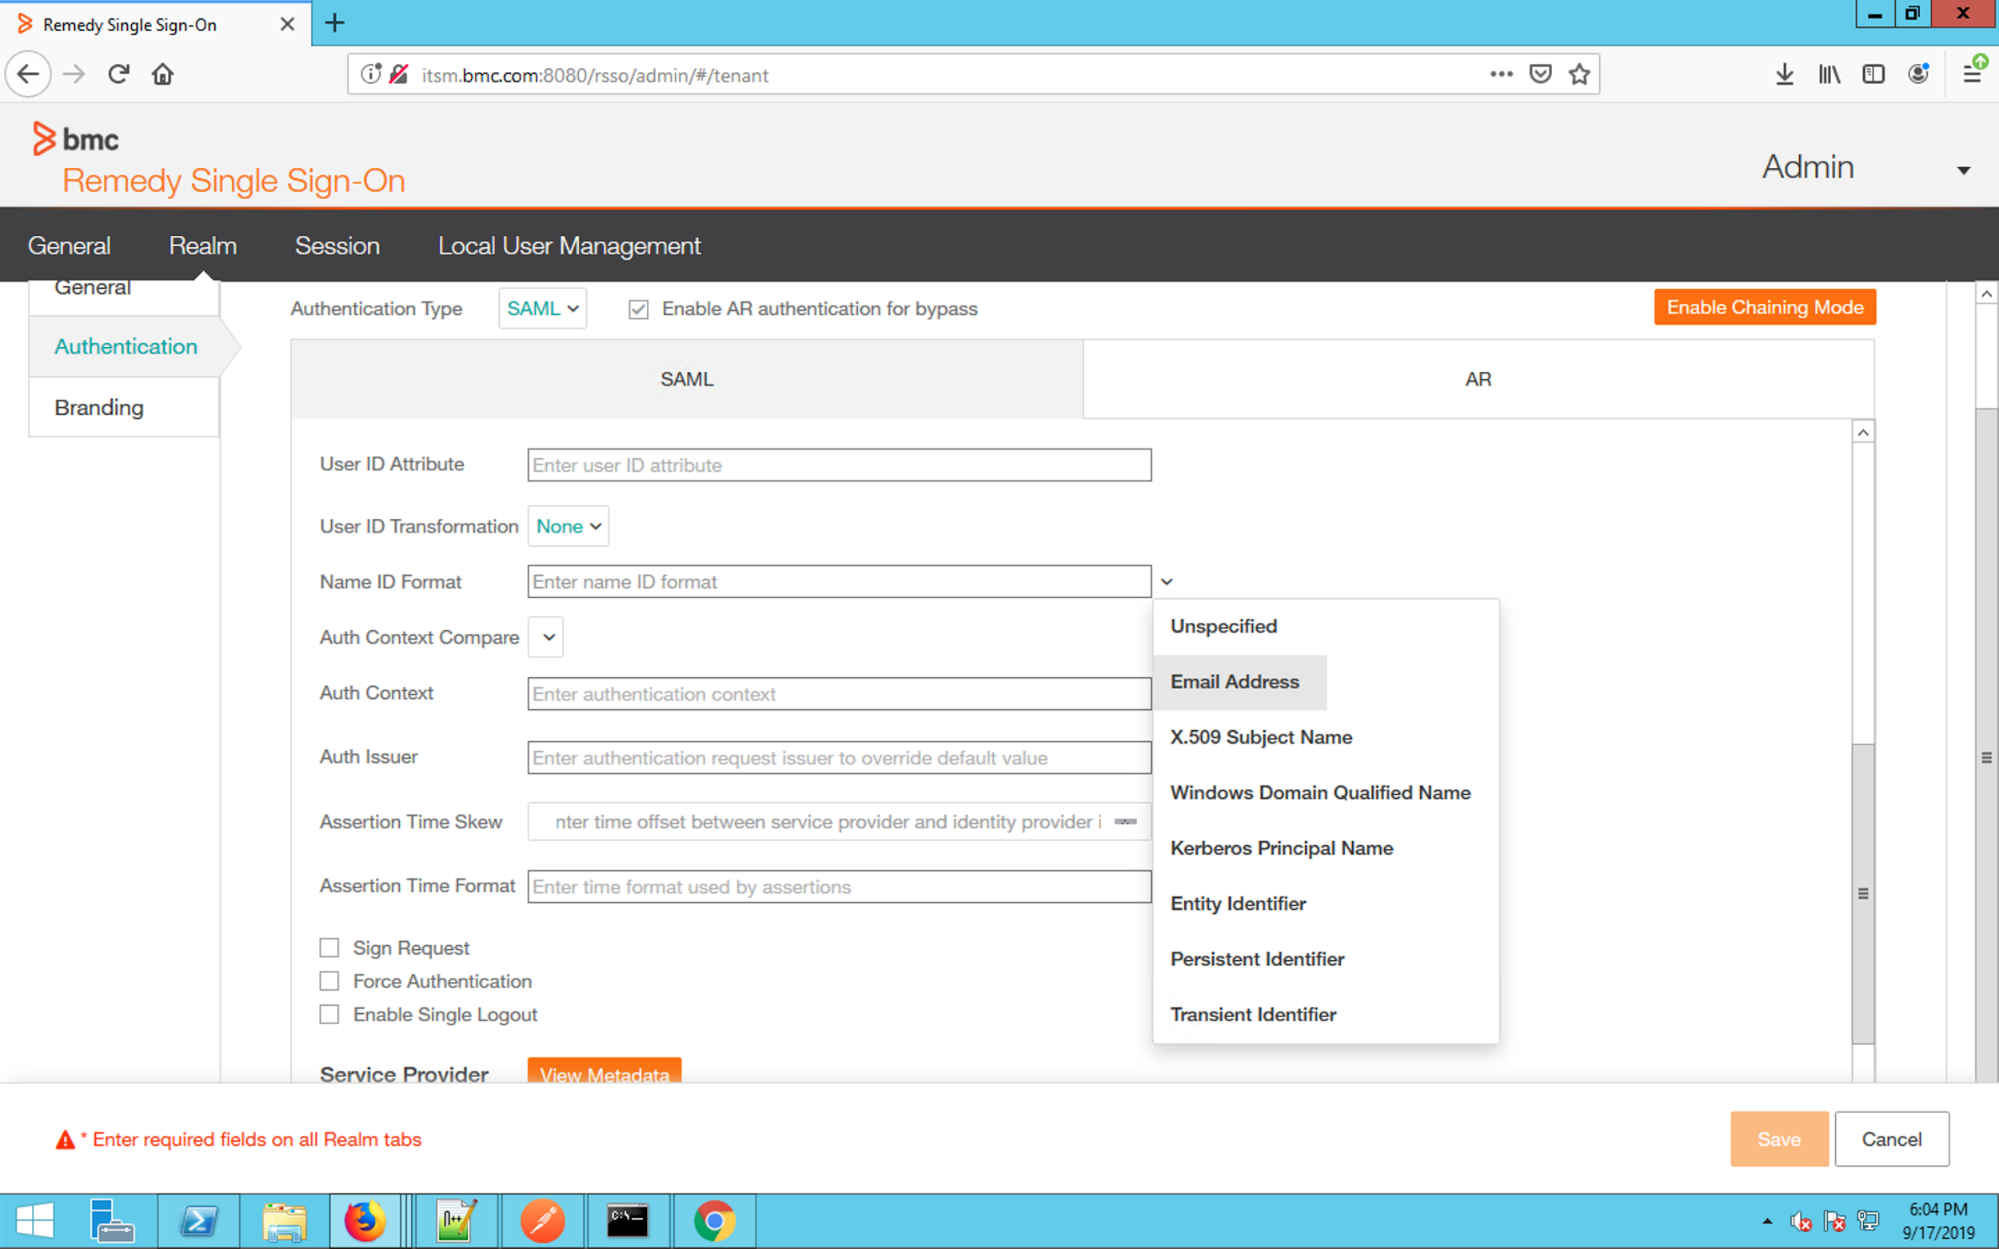
- Scroll down and set the Name ID format to Email Address. The default variables for the remaining fields don’t need to be edited.
Download the Remedy SP Metadata.
- Copy the entityID. This will be entered in to OneLogin as the Remedy SSO EntityID.
- Under “AssertionConsumerService”, copy the location URL.
- This will be entered in to OneLogin as the Remedy SSO ACS URL. In OneLogin, regex validate the ACS URL. This is recommended for production deployments.
For a more expansive discussion of Remedy SP Metadata, see the BMC blog.
Configure provisioning
Note: You must be using the Remedy 9.1 helix release to support provisioning. While SAML SSO can be configured with older versions of Remedy 9.1, OneLogin only supports provisioning against the Remedy 9.1 helix.
Authenticate the API
- Navigate to the configuration tab in the OneLogin Administrator for Remedy.
- Enter your API username/password credentials and the web-accessible endpoint defined for the User Form to manage users with.

Provision Values
Once the API is configured, configure the OneLogin attributes to map to the corresponding User values on the Form. By default, this application is only configured with the base user attributes.
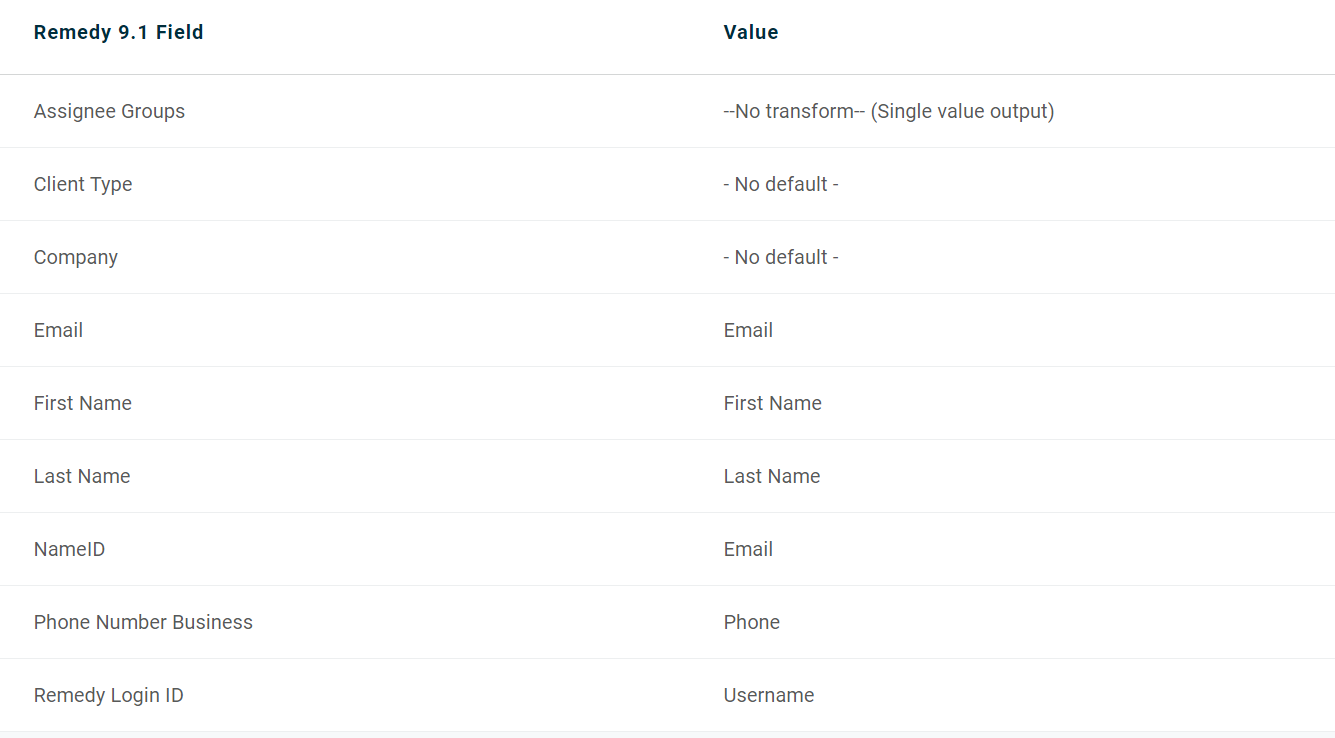
Email, Name ID and Remedy Login ID are mapped to the user’s email attribute. On subsequent updates to the user, the Remedy Login ID can be set to something different from the user's email address. However, if there are no existing users in the Remedy instance, or the users were already created using email as this value, it is simplest to just set all these values to be the user’s email attribute.
First Name: the user's first name
Last Name: the user's last name
Phone Number Business: the user's business phone
Client Type: This value must be set to one of the Client Types set in your Remedy instance. This can either be hard-coded to a specific value or you can use a User Mapping to define a custom attribute with different values and pass in that custom attribute.
The list of allowed values can be found in the Remedy UI:
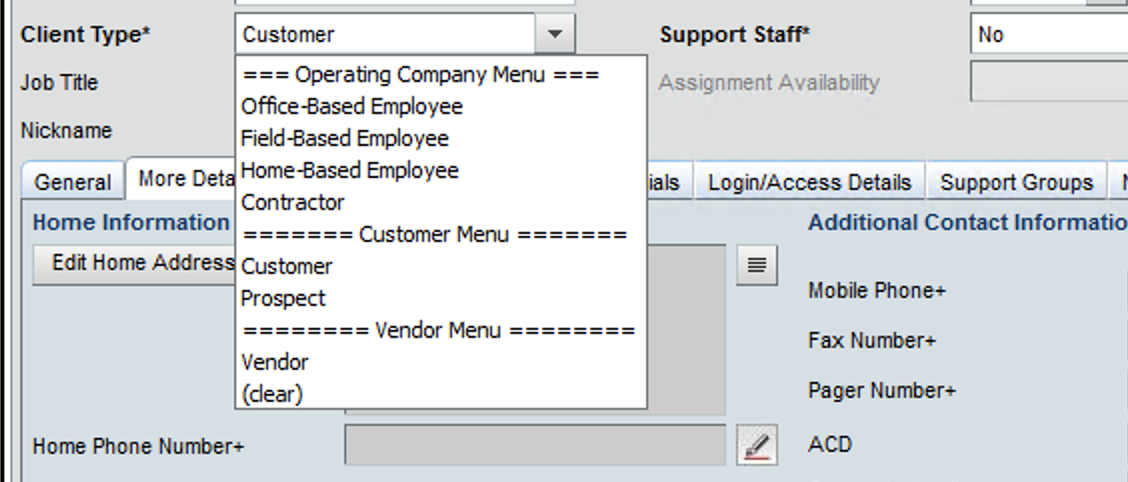
Company: This value must be set to one of the Company values set in your remedy instance. This can either be hard-coded to a specific value or you can use a User Mapping to define a custom attribute with different values and pass in that custom attribute.

Assignee Groups - Click on the Refresh Entitlements link on the Provisioning tab to update the list of available group entitlements. This allows you to configure Rules in OneLogin that map to existing groups in Remedy.
Add Additional Values
To add additional Provisional values, include the value on your Remedy user form and click Add Parameter link on the parameter tab. Verify that the parameter name is exactly the same as the form entry field name and click Save to add a custom parameter.
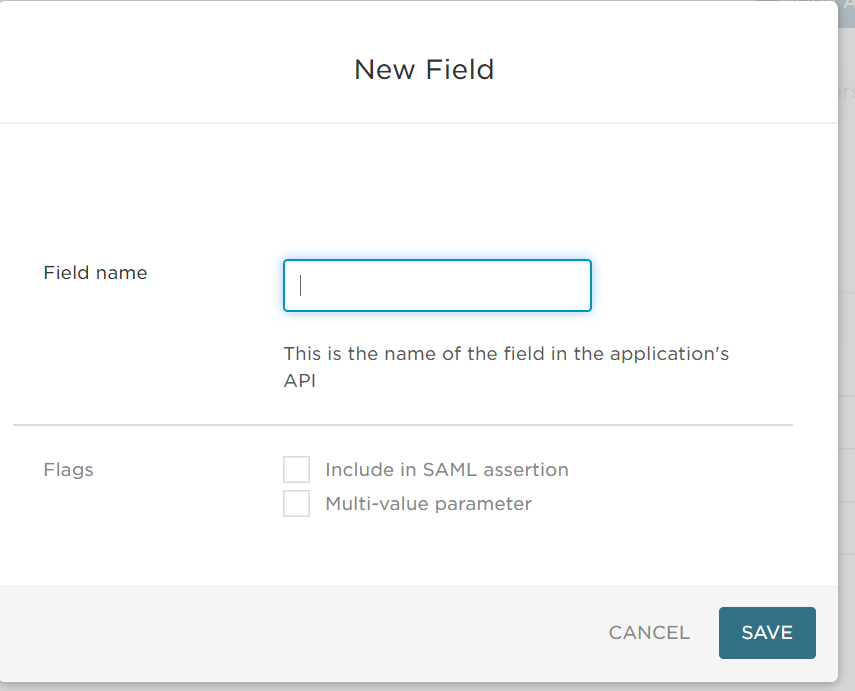
Any values marked as optional in the Remedy form aren't required in OneLogin. However, if you mark values as Required in the Remedy form, you must add it to OneLogin attributes and a value must be provided from OneLogin or provisioning fails.