OneLogin is an Identity Federation solution that performs Identity and Access Management (IAM) on the AWS cloud. Implementing this solution, you can seamlessly provide appropriate identity safeguards and automation as you scale your AWS Multi-Account environment.
The purpose of this AWS Implementation Guide is to enable every AWS Marketplace customer to activate, deploy and configure OneLogin in their AWS Control Tower environment while taking full advantage of the resources pre-configured by AWS Control Tower as part of the initialization.
Solution Overview and Features
Cloud user and account setup and access management can quickly get complicated as you build out your AWS environment, but AWS Control Tower provides the easiest path to build a baseline environment based on best industry practices. OneLogin's IAM integrates with AWS's to ensure that your organization has the appropriate identity safeguards and automation as you scale your multi-account, multi-role environment.
OneLogin can help scale your AWS infrastructure securely and seamlessly with:
- Identity Federation - OneLogin's best-in-class directory connectors can integrate AWS with multiple user stores in real-time, including Active Directory, LDAP, Google and more. Depending on your environment, you can integrate in minutes rather than days or weeks, and provide your users with consistent federation from the cloud.
- Strong & Adaptive Authentication - Secure access and allow users to use their master credentials to log in to AWS and all their corporate SaaS applications. Prevent password theft and orphaned AWS accounts with single sign-on (SSO) and contextual multi-factor authentication (MFA).
- Automated User and Access Provisioning - OneLogin's intuitive rules engine easily maps multiple roles per user for comprehensive access assertion. Automate and manage least privileged access based on directory attributes such as account and role (e.g. Amazon RDS Power User, Amazon S3 Power User, Amazon EC2 Power User, etc.). Provision users in real-time with appropriate role privileges with JIT provisioning.
- Centralize Access Management - Create and enforce customized security policies such as MFA, password complexity, session timeout, and more. Easily apply those policies based on user attributes or other identifiers such as IP address to help prevent unauthorized application access.
- Decrease Administration and Support Costs - Free up IT with built-in self-service password reset and automated user provisioning and deprovisioning. Spend your time and resources focused on other infrastructure, IT, or development initiatives.
- Accelerate Your Cloud Migration - Equip your baseline AWS environment with identity guardrails such as access controls, Smartfactor MFA, and automated security policies. Automatically replicate as you create additional AWS accounts, roles, and tenants. You can also integrate OneLogin with AWS Organizations, AWS IAM, and Session Tags.
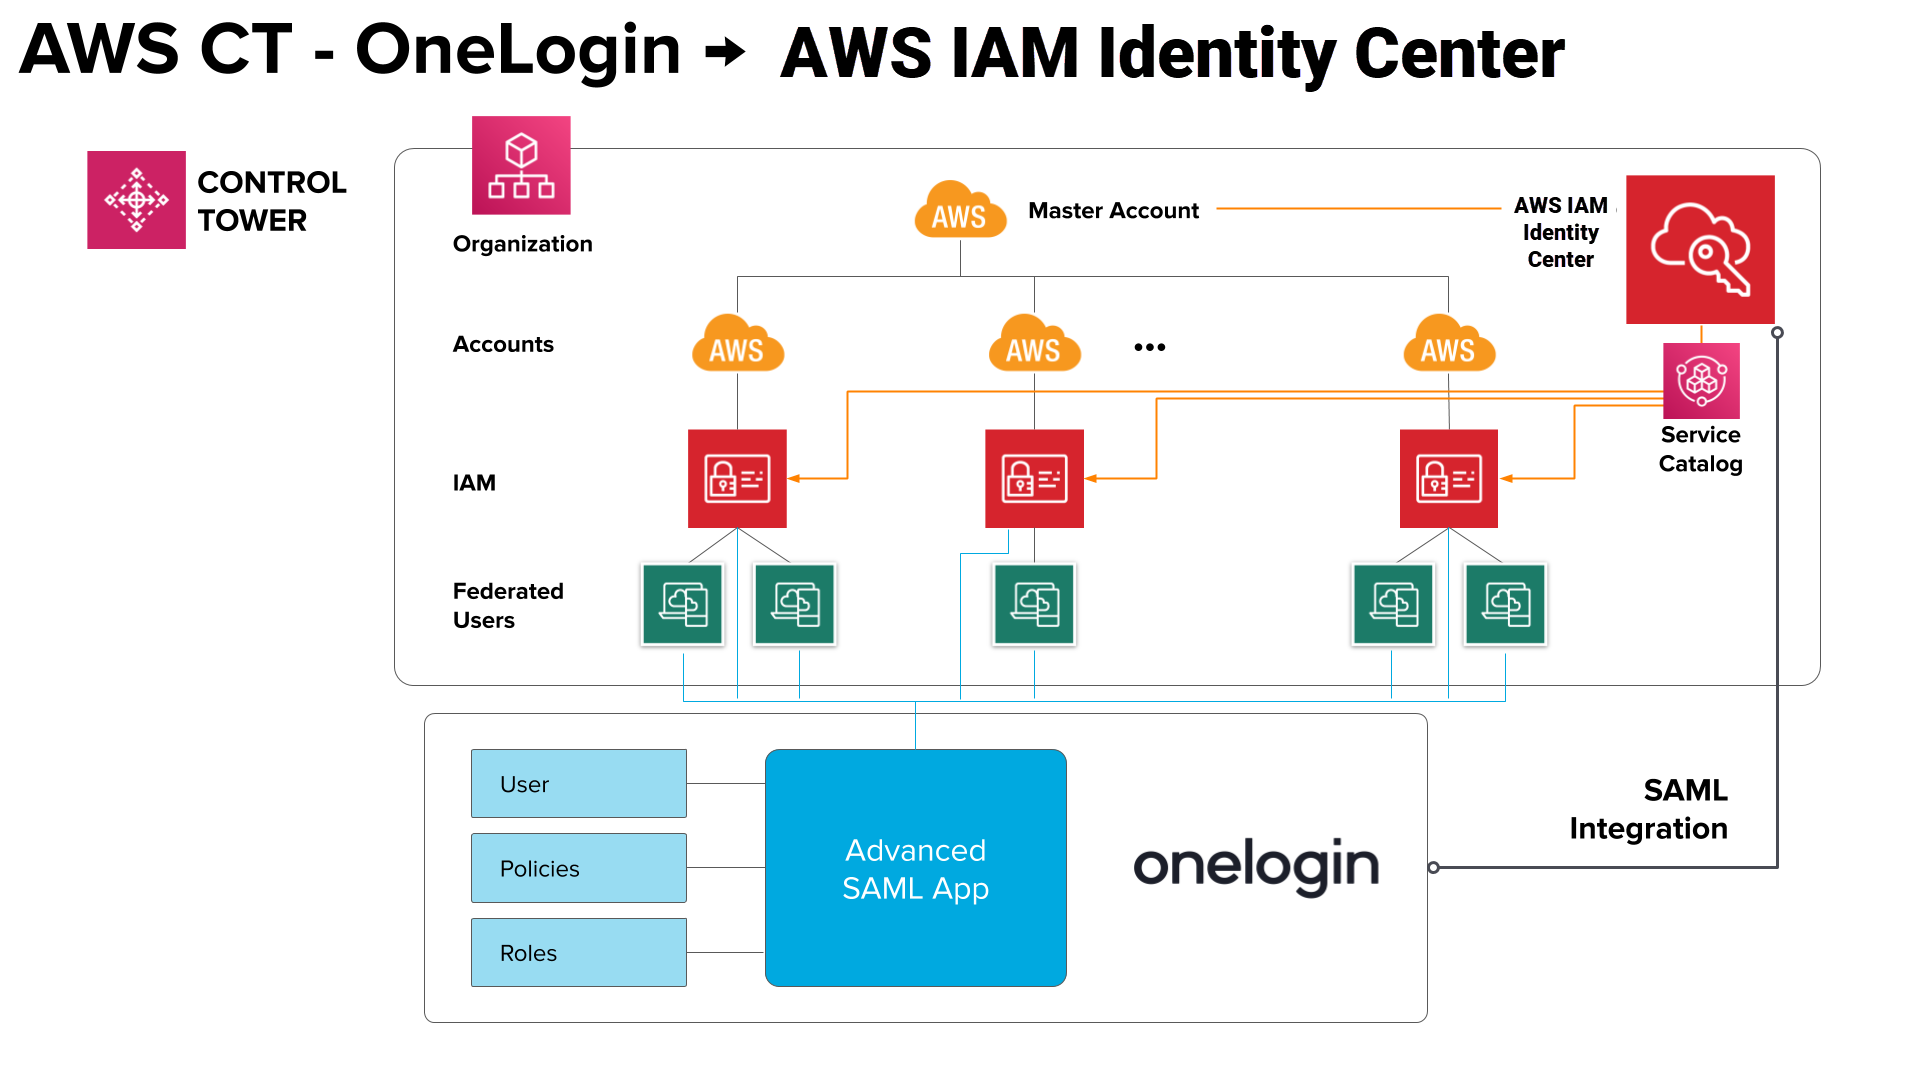
Architecture Diagram
Implementing strong, scalable IAM is a best practice for security and scalability. OneLogin's Trusted Experiences Platform is built to seamlessly manage all digital identities for your workforce and customers from the cloud. With OneLogin's powerful authentication and role-based user provisioning engine, quickly enable SSO across mobile, web and desktop, enforce MFA and security policies like password complexity and IP restriction, and automate user account provisioning across your corporate applications. OneLogin's automated AWS role provisioning enables organizations to streamline the most complicated of user policies and assign least-privileged policies to hundreds or thousands of permissions. OneLogin also enhances AWS's native security capabilities and is commonly used alongside AWS STS, AWS Organizations, AWS Session Tags, AWS Control Tower, AWS IAM, and Amazon EventBridge.
OneLogin integrates with AWS Control Tower in two ways:
- OneLogin and AWS Control Tower with AWS IAM Identity Center (this article)
- OneLogin and AWS Control Tower with SAML
In this document, you can find the implementation guidelines for scenarios where OneLogin and AWS Control Tower are integrated using the AWS IAM Identity Center (successor to AWS SSO). OneLogin provides a sample CloudFormation Template that is used to set up identity federation with OneLogin, as well as to provide guidance on sample AWS IAM Roles and permissions in the different AWS accounts. After AWS Control Tower creates the AWS accounts, OneLogin can perform identity federation via AWS IAM Identity Center or directly to the accounts themselves.
Deployment and Configuration
Creating a OneLogin Contract in AWS
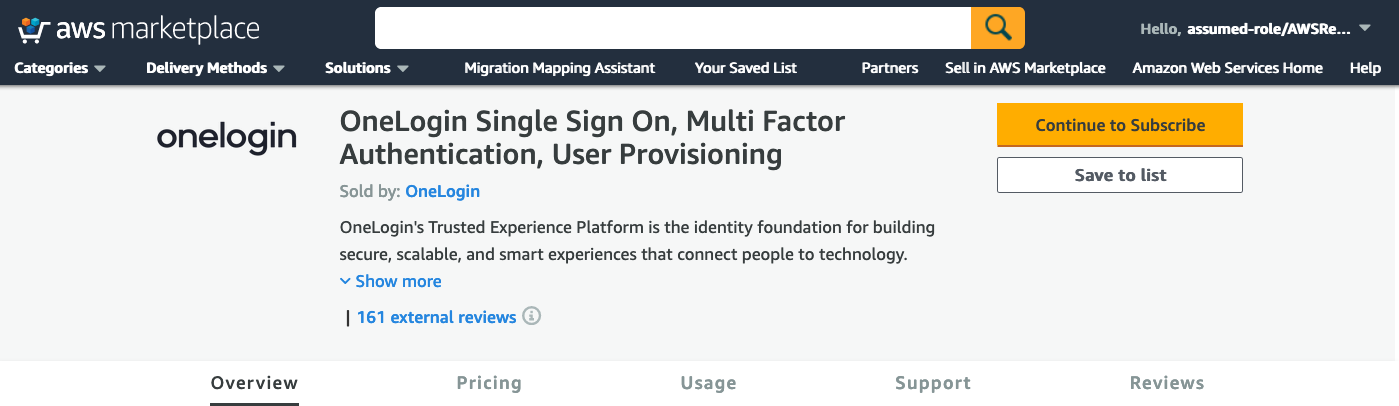
Subscribing to OneLogin on AWS Marketplace
Go to OneLogin in the AWS Marketplace and click Subscribe.
Configuring Your Contract Duration, Renewal and Contract Options
On the next screen, select your desired Contract Duration, Renewal Settings and Contract Options.
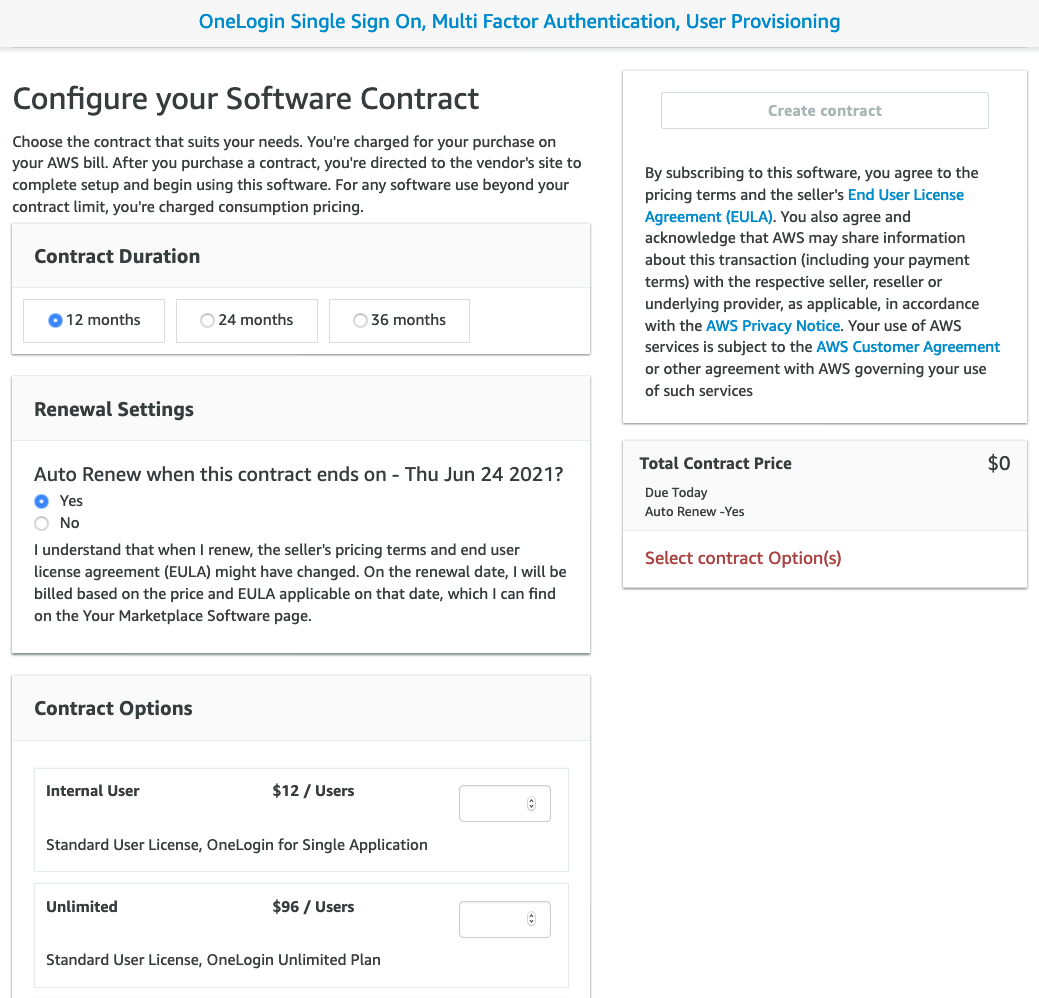
Creating and Paying For Your Contract
Once you have configured your contract, click Create contract. If you agree to the pricing, click Pay Now when prompted to confirm the contract.
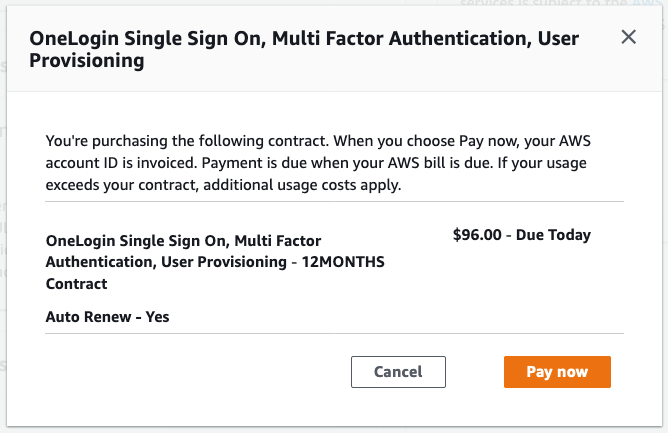
Setting Up Your Account
After confirming you wish to pay now, you're redirected to a sign-up form. Once the form is complete, a OneLogin account is automatically generated for you. You can now sign in to OneLogin.
Connecting OneLogin & AWS Control Tower with AWS IAM Identity Center
This topic describes how to configure OneLogin to provide SSO for AWS Control Tower using AWS IAM Identity Center.
OneLogin Administration
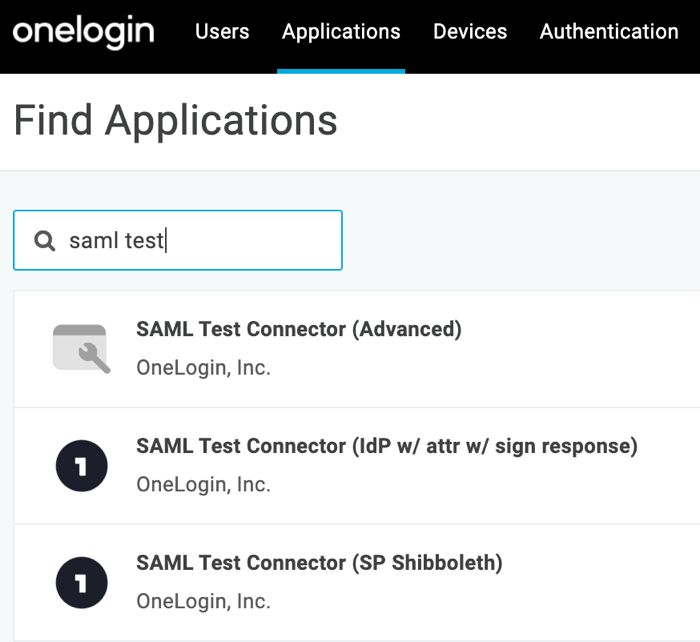
- Log in to OneLogin and go to Applications > Applications.
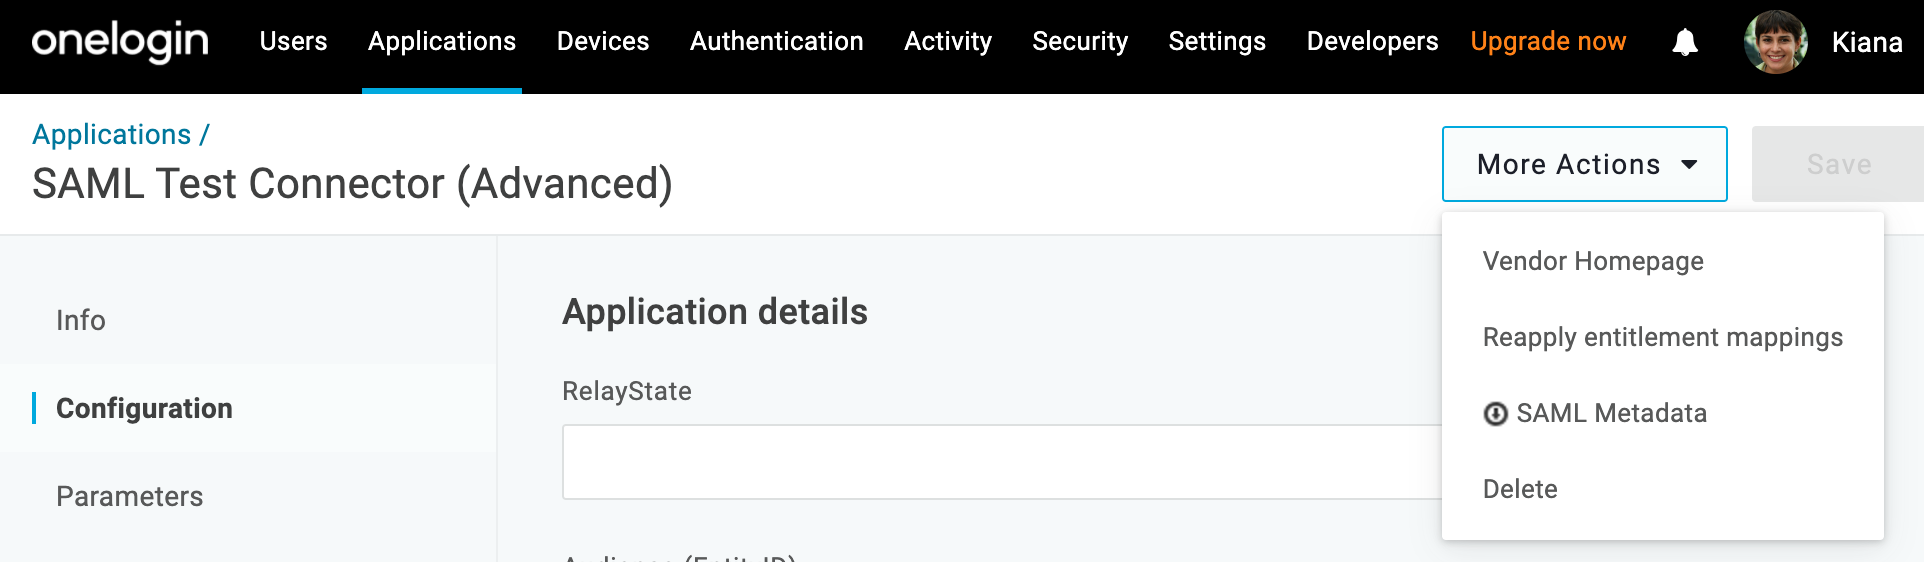
- Click Add App, then search for and select SAML Test Connector (Advanced).
- On the initial Configuration tab, rename the app to
AWS Control Tower Demoand click Save.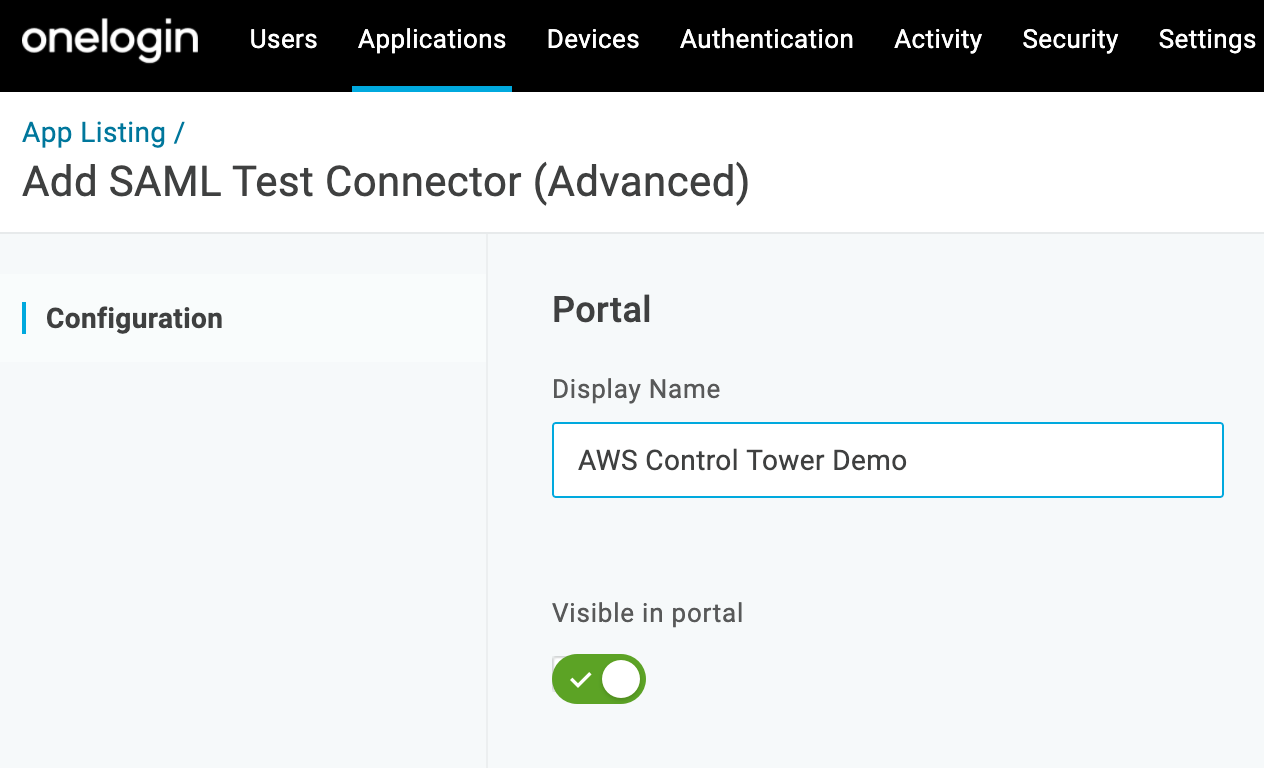
AWS Control Tower
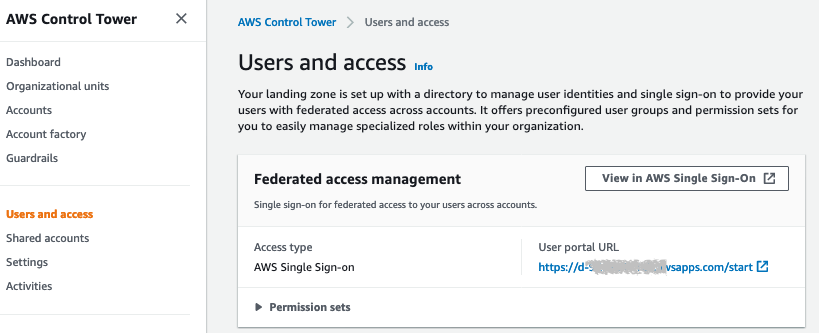
- Open a second tab and navigate to the AWS Control Tower console. Click User and Access on the left-hand side and select View in AWS Single Sign-On to open AWS IAM Identity Center.
- On the Settings page, choose Change next to Identity Source.
- On the Change directory page, choose External Identity Provider.
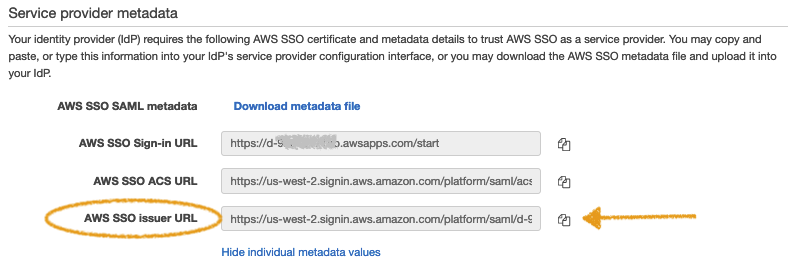
- In the Service provider metadata section, click Show Individual Metadata Values
- Click the Copy icon next to AWS SSO ACS URL.
OneLogin Administration
- Switch back to the OneLogin configuration tab and select Configuration in the left-hand navigation pane.
- Paste the AWS SSO ACS URL you copied from IAM Identity Center into the Recipient, ACS (Consumer) URL Validator, and ACS (Consumer) URL fields.
Important: you MUST modify the URL in the ACS (Consumer) URL Validator using Regular Expressions code. Specifically:
- Add a
^character at the beginning. - Escape all forward-slashes with a leading backslash.

- Add a
AWS Control Tower
- Return to your AWS Control Tower tab and copy the AWS SSO issuer URL.
OneLogin Administration
- Return to OneLogin and paste the AWS SSO issuer URL you copied into the Audience field.
- Scroll down and confirm that SAML nameID format is set to Email, then click Save in upper right.
- Under More Actions, click SAML Metadata. This will download the OneLogin SAML metadata file from OneLogin to your computer's downloads folder.
AWS Control Tower
- Switch back to the AWS Control Tower console, click on User and Access on the left, and click View in AWS Single Sign-On to open AWS IAM Identity Center.
- Choose Settings in the left panel. Next to Identity source, choose Change.
- In the Identity provider metadata section, choose Browse. Search for and upload the metadata file that you downloaded from the OneLogin Portal.
- Choose Next: Review, then type
CONFIRMin the text box to confirm that you want to change the directory. Click Finish.
Testing Your Configuration
Adding a Test User from OneLogin to AWS
OneLogin Administration
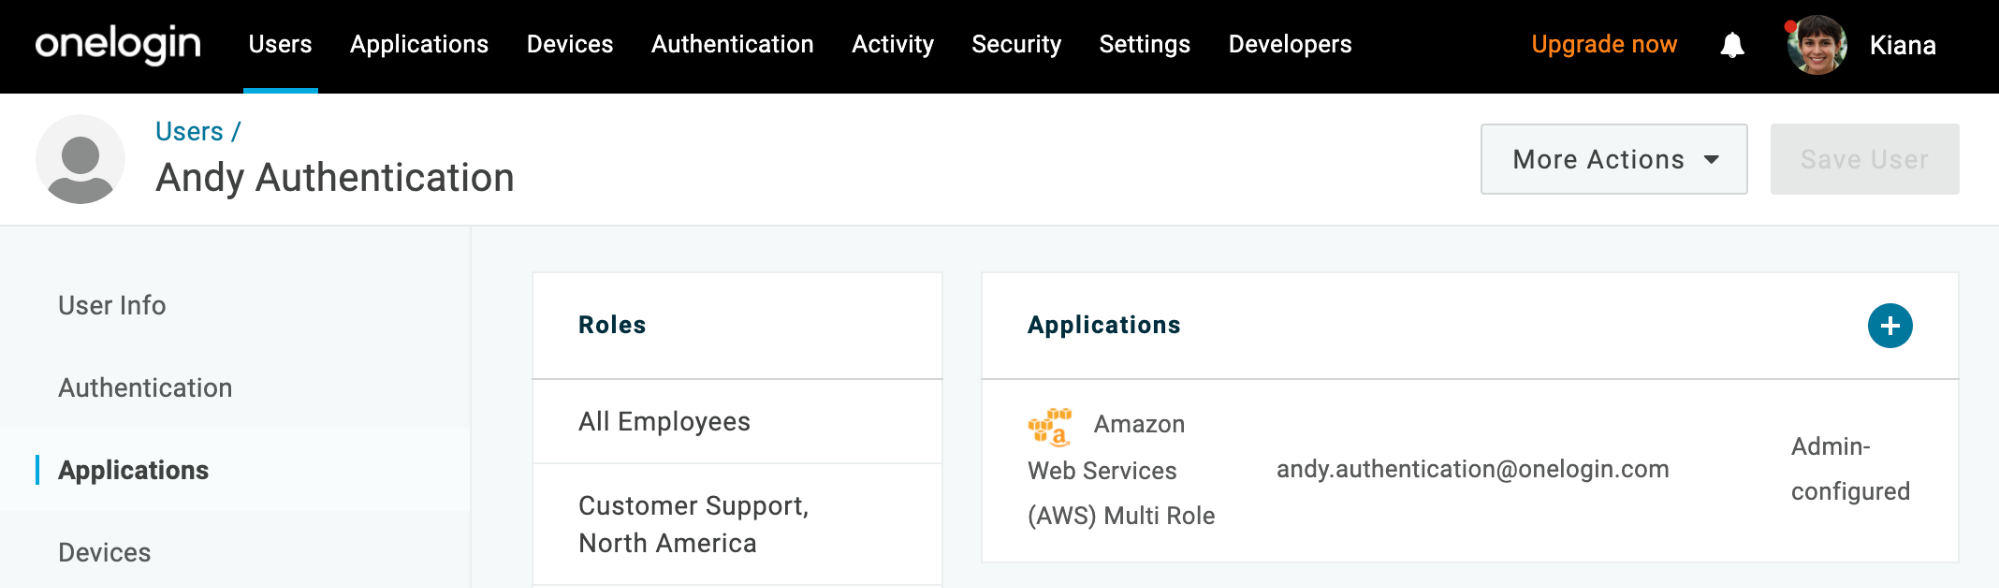
- Go to Users at the top navigation bar of your OneLogin admin portal, then select your test user.
- In the left-hand navigation pane, select Applications and click the blue + sign to add a new application for this user.
- Select AWS Control Tower Demo from the drop-down and click Continue. Confirm that the nameID value shown matches the email address of your test user.
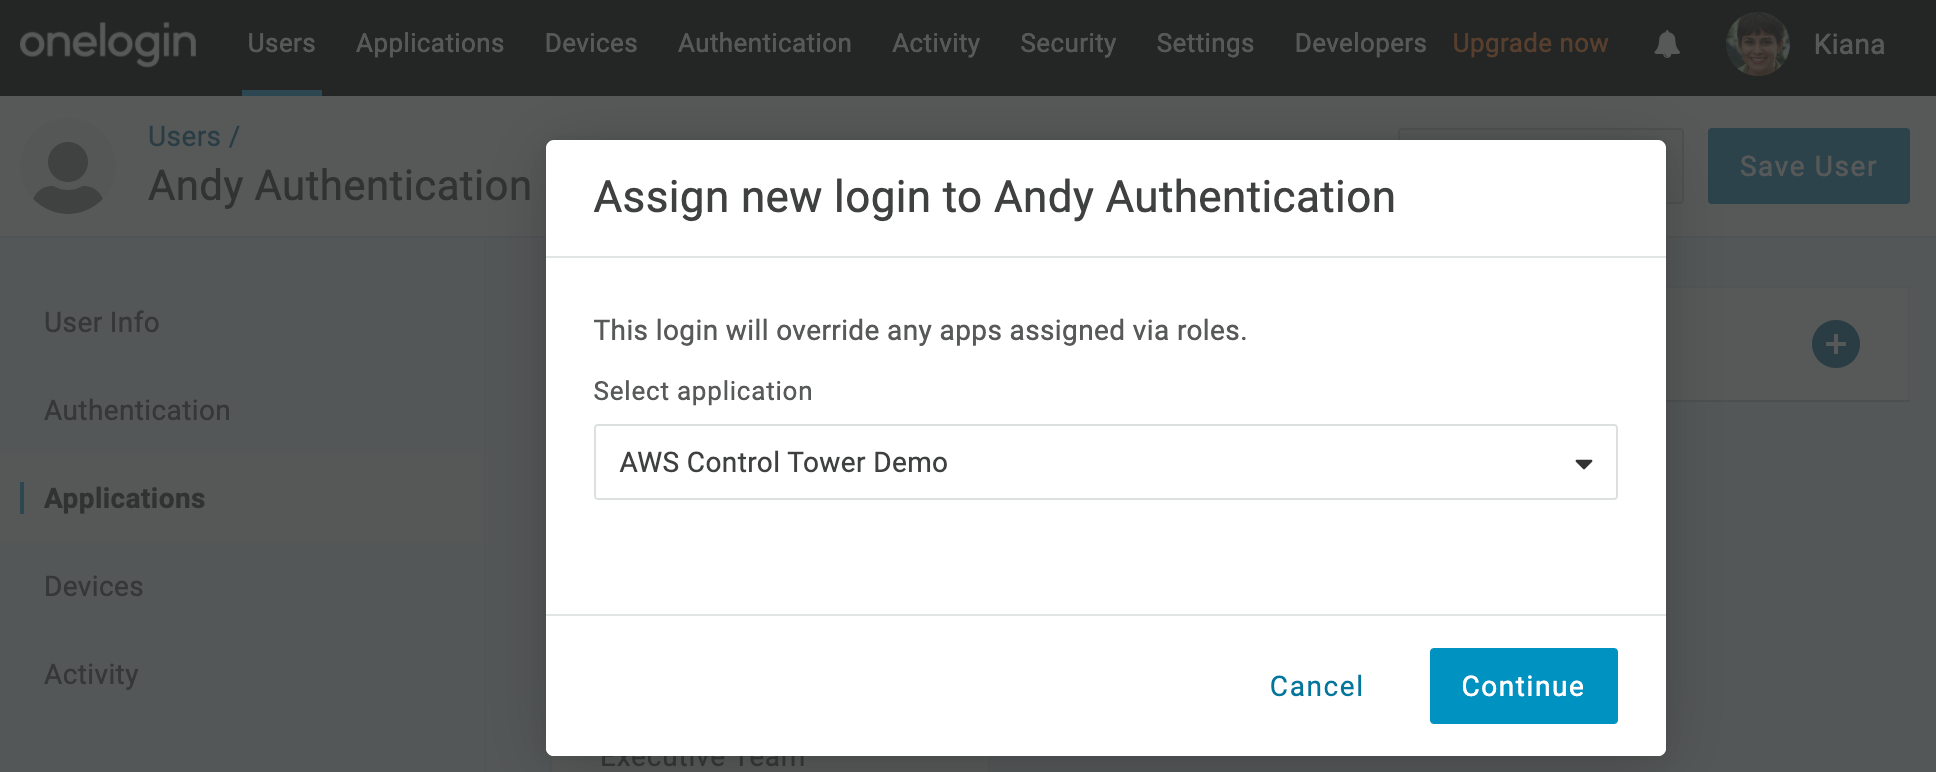
- Click Save, then Save User.
AWS Control Tower
- Switch back to the AWS Control Tower console. Click User and Access on the left-hand side and choose View in AWS Single Sign-On to open AWS IAM Identity Center.
- In the left navigation pane, choose Users, then choose Add User.
- in the Username field, enter the email address associated with your OneLogin test user.
- Enter that same email address in the Email and Confirm Email Address fields.
- Enter any value you like for First Name, Last Name, and Display Name fields, but ensure that they are populated.
- Choose Next: Groups and select AWSControlTowerAdmins and AWSLogArchiveAdmins for testing purposes.
- Click Add User. If the user is added successfully, your configuration is complete.
Assigning the Test User to an Account
AWS Control Tower
- On the AWS Accounts page in the left navigation pane, go to the AWS organization tab. Select the AWS account you want to assign to the user and choose Assign users.
- Select the user you created and click Next: Permission sets.
- Under Select Permission Sets, select the permission set you want to assign to the user. If you don't have an existing permission set, choose Create New Permission Set. Click Finish.
Testing Your SSO
OneLogin Administration
- Select Profile -> App Portal/Home from the top-right corner.

- Go to the Company: Everything tab of your app portal.
- Click on the AWS Control Tower Demo application. If it doesn't appear, re-confirm that your test user is assigned to the AWS Control Tower Demo application in OneLogin.
- Following a set of browser redirects, the AWS access portal appears and you are able to access your AWS Control Tower master or log account based on the OneLogin user authentication.
Optional: Associating a Managed Control Tower Account with OneLogin User
AWS Control Tower
- Open the Control Tower console from your master account, go to Account Factory, and click Enroll Account.
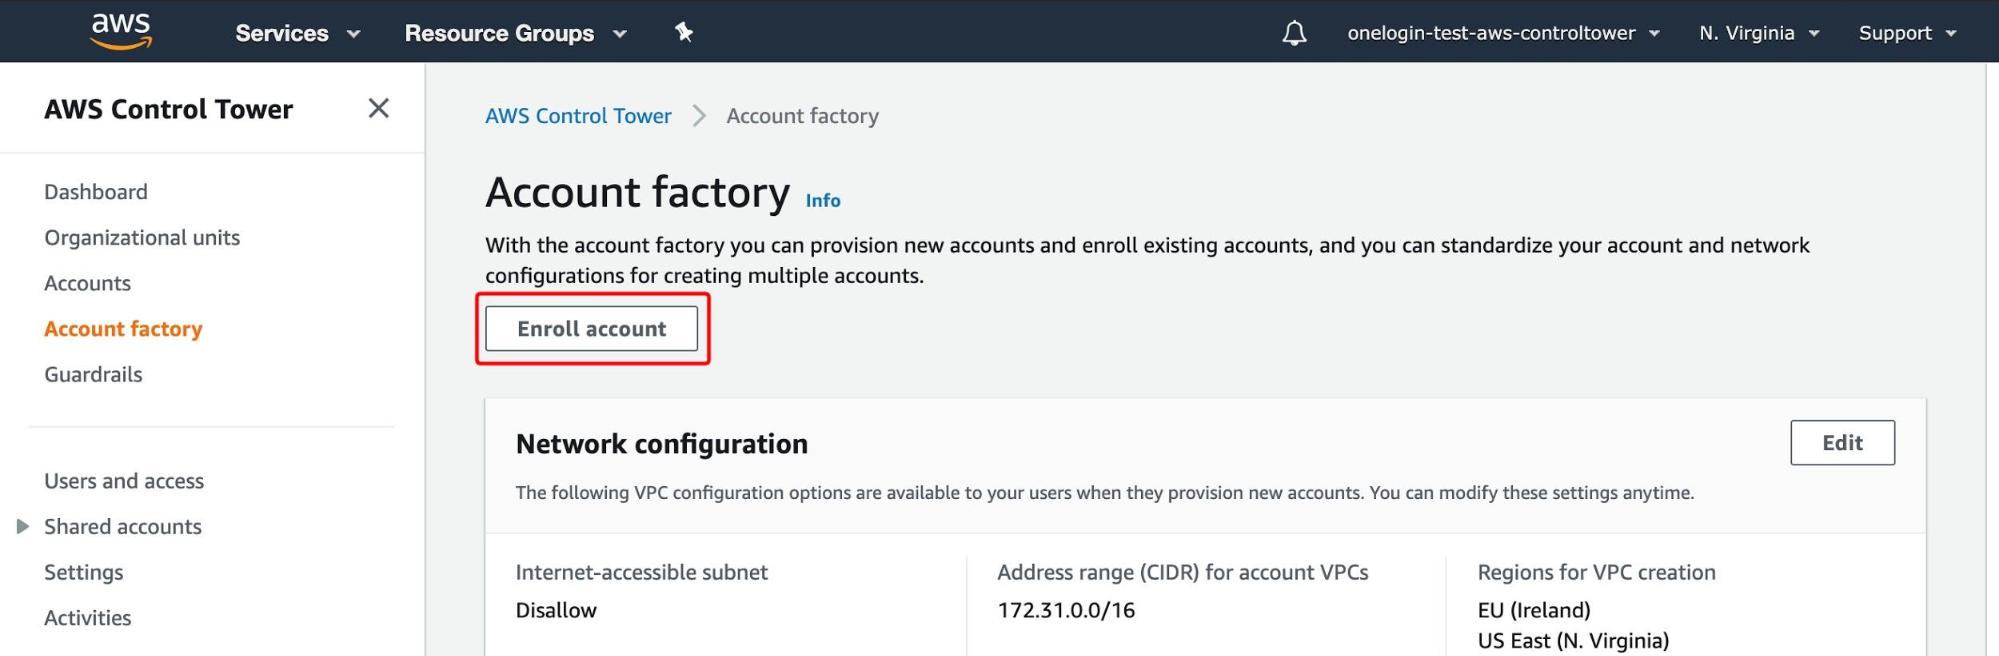
- Select AWS Control Tower Account Factory as the product name and click Launch Product, then provide a name for the product and click Next.
- Type in a new SSO user email, account email, and managed OneLogin user details, then click Next.
- Click Next and Launch. This step takes about 15-20 minutes to complete; your status will update to SUCCEEDED when it's done, and you can move on to additional steps while it is in progress.
- In the meantime, check the email you provided for an invitation email from no-reply@login.awsapps.com, and click Accept Invitation.
- Note your User Portal URL (example: https://d-xxxxxx.awsapps.com/start) and your Username.
- Open a fresh browser or incognito window and paste your User Portal URL into the address bar. You'll see a series of redirects on your browser to take you to OneLogin.
- Enter the OneLogin username created in the previous step. This redirects you to AWS IAM Identity Center.
Supplementary Information
Best Practices
- Aim for least privileged access to AWS.
- Think through your AWS IAM roles and permissions.
- Determine how you would want your AWS IAM structure to look like for the Control Tower created accounts and your production AWS accounts.