The OneLogin for RDG Server Portal enables secure, multi-factor user login to the OneLogin User Portal. Users can access remote Windows desktops and servers using the Remote Desktop Protocol (RDP) through Microsoft RD Gateway (RDG). This document covers the steps to install the OneLogin RDG Server module, configure the OneLogin RDG Portal application, and configure the user's Windows or Mac OS X system.
Prerequisites
- Microsoft Windows 10 or Mac OS X 10.13+ with the Microsoft Remote Desktop Client (RDC) installed
- Windows Server 2012, 2016, or 2019 with RDG Server role installed and configured
- OneLogin RDG Server module MSI installer
- OneLogin account with user that has administrator privileges
- Outbound HTTPS (port 443) access to OneLogin for systems where the OneLogin RDG Server module will be installed
Download
Download the OneLogin RDG Server module to a temporary directory on the target Windows Server system.
Architectural Overview
The solution requires use of Windows Server configured with the RDG Server role and a custom OneLogin RDG Server authentication module. The user authenticates to the OneLogin portal according to the assigned user policy. We recommend that you require multi-factor authentication (MFA). SmartFactor MFA can be used to improve the user experience while maintaining strong MFA policies.
Once an authorized user logs in to the OneLogin portal, the Microsoft RDG Server applications are available. When you select an app, it returns a .rdp file with a token. The OneLogin Microsoft RDG Server module validates this against a OneLogin HTTPS endpoint. The user can log in to the target host that's prepopulated with their Windows User Domain name. They must enter their Domain password to access the target host.
Before You Begin
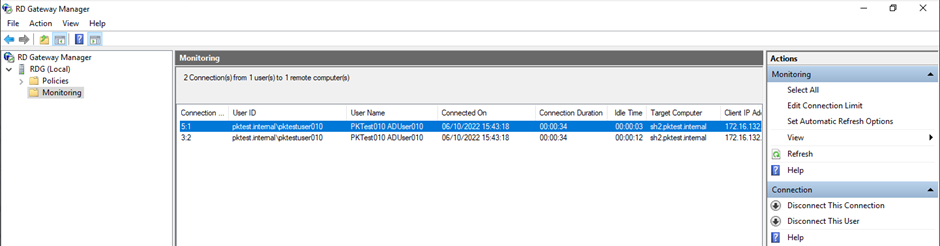
Confirm that end users are accessing the Remote Desktop Session Hosts through the RDG (by default, users on the local network bypass the RDG). To do this, start a remote desktop session from a client computer. On the gateway server, start the Remote Desktop Gateway Manager and browse to Monitoring in the left panel. If the remote desktop session is going through the Remote Desktop Gateway, it will be displayed here (you may need to Refresh to see the session).
If the session is not going through the Remote Desktop Gateway, you may need to add the following parameters to the RDP file to force it through the Gateway:
gatewayusagemethod:i:1gatewayprofileusagemethod:i:1
Note: If the RDP file is signed, this will invalidate the signature, so you will also need to remove the signscope and signature parameters in order to test with the updated RDP file.
Keep a copy of the RDP file that you used to start the RDP session. You may need parameters from this file to customize the RDP file that will be created by OneLogin.
Module Installation
Your target Windows Servers must have the RDG Server role installed and configured for use on your network prior to installation. OneLogin recommends that you use the Microsoft documentation to get RDG working properly with native Windows Domain authentication before installing the OneLogin RDG Server module.
Note: Installing the OneLogin RDG Server module disables the Microsoft Windows domain authentication for RDG.
-
Log in to the RDG server. In the Server Manager, disable IE enhanced security.
-
Double-click the downloaded
OneLoginRDGServerPlugin.msifile to start the installation and follow the installation wizard instructions.
-
Accept the OneLogin Terms of Service and click Next to begin the installation.
-
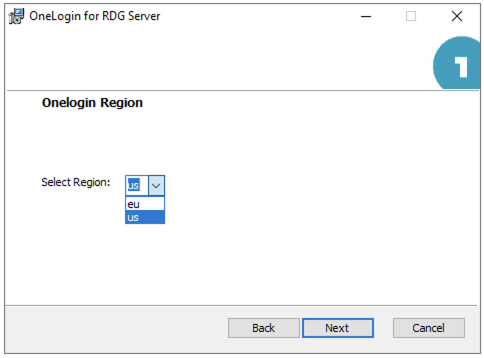
Select the US or EU region.
-
Install the module, then click Finish to close the installation wizard.
Note: The OneLogin RDG Server module must access an HTTPS REST endpoint at OneLogin to validate the OTP. You must ensure that the Windows Server has outbound access via HTTPS to OneLogin.
If required for troubleshooting or reference, the OneLogin RDG Server module Log File is located at %PROGRAMDATA%\OneLogin\OneLoginTSGAuthentication\OneLoginTSGAuthentication.log
Network Policy Configuration
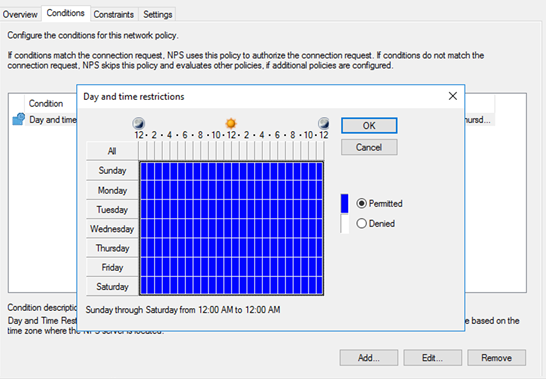
Open Windows Server Network Policy Manager network policies and select the RDG_CAP_AllUsers policy. Remove any conditions in the Conditions tab, then add a new condition with the type Day and Time Restrictions and select all permitted times.
Tip! We recommend that you take screenshots of all existing conditions before you remove them. If you need to roll back and uninstall the OneLogin Authentication Module, you will need to remove the newly created condition and re-create the deleted conditions.
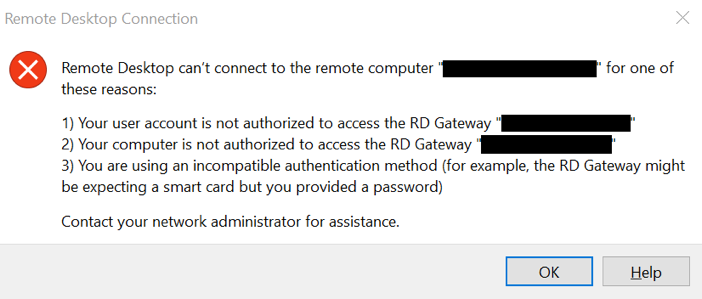
"Remote Desktop can't connect to the remote computer…"
This error is typically caused by a Network Policy Server (NPS) on the Remote Desktop Gateway server that needs to be relaxed. Ensure that all conditions have been removed and all day and time restrictions are permitted.
If the error persists, verify that the username derived from the Windows Username configuration parameter is correctly formatted and is authorized to RDP to the Connection Broker or Session Host.
Application Configuration
You'll need to add at least one Microsoft RDG Server application to OneLogin, but can configure more as needed. After configuration, authorized users see a tile in the OneLogin portal for each Microsoft RDG Server application.
-
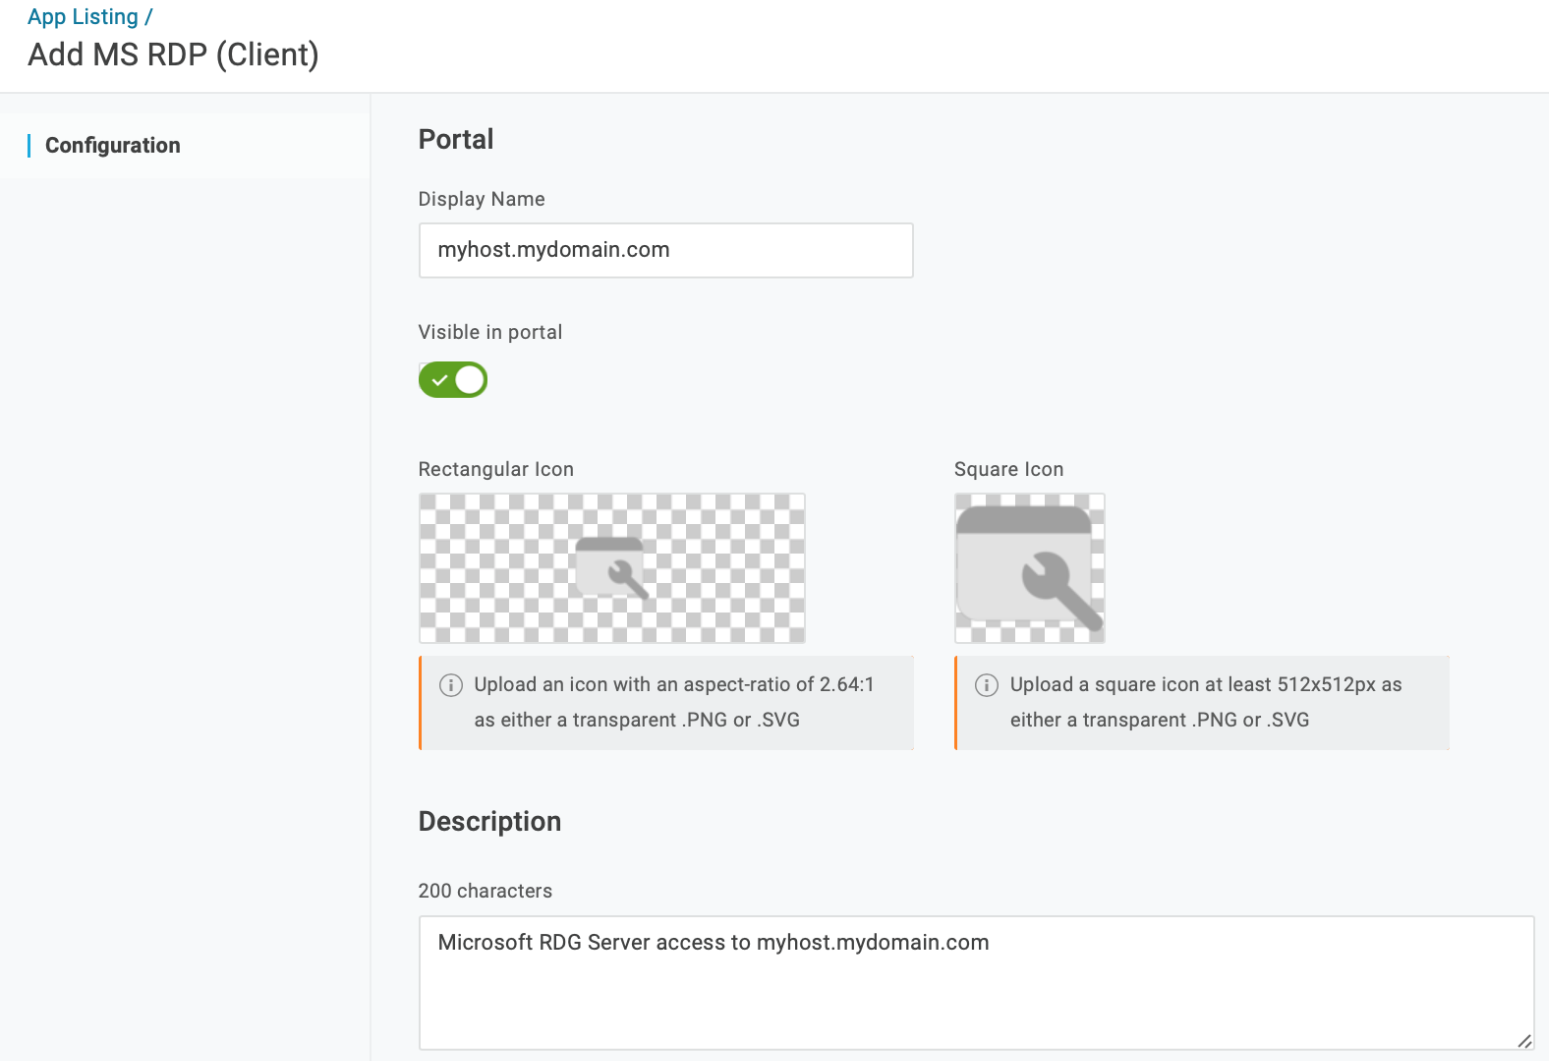
In your OneLogin admin portal, add the application Microsoft RDG Server and give it a descriptive name, such as the host name of the target system. This name is searchable and displayed under the application tile in OneLogin portal. Add icons and a description if desired, then Save the new app.
-
Go to Configuration to enter the fully-qualified DNS name or IP address for the RDG Server in the RDG Server Host field. This value populates the RDP file's
gatewayhostname:s:attribute.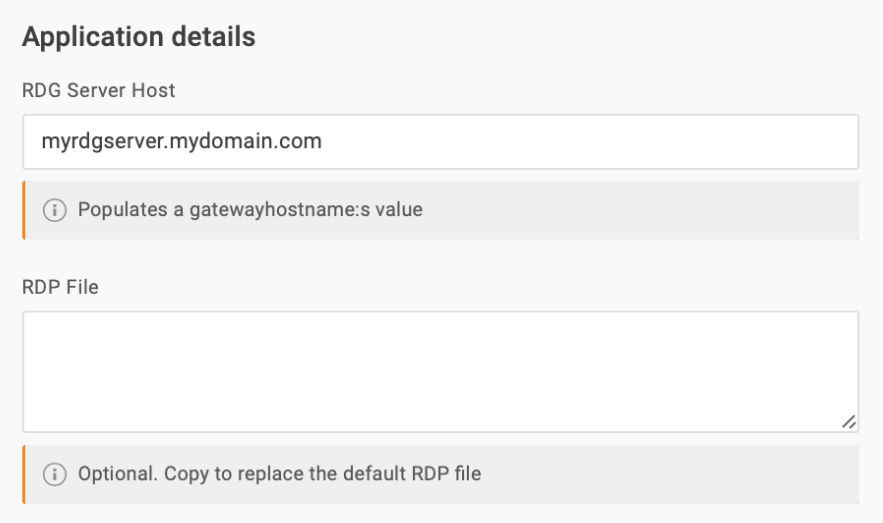
If you want to use a custom RDP template instead of the OneLogin default, copy and paste it into the RDP File field. At minimum, the file must include the following properties:
gatewayhostname:s:full address:s:gatewayaccesstoken:s:gatewaycredentialssource:i:5
Properties use the format
name:type:value. OneLogin won't override the property values if they are hardcoded, but any empty value fields allow OneLogin to insert dynamic values. Thegatewaycredentialsourceproperty must have a value of5, and thegatewayaccesstokenproperty must be left empty, as it is used to pass the Windows Domain username and one-time token to the RDG Server.Distributed RDS Installation
The default RDP file generated by OneLogin should work in an environment where the connection broker and session host are co-located, but in a typical RDS Session Host deployment, the Remote Desktop Gateway, Connection Broker and Session Host(s) are all on separate servers. In that case, you will need to manually configure the following properties:
gatewayhostname:s:full address:s:gatewayaccesstoken:s:gatewaycredentialssource:i:5loadbalanceinfo:s:tsv://MS Terminal Services Plugin.1.your-collection-nameworkspace id:s:your-connection-broker-fqdngatewayusagemethod:i:1gatewayprofileusagemethod:i:1use redirection server name:i:1
Check the RDP file that you used before installing the OneLogin Authentication Module to find the correct values for
loadbalanceinfoandworkspace id.The values for
gatewayusagemethodandgatewayprofileusagemethodmust both be set to1to ensure that clients on the local network do not bypass the Remote Desktop Gateway.You may also add additional parameters for monitor usage, device sharing, etc. Please consult Microsoft documentation for a list of supported RDP file settings.
-
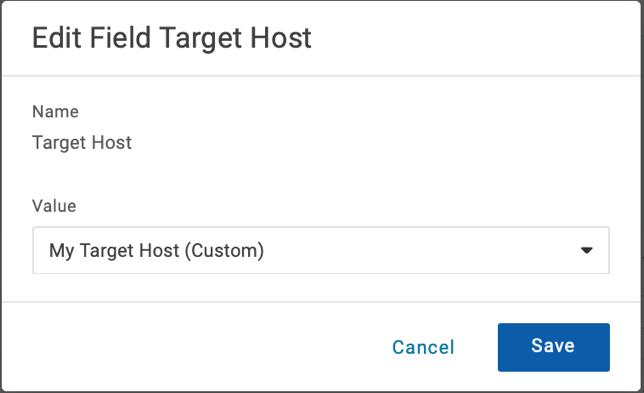
Save your configuration and set your app parameters, depending on your use case and the parameter you're configuring.
For example, if you configure a unique Target Host for many end users to access, use a custom field with a user-specific value to populate the hostname or IP address dynamically by selecting Configured by admins. If you configure a server for multiple users to access, use Configured by admins and shared by all users and enter a static value for the Target Host; this is typically the hostname of the Connection Broker Server in your RDS configuration.

Assign the Windows Username parameter to the OneLogin field for the user's Windows Domain name. For example, you might want to assign it to
sAMAccountNameoruserPrincipalName, or you may need to create a custom field that composes the Domain\sAMAccountName.If the OneLogin field containing the correct username does not exist, you may use a macro to assign the value. For example, enter
domain\{samaccountname}with the user domain; the macro{samaccountname}will be automatically replaced with the user's sAMAccountName when the file is generated.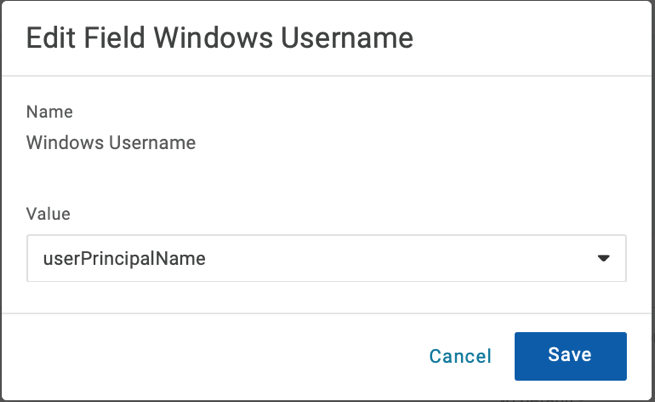
-
Go to Access to configure any policies and roles as necessary, then Save the new application.
-
The app appears as a new tile in the user portal. When selected, it returns a
hostname.rdpfile to the browser that contains the information required to connect to the RDG Server, as well as the target host and the domain username. The file also contains the token used to authenticate the user by the RDG Server; the token is valid for 30 seconds.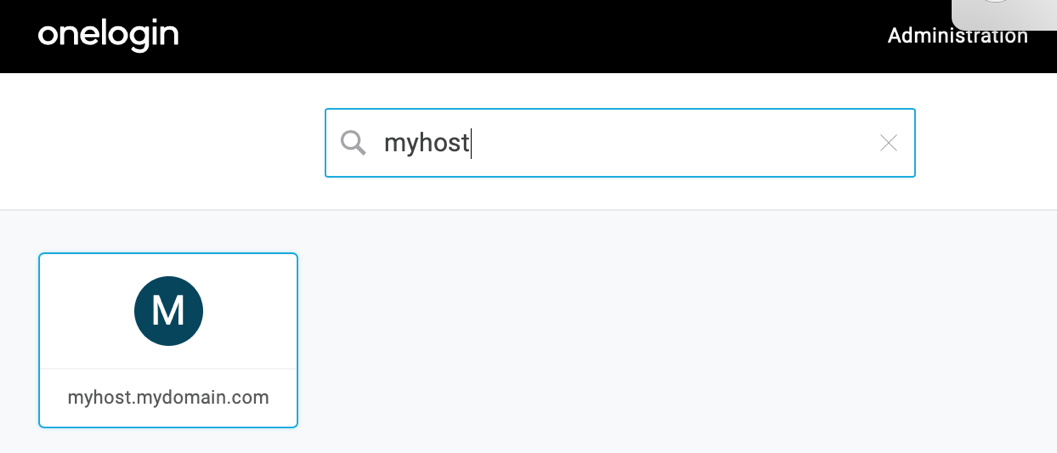
Note: The Microsoft Terminal Service Client must be installed on the user system and associated with RDP file extensions in order to launch a connection. Some browsers may prompt the user with a dialog to open the file directly. Others may automatically download the file but require it to be launched manually. Intermittent cleanup of the user's Downloads folder is recommended to remove prior versions.
Important: There is a known issue with Mac OS X that prevents using the Microsoft Remote Desktop 10 from the Mac App Store; Mac users must instead use Microsoft Remote Desktop 8. Microsoft is aware of this regression, but we do not have an estimate from Microsoft on resolution.
Manually Installing the RDG Certificate
If certificate issues occur, you may need to manually install a certificate:
- Go to Start > Administrative Tools > Remote Desktop Services > Remote Desktop Gateway Manager.
- In the Console tree, right-click RD Gateway Server and select Properties.
- Go to the SSL Certificate tab, then click Import a Certificate.
- Click Browse and locate your SSL Certificate. Click Open.
- Enter the password that you've created for your Private Key.
- Click Import Certificate and then OK.
- Restart your server for the changes to take effect.