This knowledge base article describes how to configure Microsoft Cloud App Security (MCAS) to connect to OneLogin via SAML.
Questions to ask yourself before you start this process:
- Have you identified a test user for this connection?
- Who will be given access to this app? Do you need to modify or create a new Role to successfully do so?
- Do you have admin access to Salesforce and Microsoft? Are you a super user or above in your OneLogin instance?
- Do you have a safe place to copy-paste values to transfer them from OneLogin to Salesforce and Microsoft?
Salesforce
- Log into Salesforce as an admin, then go to Settings > Identity > Single Sign-on Settings.
- Copy your Salesforce assertion consumer service URL, then paste it somewhere safe for later retrieval.
OneLogin
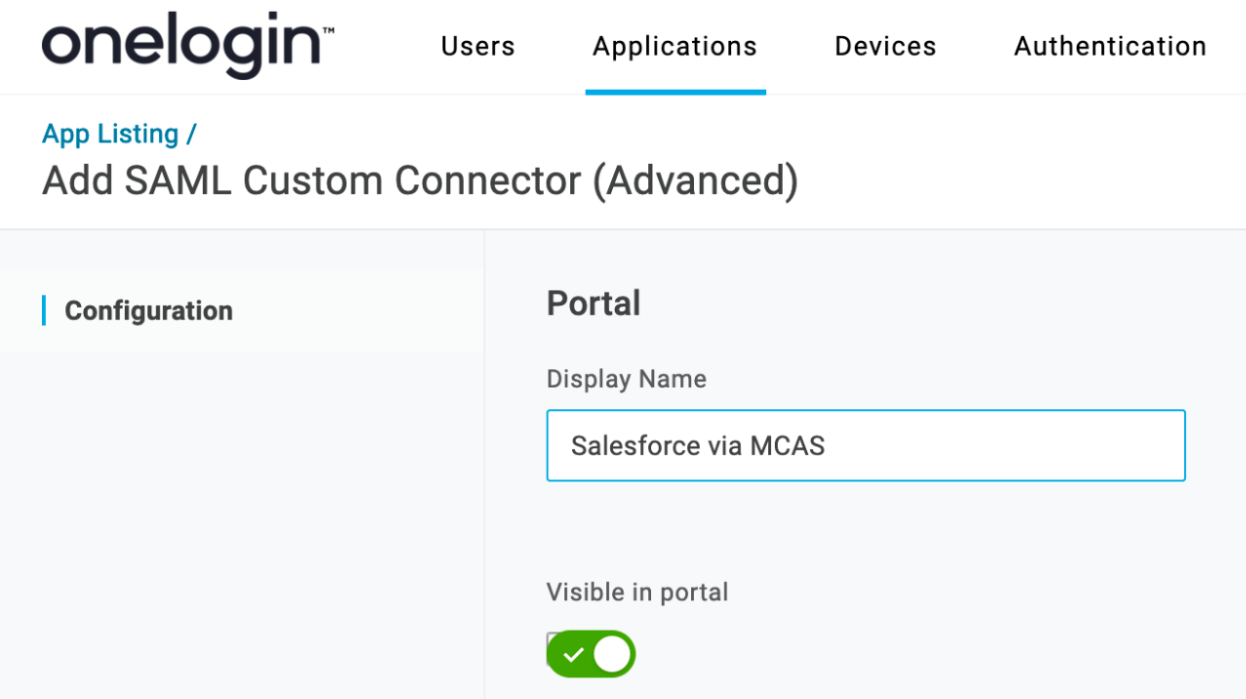
- Navigate to Administration > Applications > Applications, click the Add App button, and search for SAML Test Connector (Advanced).
- Select the app and name it Salesforce via MCAS, then change the icon if you wish (noting that end users will see it) and click Save.
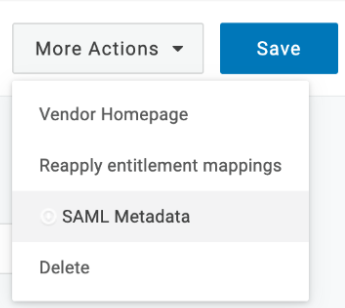
- Click the SSO tab and copy the Issuer URL, then click More Actions and download the SAML Metadata file for later use.
Cloud App Security Portal
- Open your Microsoft Cloud App Security Portal and navigate to Investigate > Connected App > Conditional Access App Control Apps, then click Add and select the application you would like to connect - in this example, Salesforce.

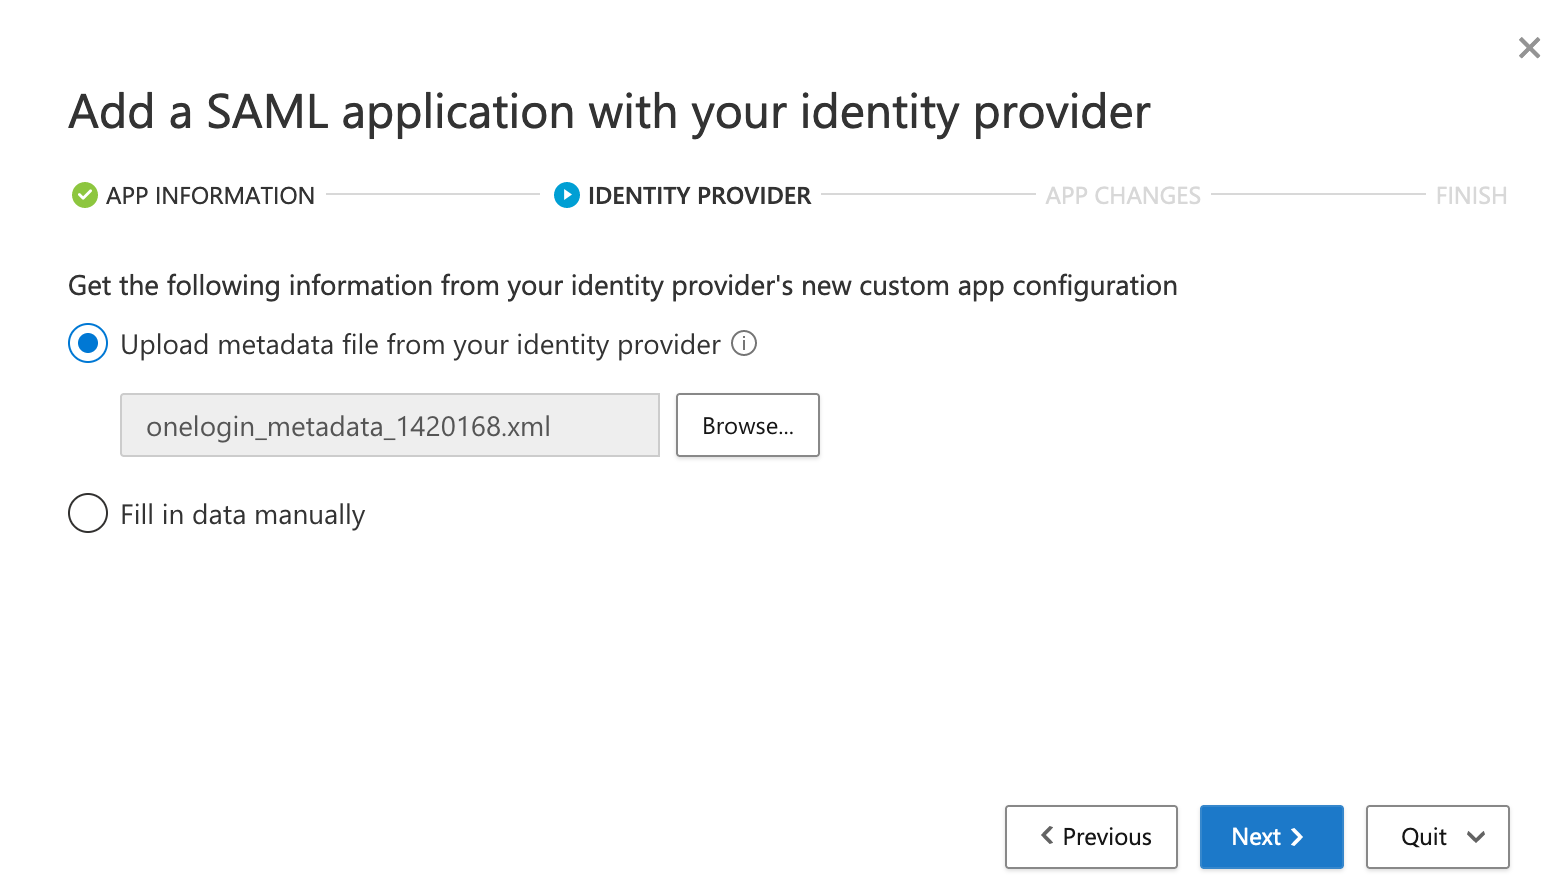
- Click Next > Next, then upload the metadata that you downloaded from OneLogin in the previous step. Click Next.
- Copy the McasSigninigCert, McasAppId, and Single Sign On URL and paste them someplace safe for later retrieval, then click Next.
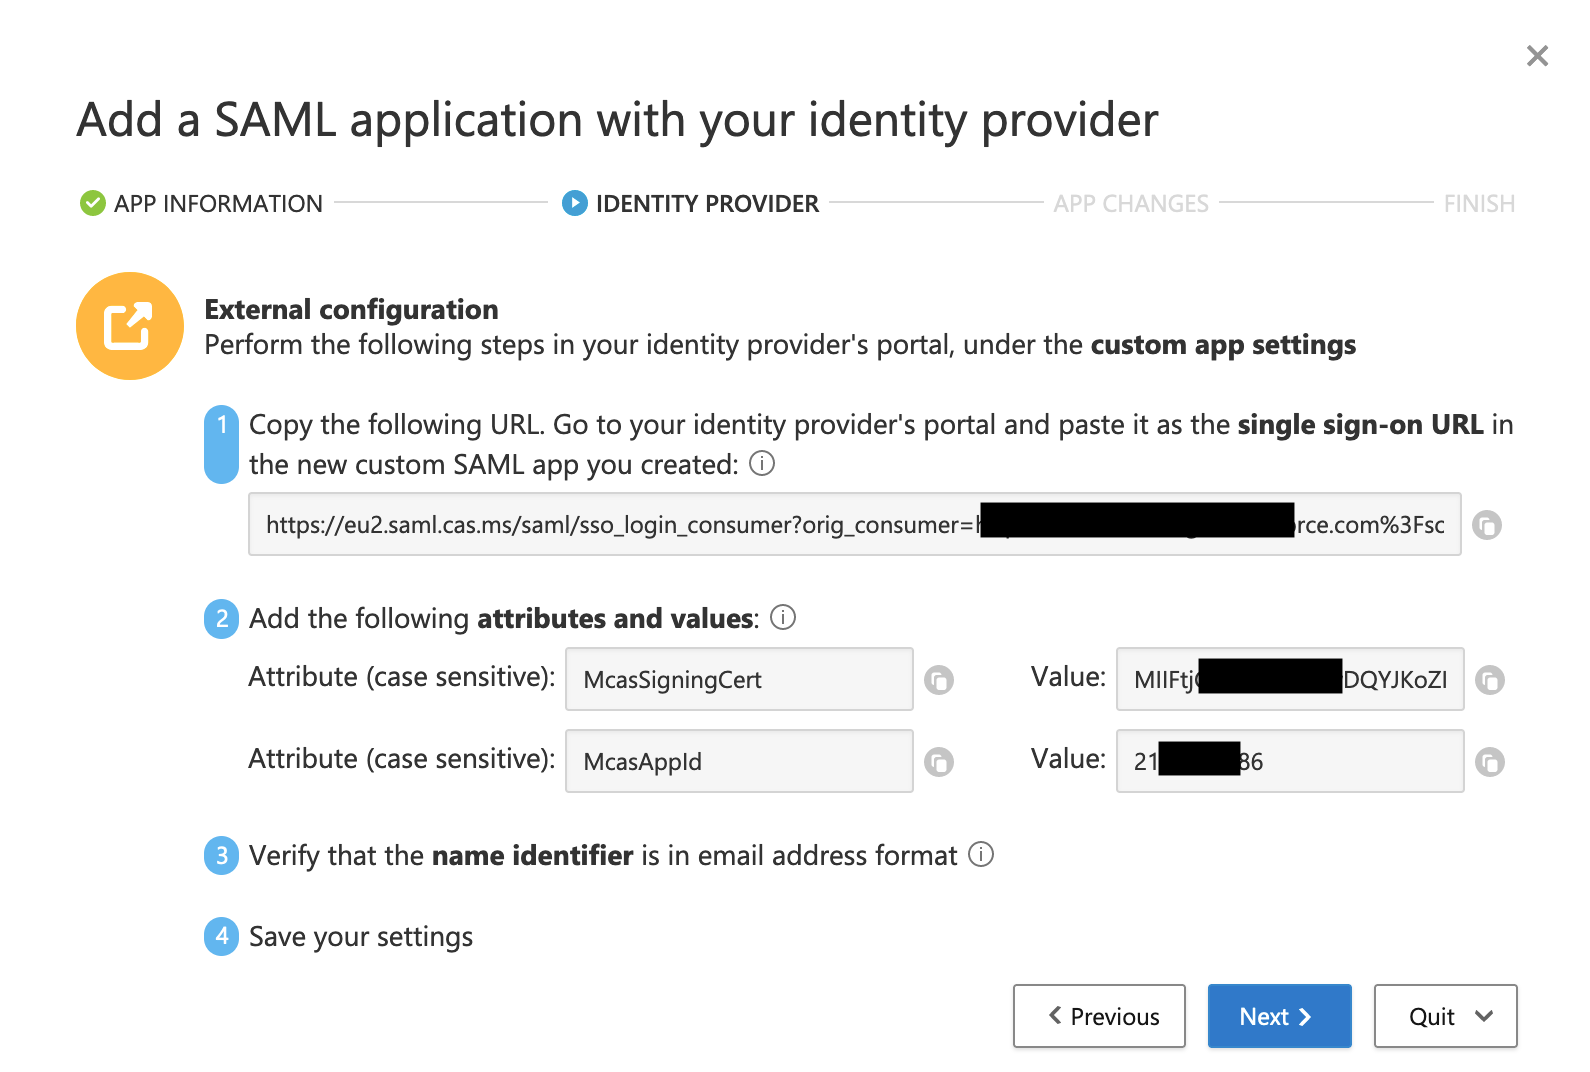
- Copy the SAML Sign On URL and paste it someplace safe for later retrieval. It will be used as the Identity Provider Login URL in Salesforce.
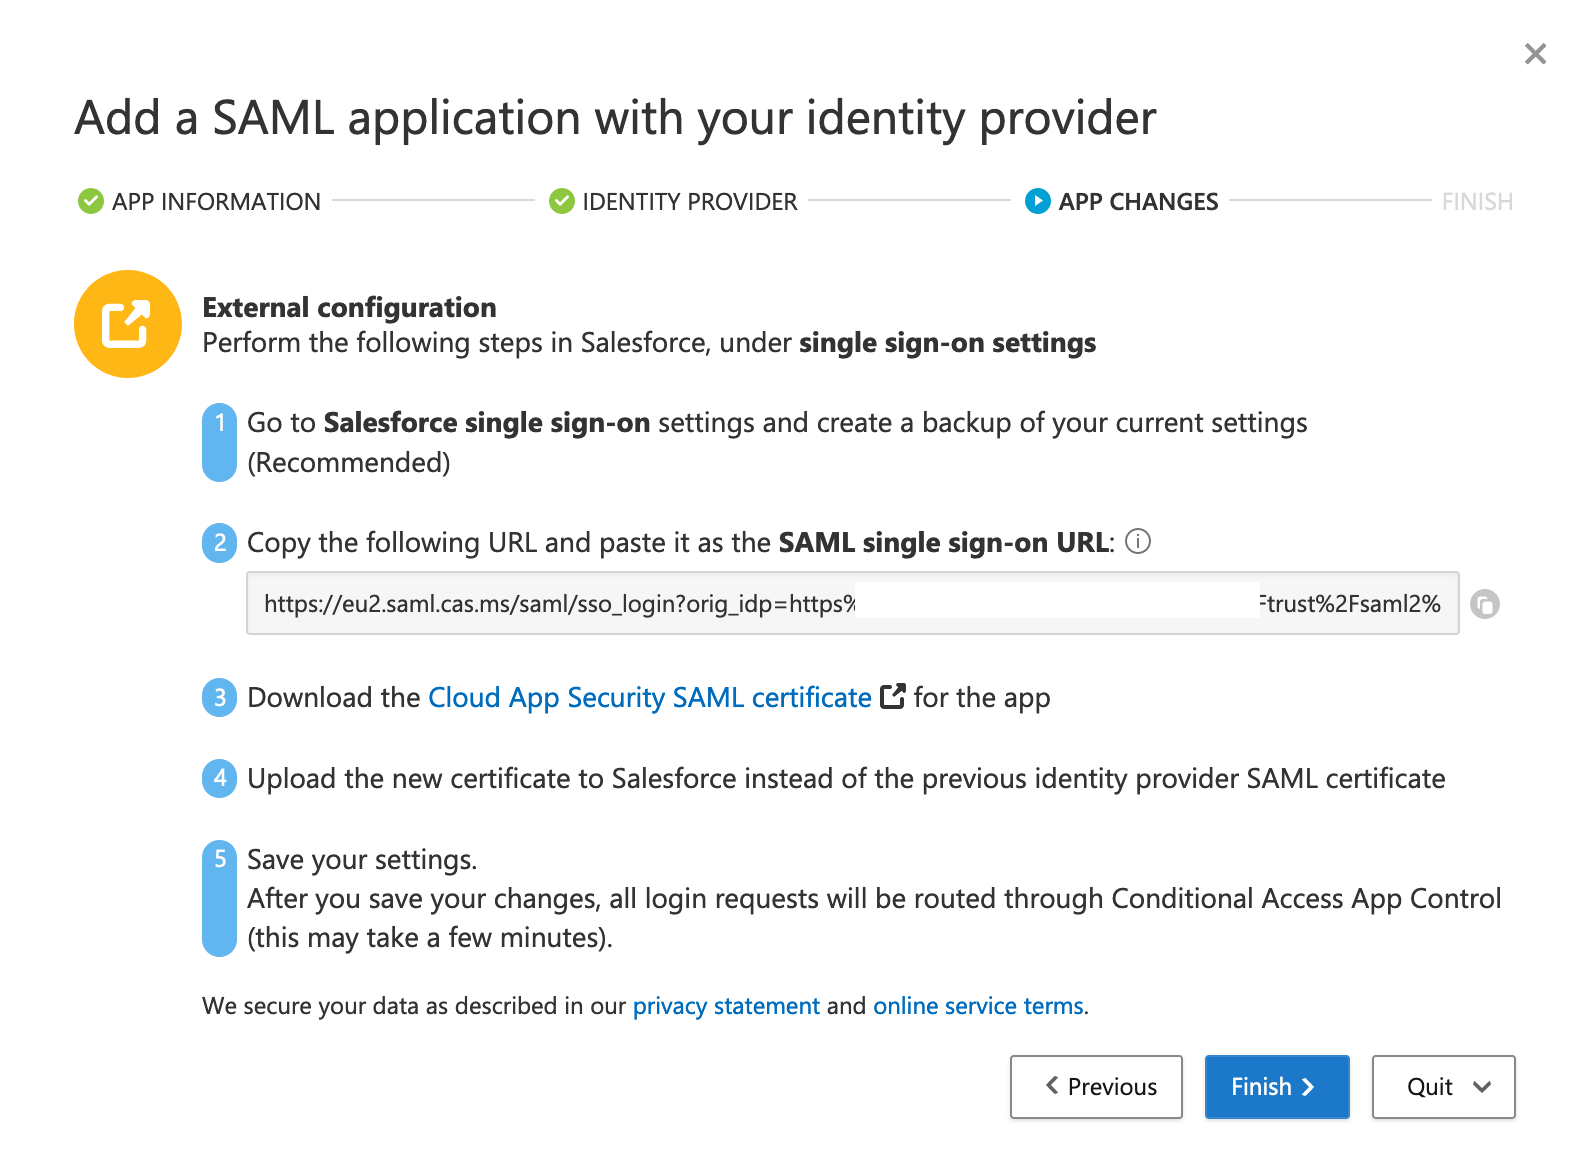
- Download the Cloud App Security SAML Certificate.
Salesforce
- Log into Salesforce as an admin, then go to Settings > Identity > Single Sign-on Settings.
- Configure the settings as follows:
| Name | OneLogin via Microsoft CAS |
| Issuer URL | The Issuer URL from OneLogin |
| Identity Provider Login URL | The SAML Sign On URL from MCAS |
| Entity ID | https://saml.salesforce.com |
| Identity Provider Certificate | Upload the certificate you downloaded from MCAS in the previous step. |
- Click Save.
OneLogin
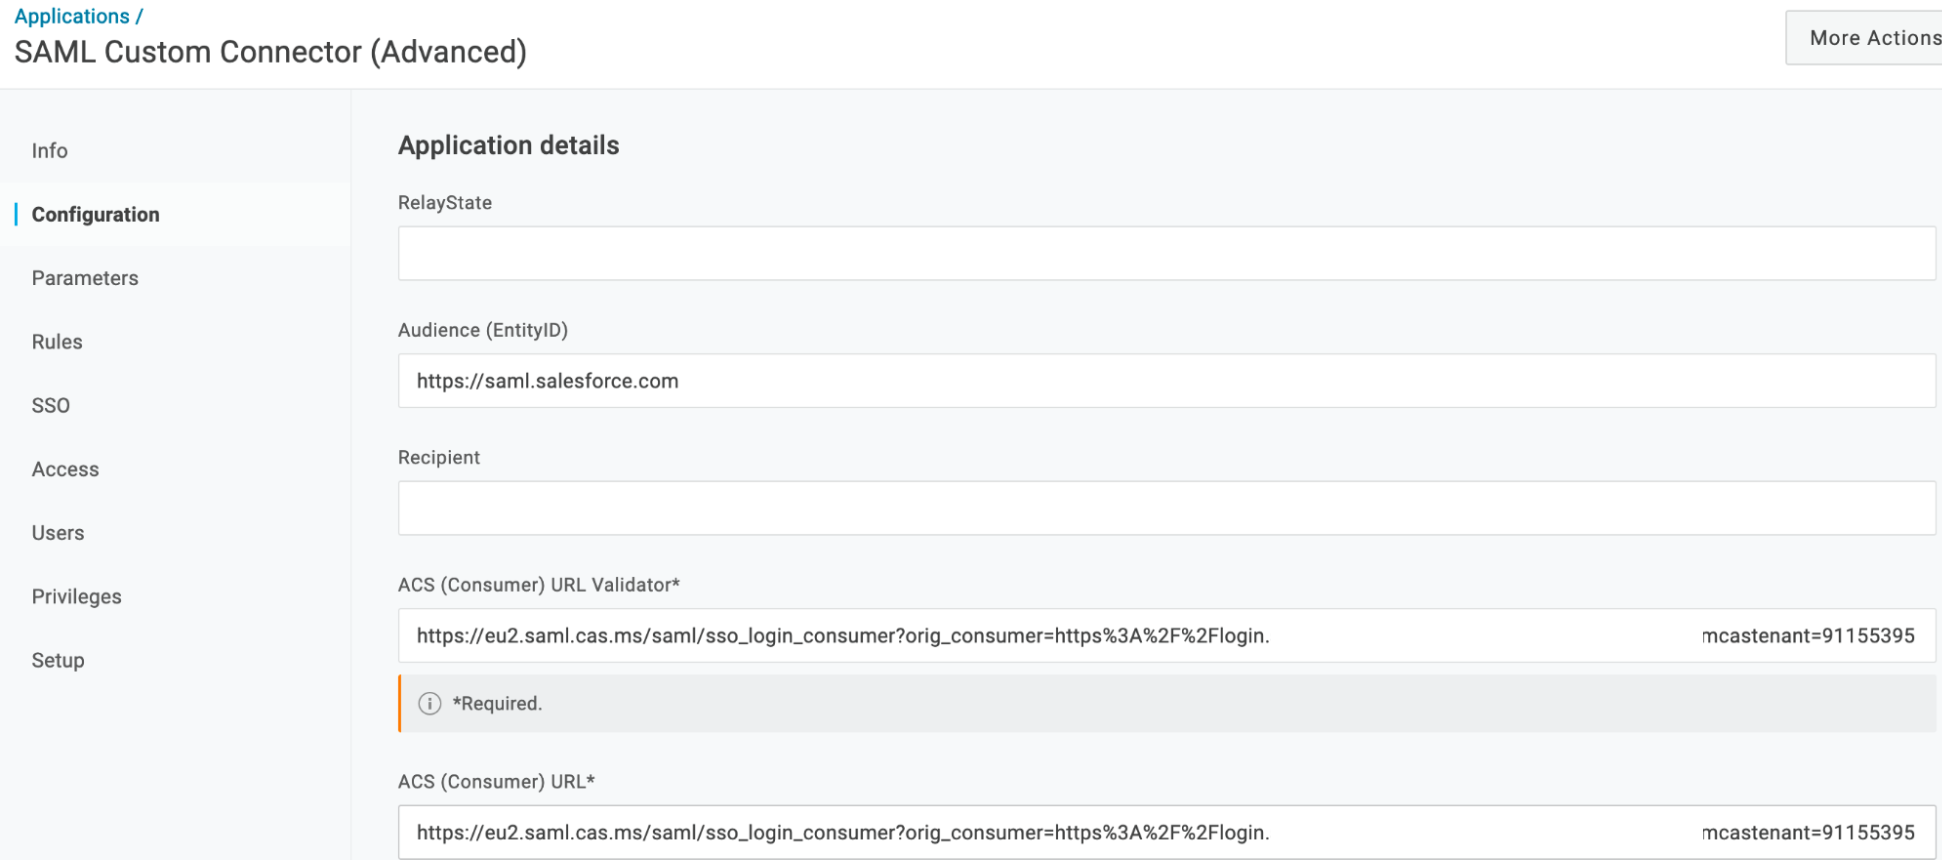
- Switch back to your OneLogin admin console and navigate to Configuration, then enter the following values and click Save:
- Audience (Entity ID): https://saml.salesforce.com
- ACS Validator: Single Sign On URL copied from MCAS
- ACS (Consumer): Single Sign On URL copied from MCAS
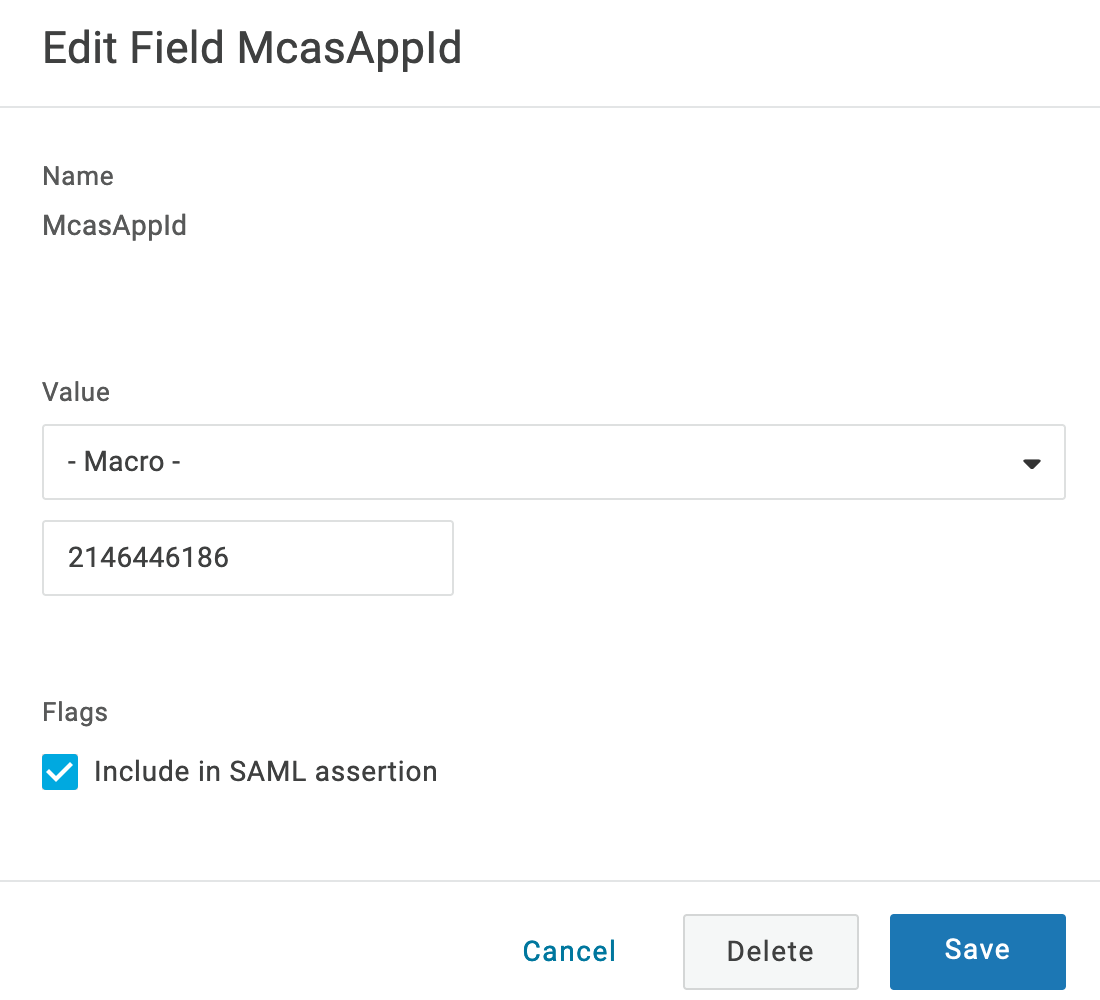
- Navigate to Parameters and click the plus sign to design a new parameter.
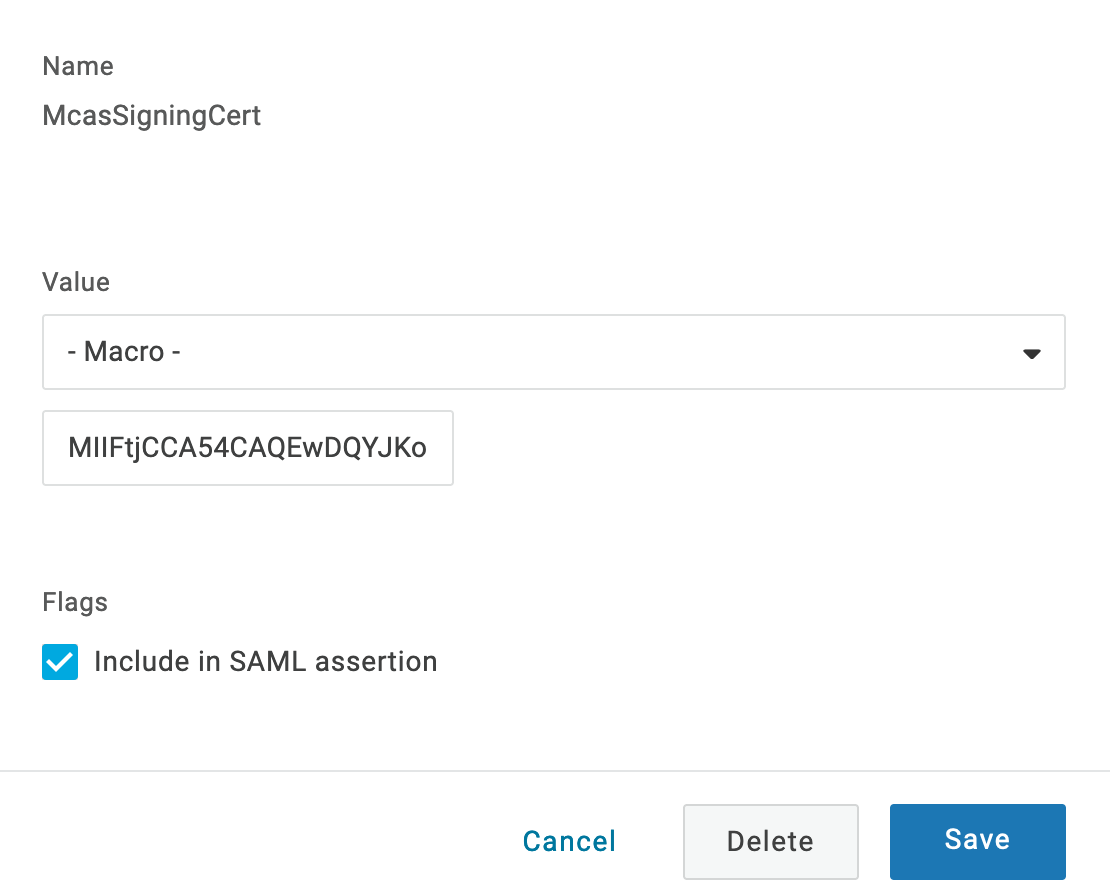
- Name the parameter McasSigningCert, then choose Macro and paste the McasSigningCert value you copied earlier. Click the Include in SAML Assertion box, then click Save.
- Click the plus sign again.
- Name the parameter McasAppId, then choose Macro and paste the McasAppId value you copied earlier. Click the Include in SAML Assertion box, then click Save.
Once they complete your setup, you can test your connection.