This knowledge base article describes how to configure ExactTarget (Salesforce Marketing Cloud) to connect to OneLogin via SAML.
Questions to ask yourself before you start this SAML connector process:
- Have you identified a test user for this connection?
- Should you generate a new default certificate? You should do so every 6-12 months or 5-10 applications - click here to learn more.
- Who will be given access to this app? Do you need to modify or create a new Role to successfully do so?
- Do you have admin access to ExactTarget? Are you a super user or above in your OneLogin instance?
- Do you have a safe place to copy-paste values to transfer them from OneLogin to ExactTarget and vice-versa?
- Have you contacted your ExactTarget account representative to enable SSO on your account?
OneLogin
- Navigate to Administration > Applications > Applications, click the Add App button, and search for ExactTarget (Salesforce Marketing Cloud).
- Select the app and name it ExactTarget, then change the icon if you wish (noting that end users will see it) and click Save.
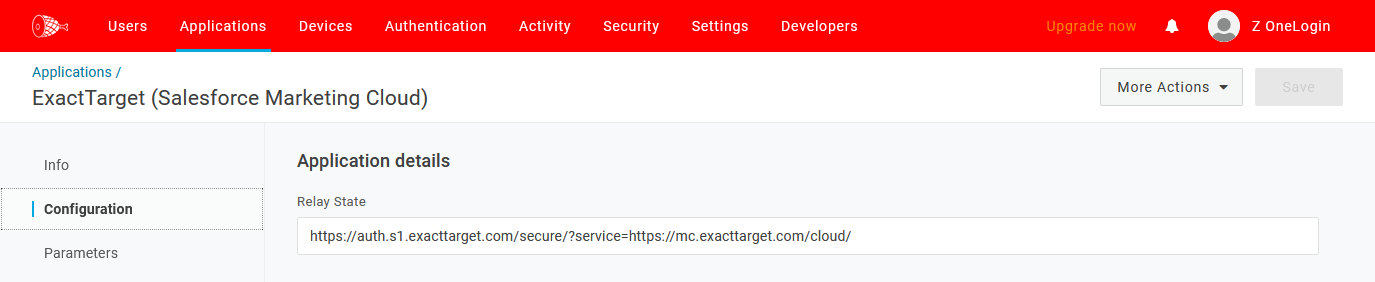
- Click Configuration and set the Relay State to
https://auth.s1.exacttarget.com/secure/?service=https://mc.exacttarget.com/cloud/
- Go to SSO and copy your SAML 2.0 Endpoint (HTTP) and Issuer URL, then paste them somewhere safe for later retrieval.

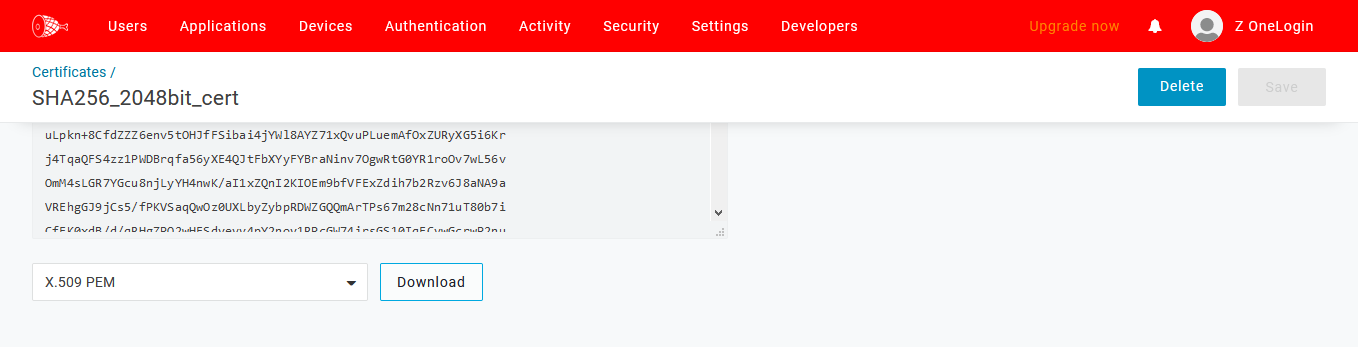
- Click View Details under the X.509 certificate, then choose Download on the next page and save it somewhere you can find it in the next steps.
- Navigate to Parameters and ensure that Username is set to email, then hover over the More Options menu in the top-right and download the SAML Metadata file.

- Click the Access tab and select which OneLogin role you want to grant to your users, then click Save.
ExactTarget
- Login to ExactTarget as an Administrator, then click on your username at the top-right and click Setup.
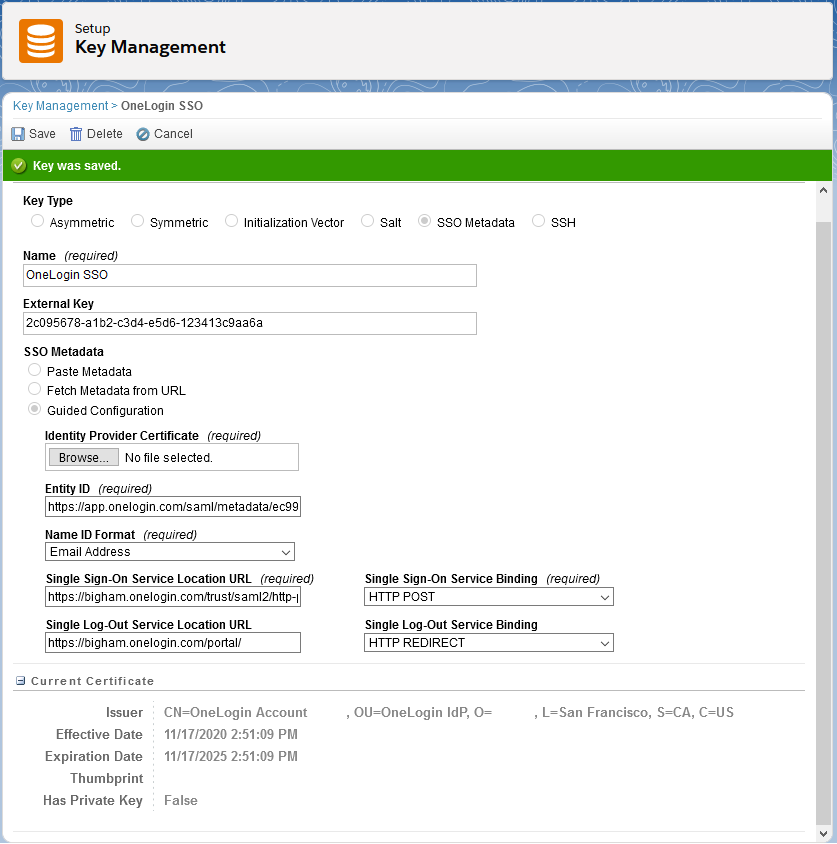
- Navigate to Administration > Data Management > Key Management and click the Create button. Select SSO Metadata, choose Guided Configuration, and configure and Save your new Key.
Sample configuration:
Name (required): OneLogin SSO
Identity Provider Certificate (required): The OneLogin X.509 PEM certificate you downloaded
Entity ID (required): Your Issuer URL
Name ID Format (required): Email Address
Single Sign-On Service Location URL (required): Your SAML 2.0 Endpoint (HTTP)
Single Sign-On Service Binding (required): HTTP POST
Single Log-Out Service Location URL (optional): https://[yourdomain].onelogin.com/portal/
Single Log-Out Service Binding (optional): HTTP REDIRECT
- Go to Settings > Security > Security Settings and click the Edit button. Under the Single Sign-On Settings section, configure the following:
Single Sign-On (required): Checked/Enabled
Do not require Identity Verification for SSO Logins (recommended): Checked/enabled

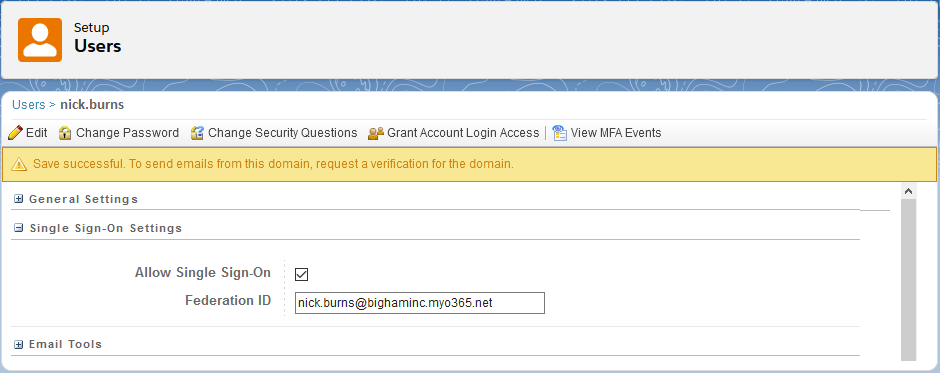
- Navigate to Administration > Users > Users > select/click a user to test with and configure the following.
Allow Single Sign-On: Checked/Enabled
Federation ID: [your test user's email]
For an IdP-initiated test, click the ExactTarget (Salesforce Marketing Cloud) app icon from your OneLogin dashboard in an Incognito window.
Note: ExactTarget (Salesforce Marketing Cloud) supports SP-initiated logins via a customer-specific URL. To obtain this URL, navigate to Settings > Security > Security Settings and scroll down to the Single Sign-On Settings section. The Marketing Cloud SP Initiated Link is the SP-initiated URL. SP-initiated attempts with any other URL will result in an error message to the end user.