This knowledge base article describes how to configure Kandji to connect to OneLogin via SAML.
Questions to ask yourself before you start this SAML connector process:
- Have you identified a test user for this connection?
- Should you generate a new default certificate? You should do so every 6-12 months or 5-10 applications - click here to learn more.
- Who will be given access to this app? Do you need to modify or create a new Role to successfully do so?
- Do you have admin access to Kandji? Are you a super user or above in your OneLogin instance?
- Do you have a safe place to copy-paste values to transfer them from OneLogin to Kandji and vice-versa?
Kandji
- Log in as an admin, then navigate to the Settings page and click the Access tab.
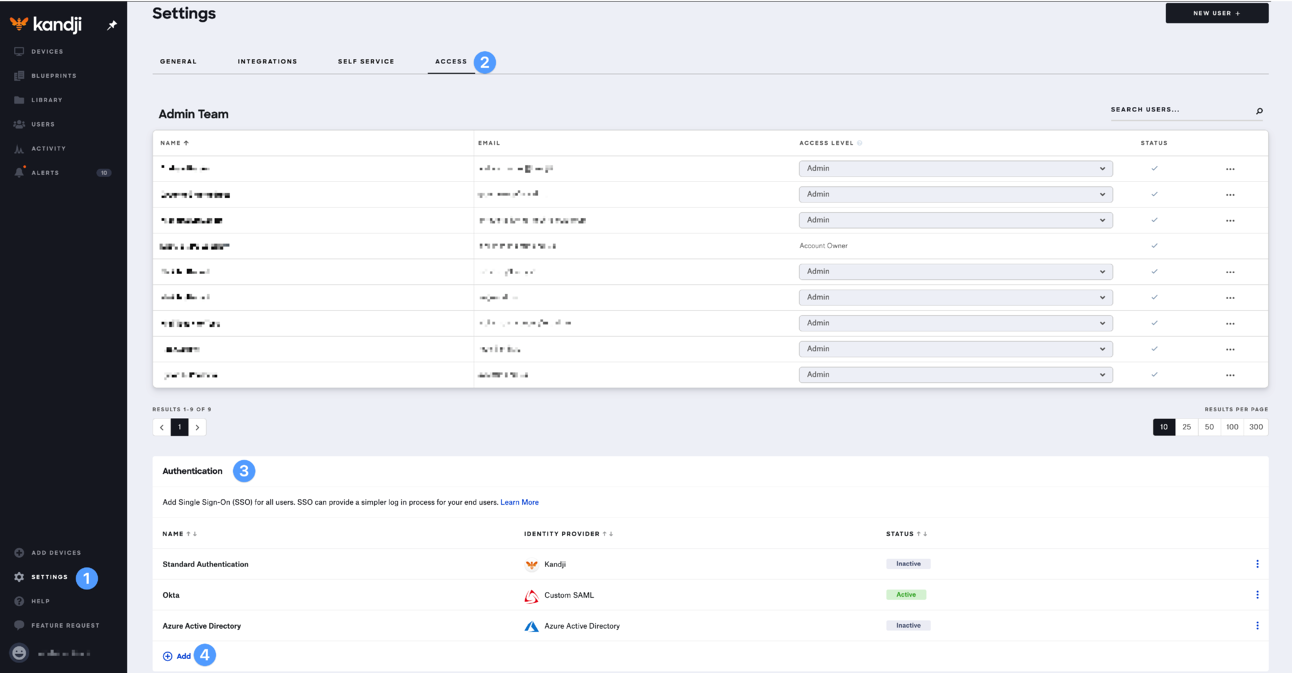
- Go to the Authentication section. If that section does not currently exist, SSO is not enabled for your instance and you must contact customer support.
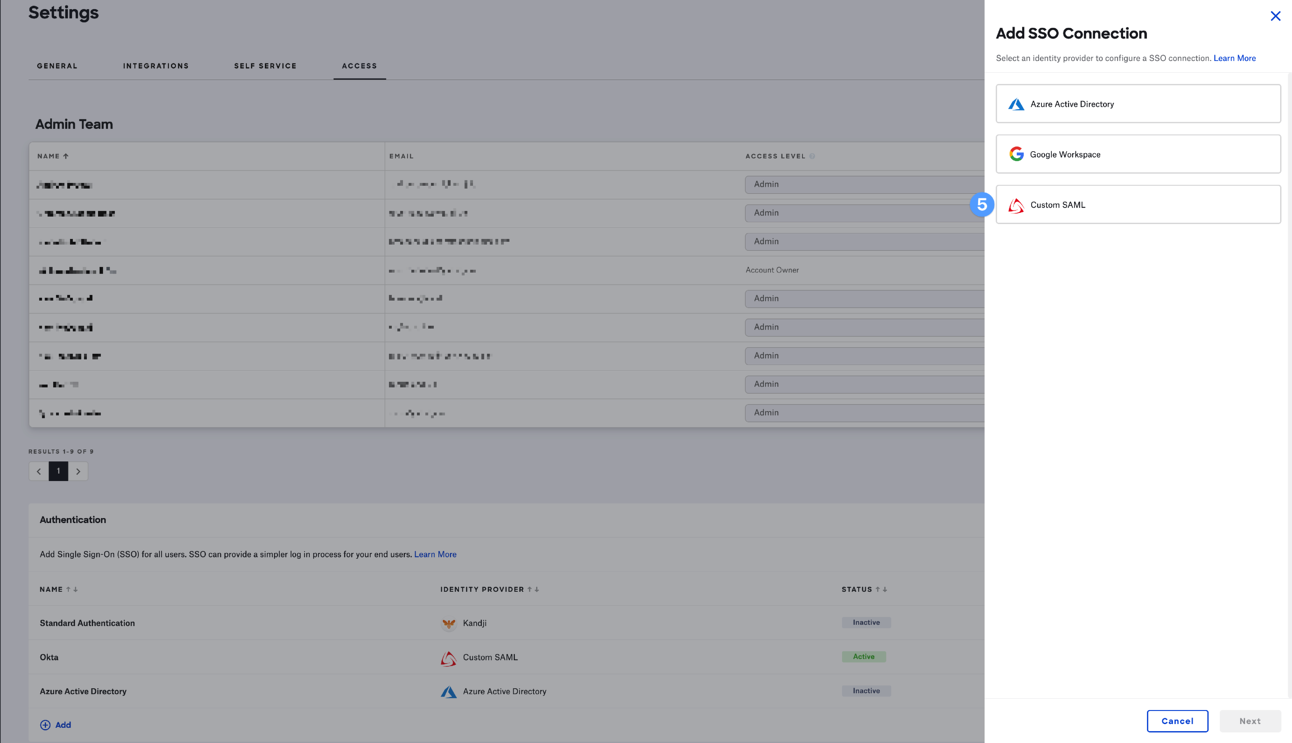
- Click the Add button on the bottom left of the authentication table.
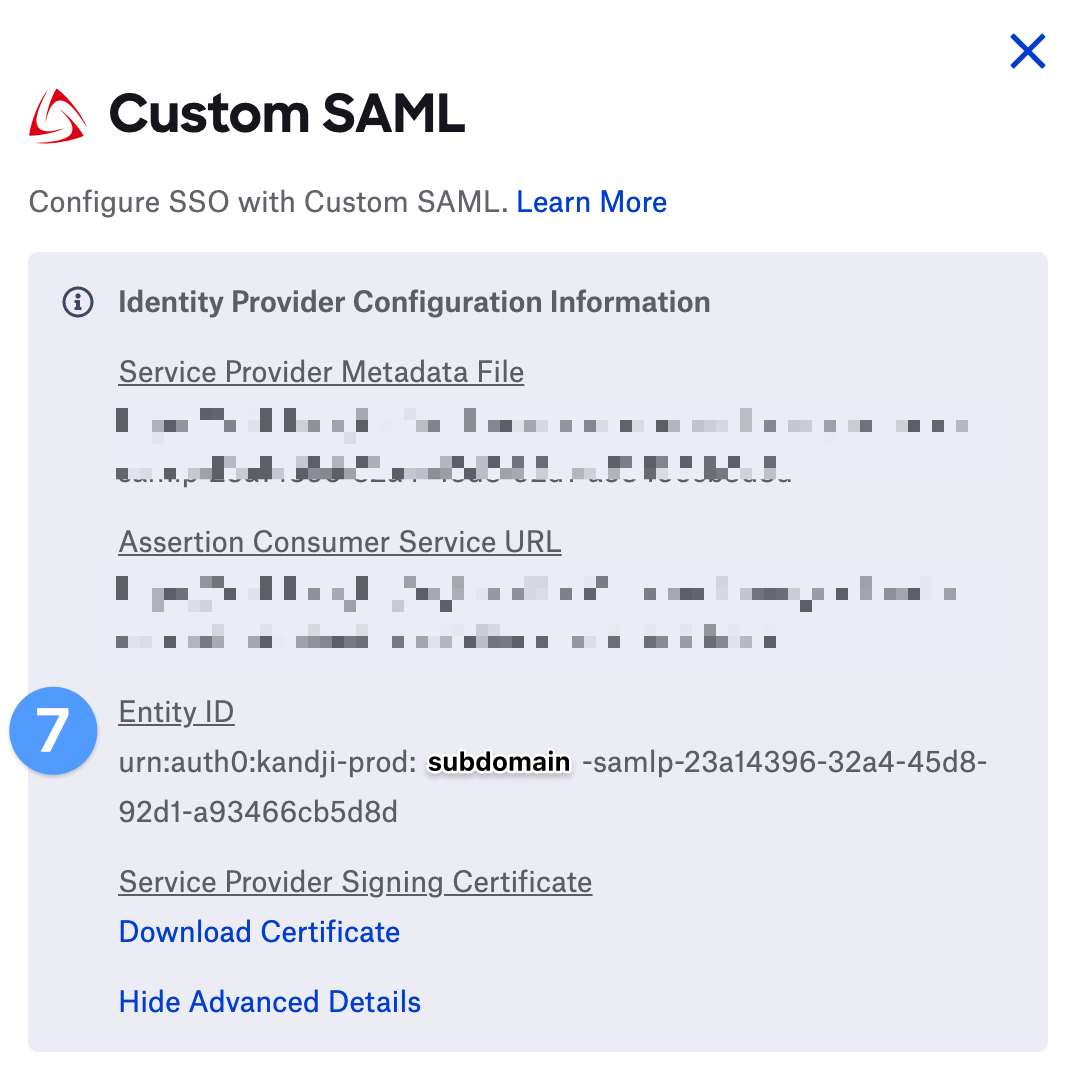
- Click Advanced Details, then copy the contents of the Entity ID after the
authurn:auth0:kandji-prod:portion of the string.
OneLogin
- Navigate to Administration > Applications > Applications, click the Add App button, and search for Kandji.
- Select the app and change the icon if you wish (noting that end users will see it), then click Save.
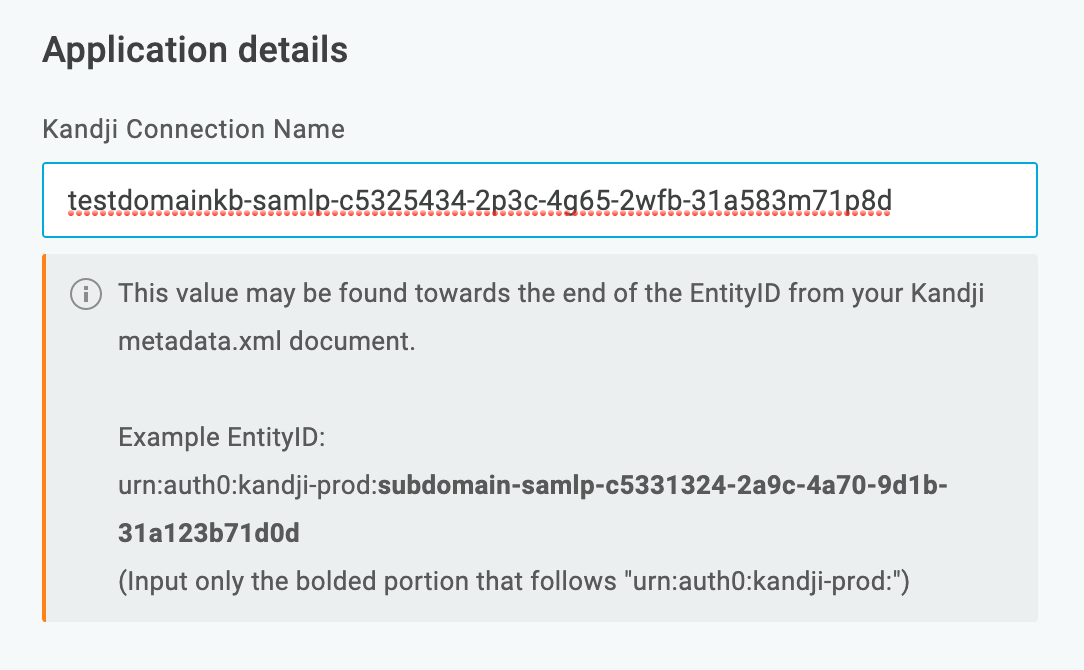
- Go to the Configuration tab and paste the Entity ID you just copied into the Kandji Connection Name area.
- Click SSO and copy both the SAML 2.0 Endpoint and the SLO Endpoint, then paste them somewhere safe for later retrieval.
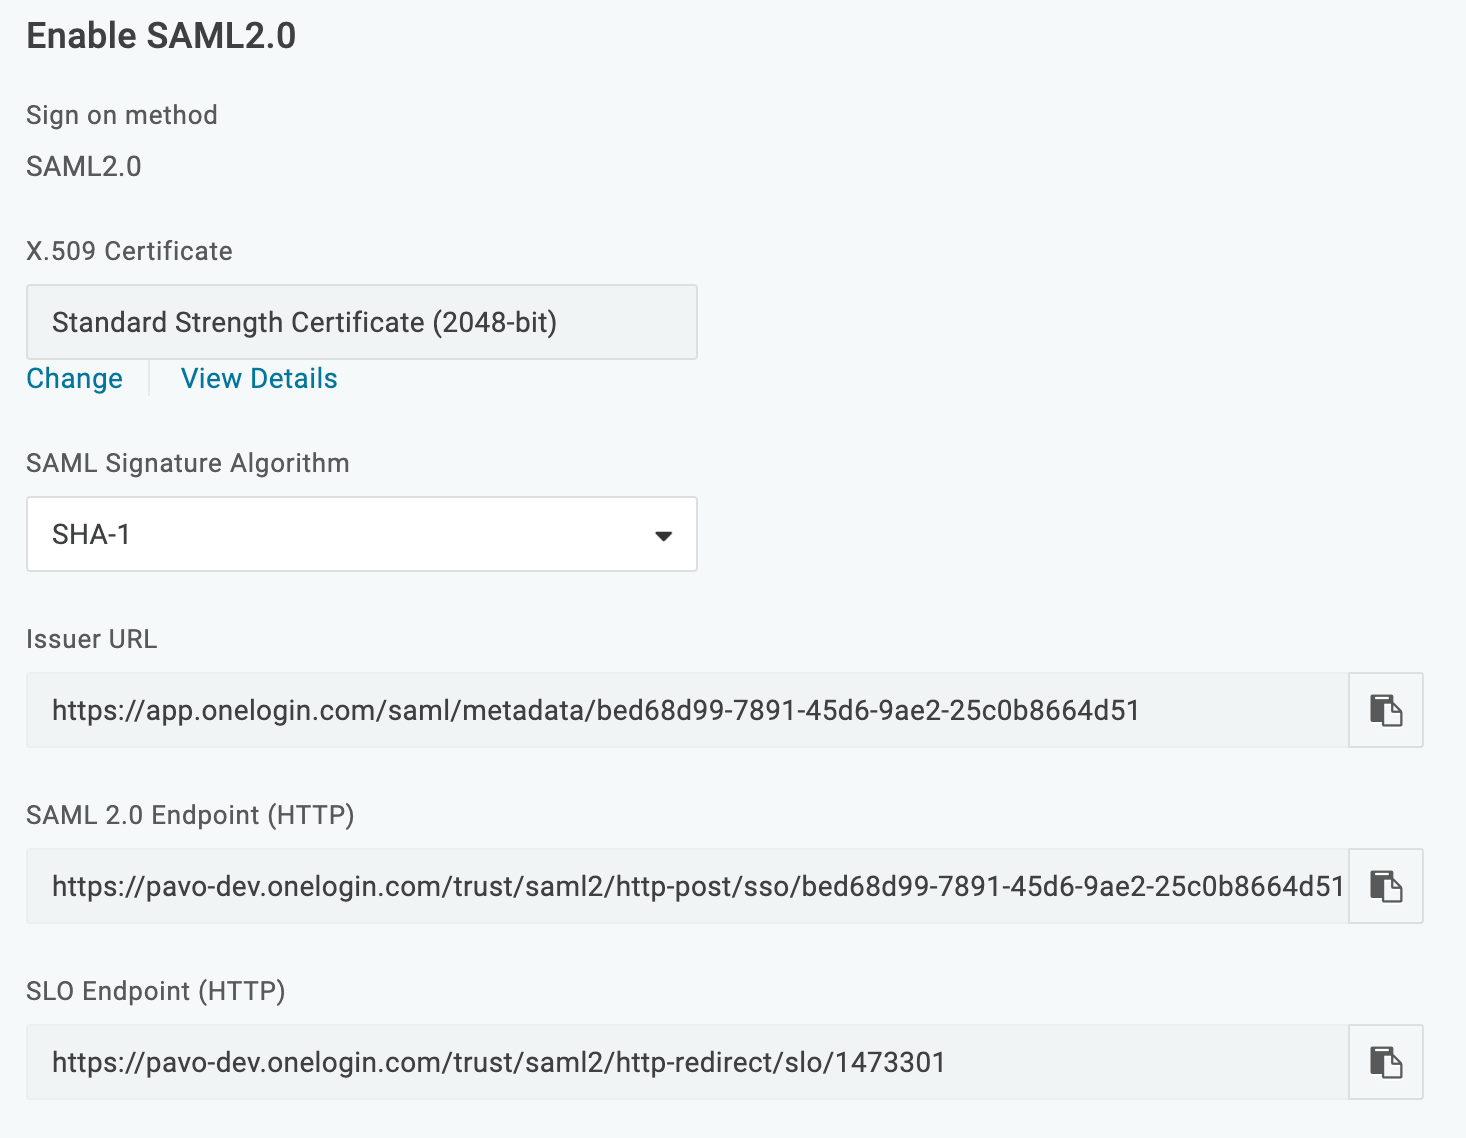
- Change the SAML Signature Algorithm to SHA-256, then click View Details under the X.509 Certificate section, click the Copy to Clipboard icon next to the certificate itself, and paste it somewhere you can find it later.
- Go to the Access tab and select which OneLogin role you want to grant to your users, then click Save.
Kandji
- Continue in the Custom SAML tab that you opened earlier.
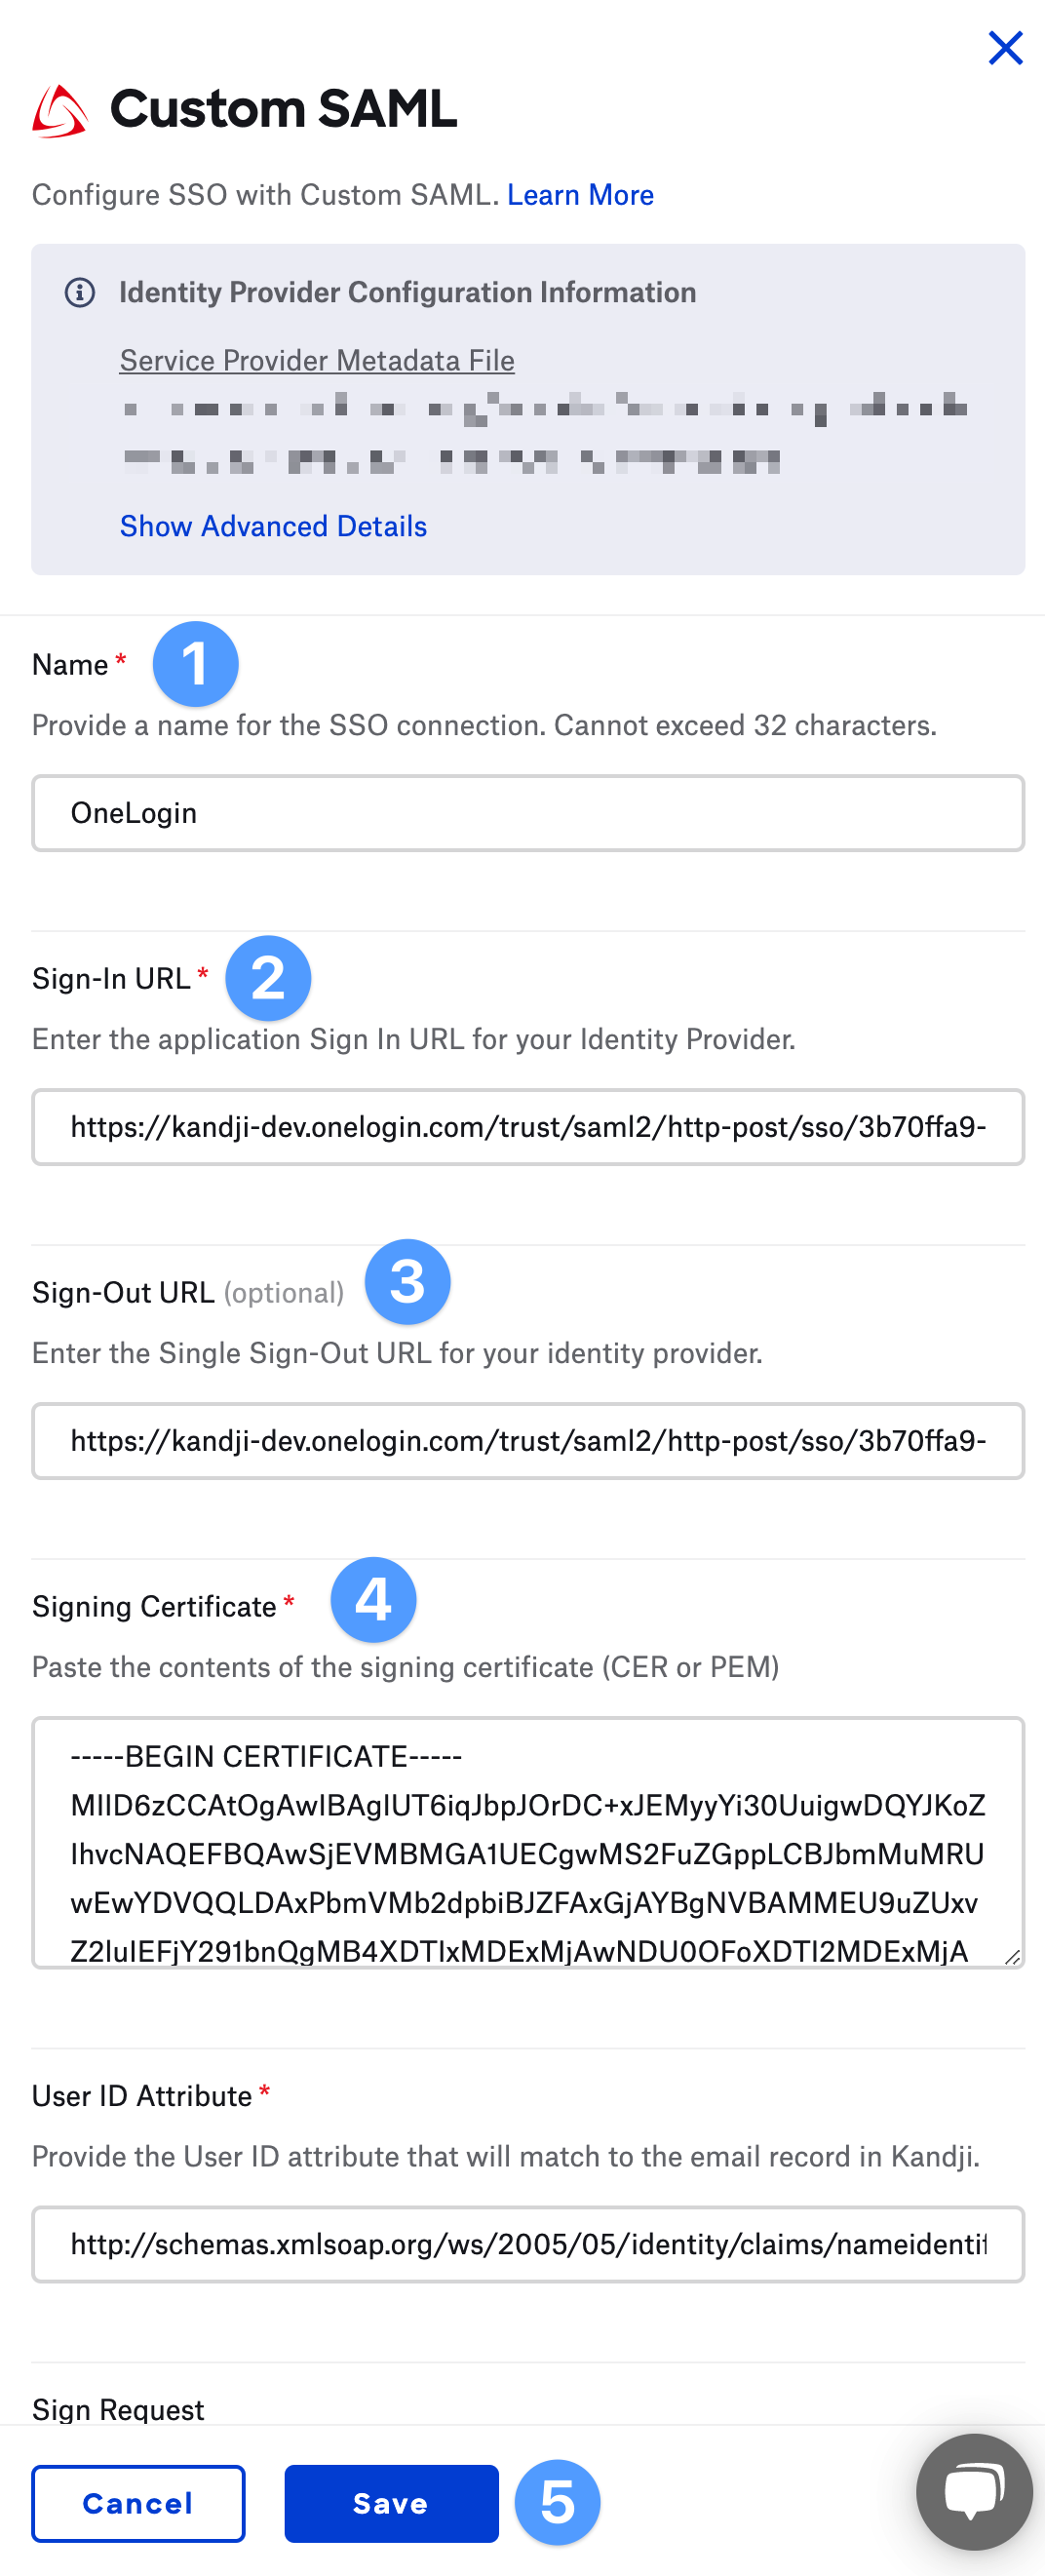
- Set the Connection Name to OneLogin, then paste in the Sign In URL (SAML 2.0 Endpoint) and Sign Out URL (SLO Endpoint) that you copied from OneLogin.
- Paste the entire contents of the X.509 certificate you copied from OneLogin, then choose Save.
You can test your connection. For an IdP-initiated test, click the Kandji app icon from your OneLogin dashboard via a separate browser or incognito browser session. You can learn more about Kandji single sign-on here.