This knowledge base article describes how to configure Zoom to rely on OneLogin SAML for required participant authentication.
Questions to ask yourself before you start this SAML connector process:
- Have you identified a test user for this connection?
- Should you generate a new default certificate? You should do so every 6-12 months or 5-10 applications - click here to learn more.
- Who will be given access to this app? Do you need to modify or create a new Role to successfully do so?
- Do you have admin access to Zoom? Are you a super user or above in your OneLogin instance?
- Do you have a safe place to copy-paste values to transfer them from OneLogin to Zoom and vice-versa?
OneLogin
- Navigate to Administration > Applications > Applications, click the Add App button, and search for SAML Custom Connector (Advanced).
- Change the icon if you wish and ensure it is not visible, then click Save.
- Navigate to the SSO tab and change your security protocol to SHA-256, then copy the Issuer URL and SAML 2.0 Endpoint (HTTP) values and paste them someplace safe for later retrieval.
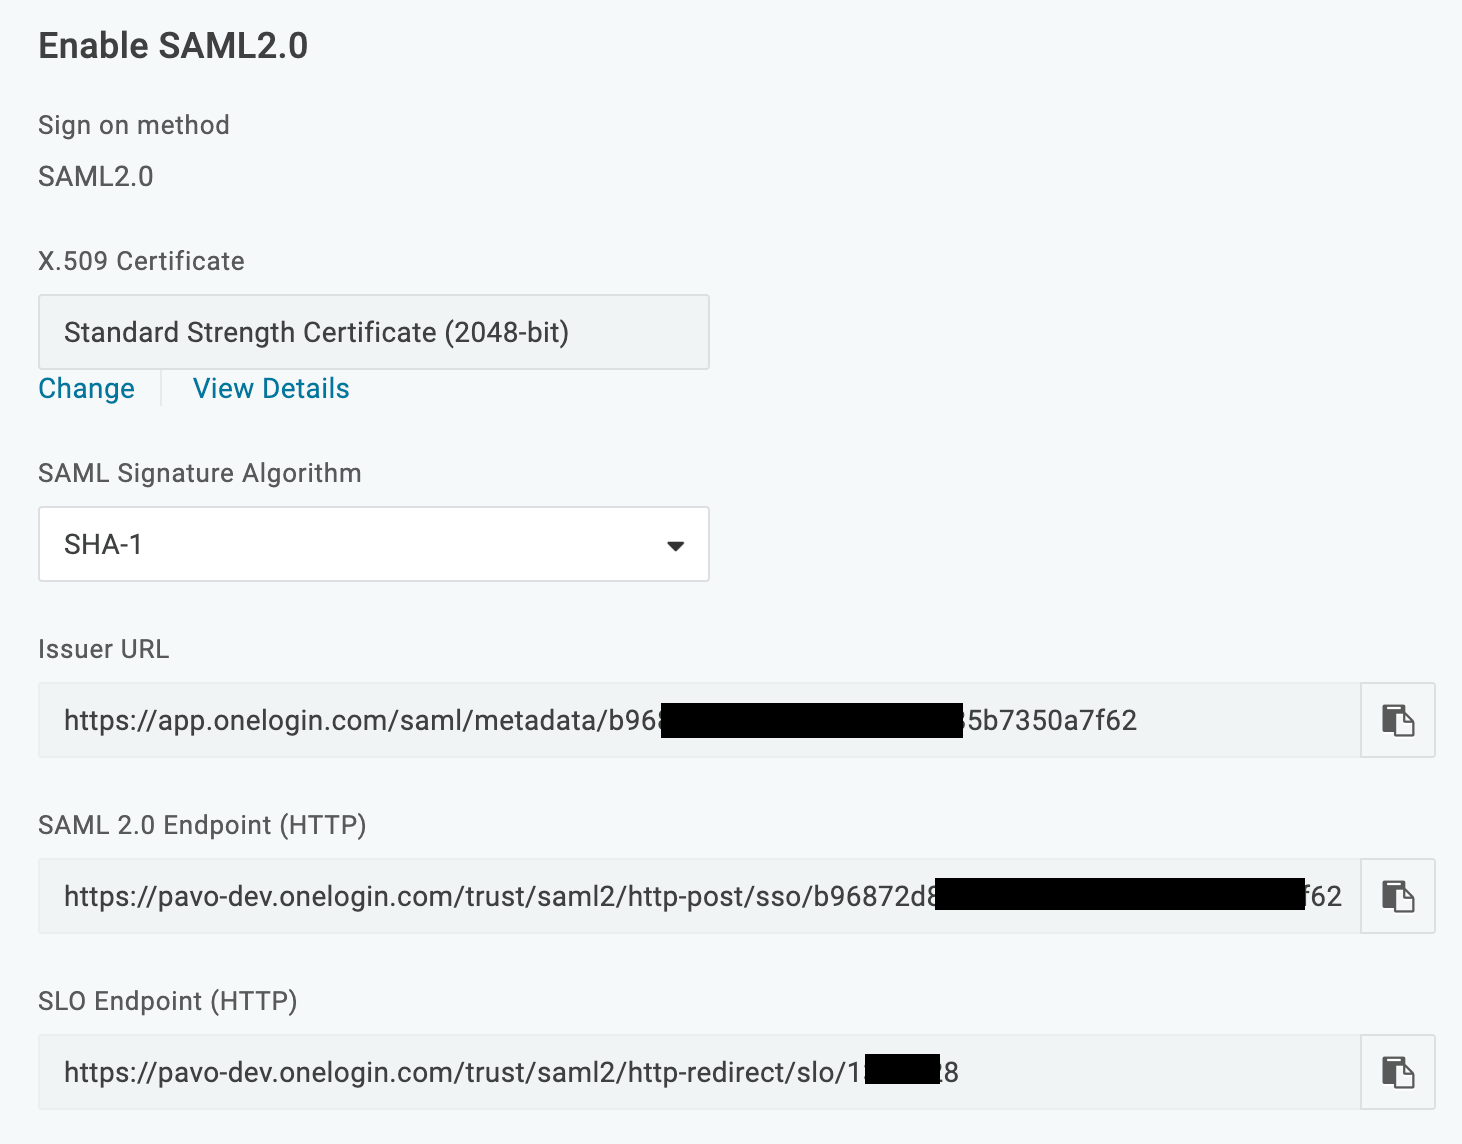
- Click View Details under the X.509 certificate link, then download the X.509 PEM certificate and save it somewhere safe.
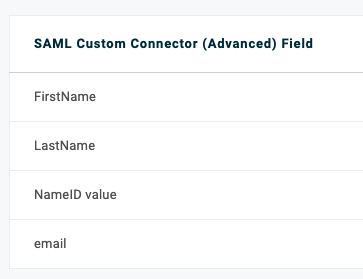
- Navigate to Parameters and ensure that NameID Value is set to the value you'll share with Zoom, probably email.
- Set the following parameters, ensuring that each is set to Include in Assertion:
| SAML Attribute Name | User field recommended |
| FirstName | First Name |
| LastName | Last Name |
- Click the Access tab and select which OneLogin role you want to grant to your users, then click Save.
Zoom
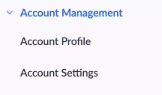
- Go to the Account Management section.
- Click Add Configuration, then choose Select an authentication method and pick Sign in to external Single Sign On (SSO).
- Under Current Provider, scroll to SAML settings.
- For Issuer (IDP Entity ID), enter the OneLogin Issuer URL you copied.
- For Sign-in page URL, enter the OneLogin SAML 2.0 Endpoint (HTTP) you copied.
- Ensure that the default security is set to SHA-256.
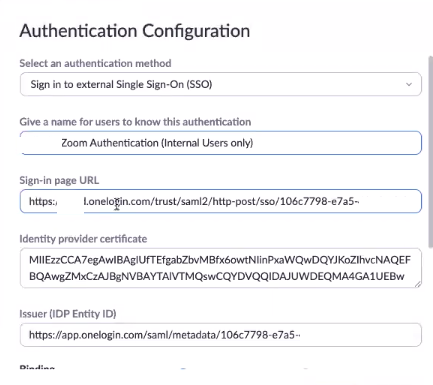
- In the Identity provider certificate section, paste the entirety of the X.509 certificate you copied.
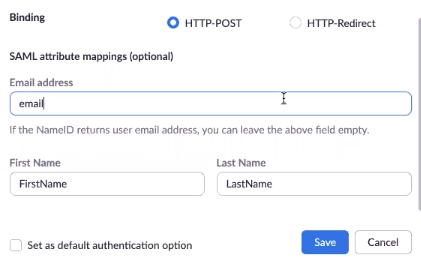
- In the Binding section, select HTTP-POST.
- Click Save, then click the link to download the SP metadata file.
Additionally, you may check to ensure that the SAML attribute mapping values match the values you set in the OneLogin administration suite, including email and First Name.
- Open the SP metadata file with a text editor, then search for md:EntityDescription entityID and copy the URL after
entityID=. Paste it somewhere safe. - Search for md:AssertionConsumerService Bind Location and copy the URL that's directly after it, then paste it somewhere safe.
OneLogin
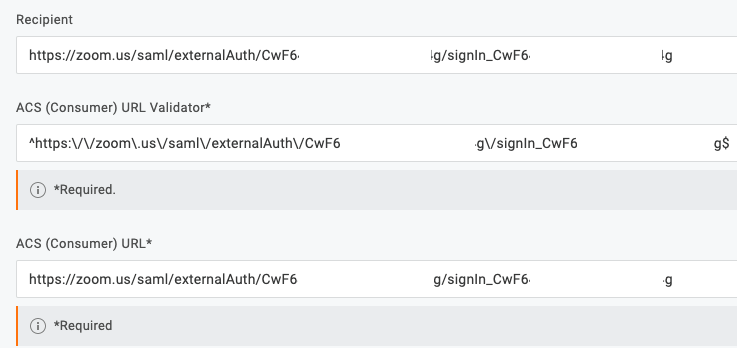
- Go to the SSO tab and paste the entityID URL you just copied into the Audience (EntityID) tab.
- Paste the AssertionConsumerService Bind Location into the Recipient, ACS (Consumer) URL Validator, and ACS (Consumer) URL fields.
- Go to the ACS (Consumer) URL Validator field and complete the following steps:
- Append a dollar sign ($) to the end.
- Prefix https:// with a caret ^
- Prefix each forward slash (/) with a backslash (\) so it looks like \/
- Prefix each period with a backslash \
- Your finished ACS (Consumer) URL Validator field will look like
^https:\/\/zoom\.us\/saml\/externalAuth\/randomGUIDhere\/signin_randomGUIDhere$. Click Save.
You can now test your connection. For an IdP-initiated test, click the Zoom app icon from your OneLogin dashboard via a separate browser or incognito browser session.