CONFIGURE SCIM
NOTE: At the time of this article, VMWare Workspace ONE Access only allowed creation of a non-LDAP based ‘OTHER’ directory via their API. The next several steps illustrate how to leverage Postman to create an OTHER directory as the repository of your SCIM synced/managed OneLogin users.
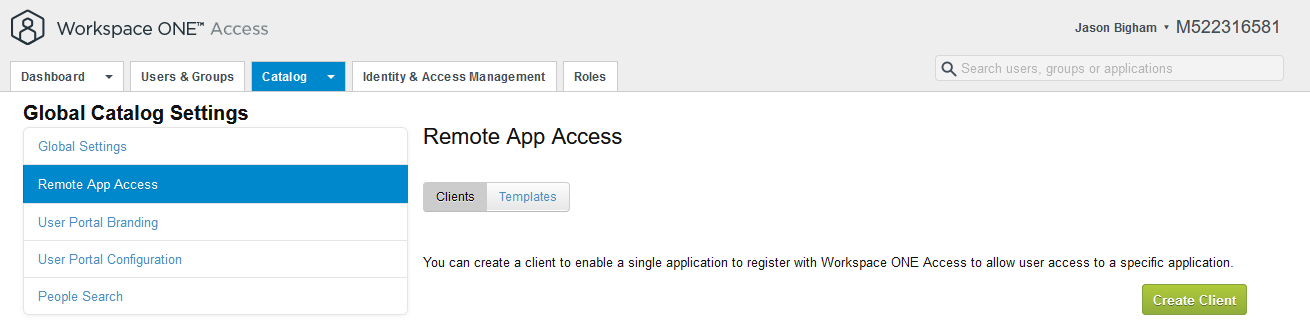
- Login to Workspace ONE Access and navigate to Catalog > Settings, then select Remote App Access on the left and click the Create Client button on the right.

- Expand the Advanced section on Create Client men and enter the following configuration:
Access Type: Service Client Token
Client ID: e.g. PostmanClient
Shared Secret: Create a secret manually or utilize the Generate Shared Secret option. Note: if you do not save your Shared Secret, it cannot be accessed again.
Issue Refresh Token: Checked/Enabled
Token Type: Bearer
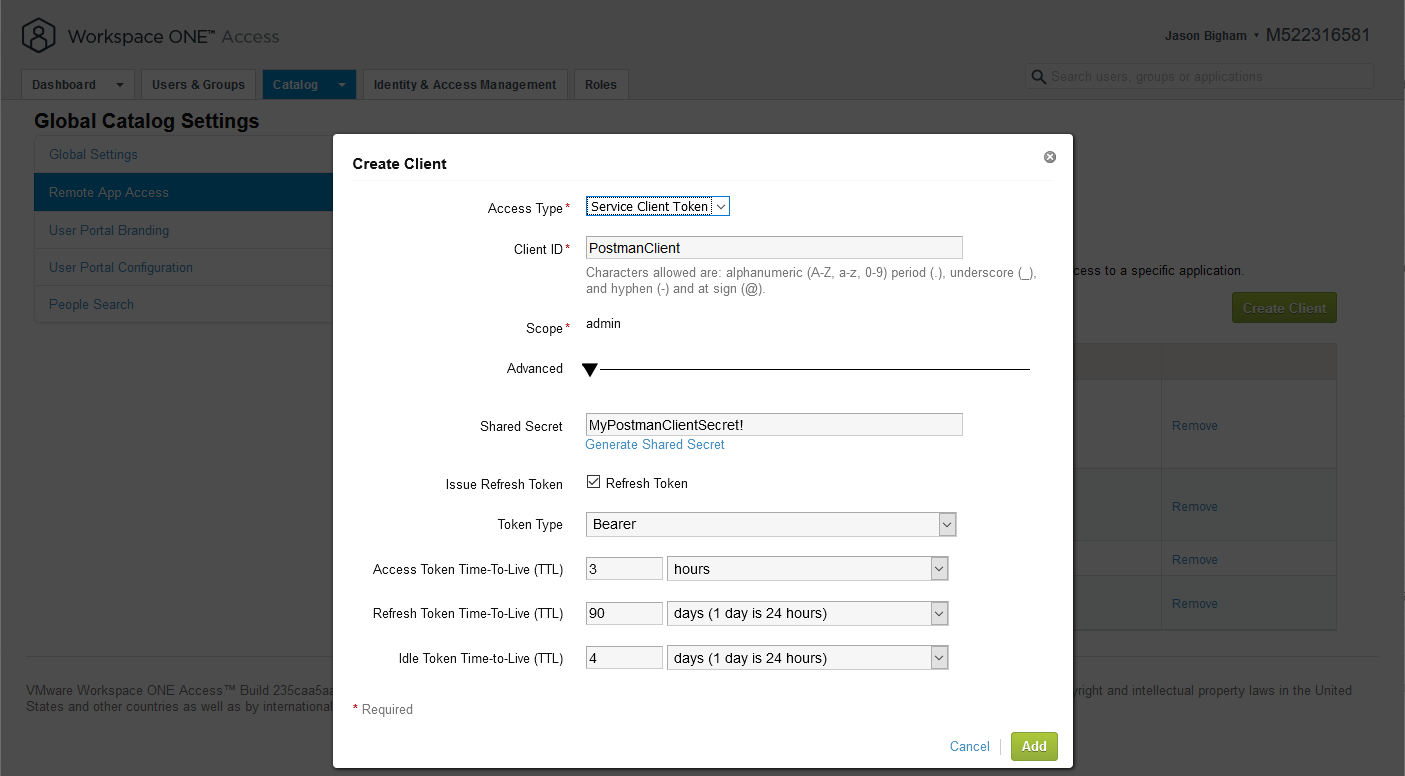
- Your configuration looks similar to the configuration below.
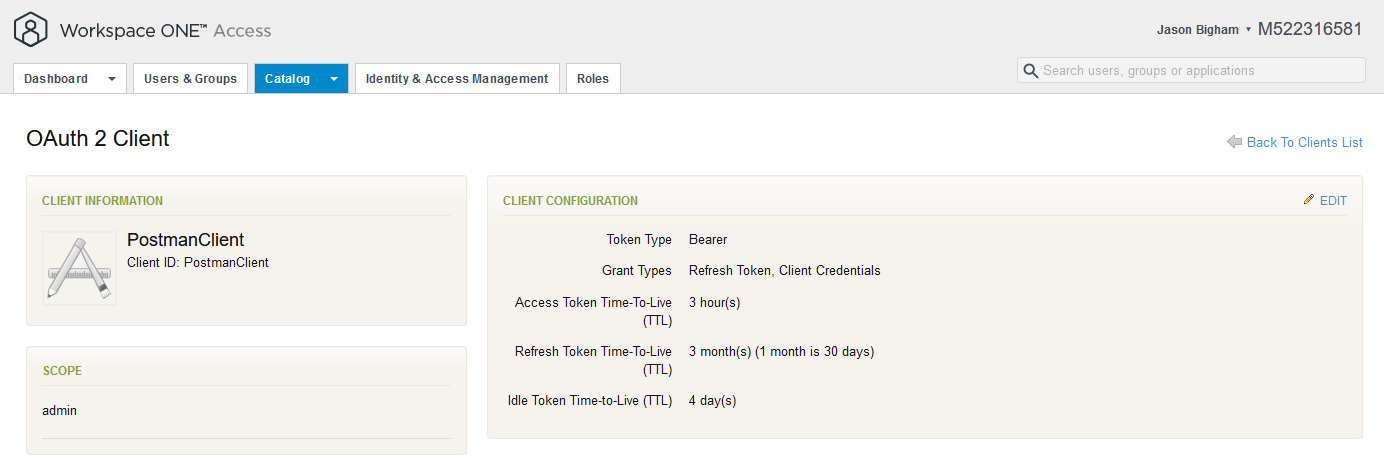
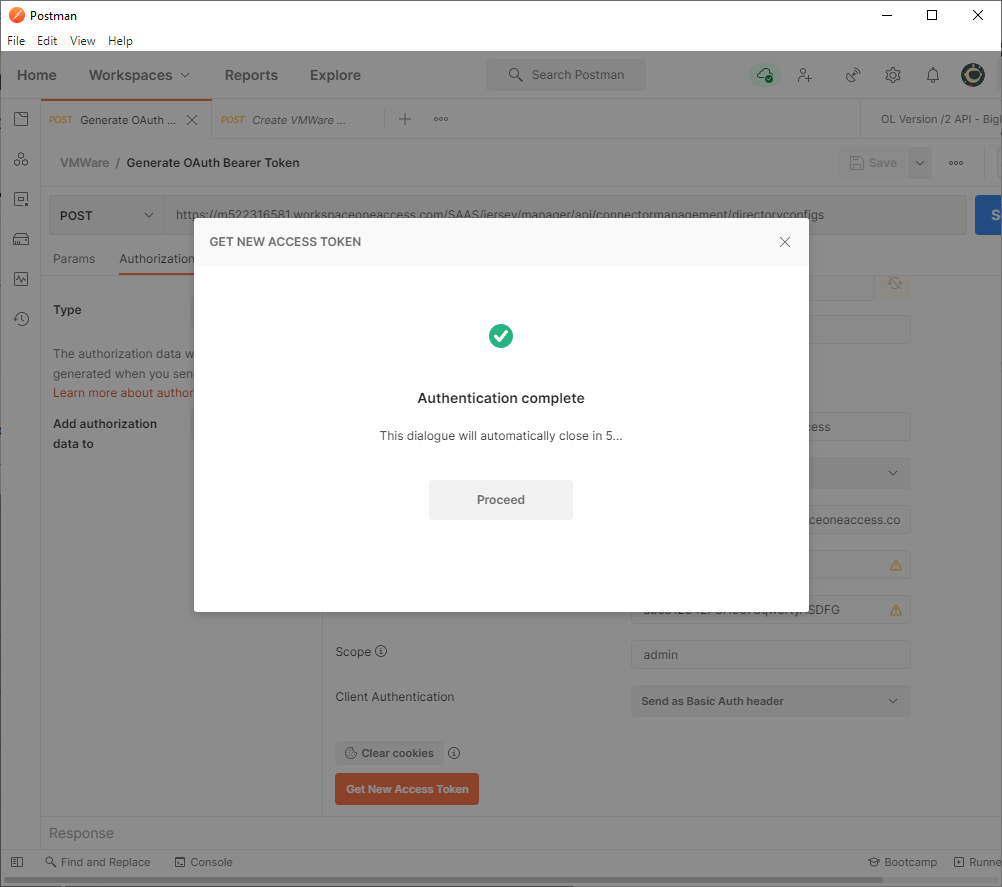
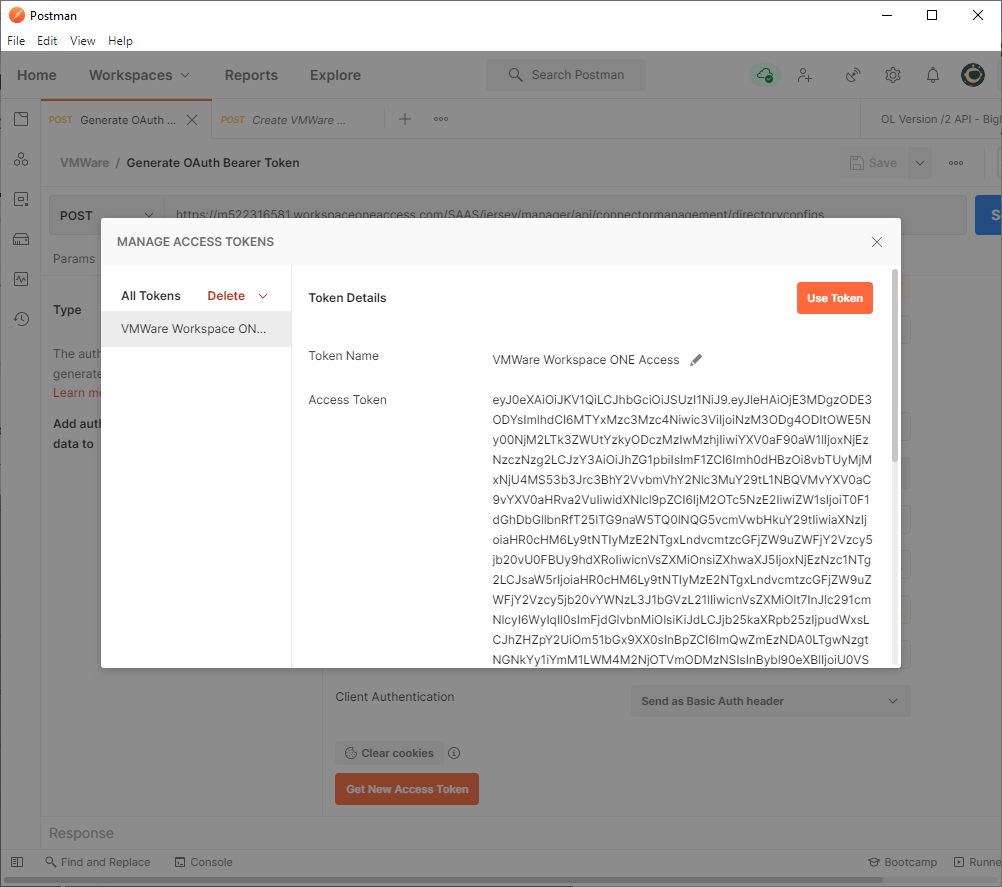
- Download, install, and launch Postman, then create a new tab to Generate an OAuth Bearer Token via the Get New Access Token button.
HTTP method: POST
URL: https:///SAAS/jersey/manager/api/connectormanagement/directoryconfigs
Authorization tab
Type: OAuth 2.0
Token Name: e.g. VMWare Workspace ONE Access
Grant Type: Client Credentials
Access Token URL: https://tenantURL/SAAS/auth/oauthtoken
NOTE: “Workspace ONE Access was formerly called VMware Identity Manager. Old tenants have the domain name vmwareidentity.com while new tenants have the domain name workspaceoneaccess.com.”
Client ID: PostmanClient
Client Secret: The shared secret you previously created and documented
Scope: Admin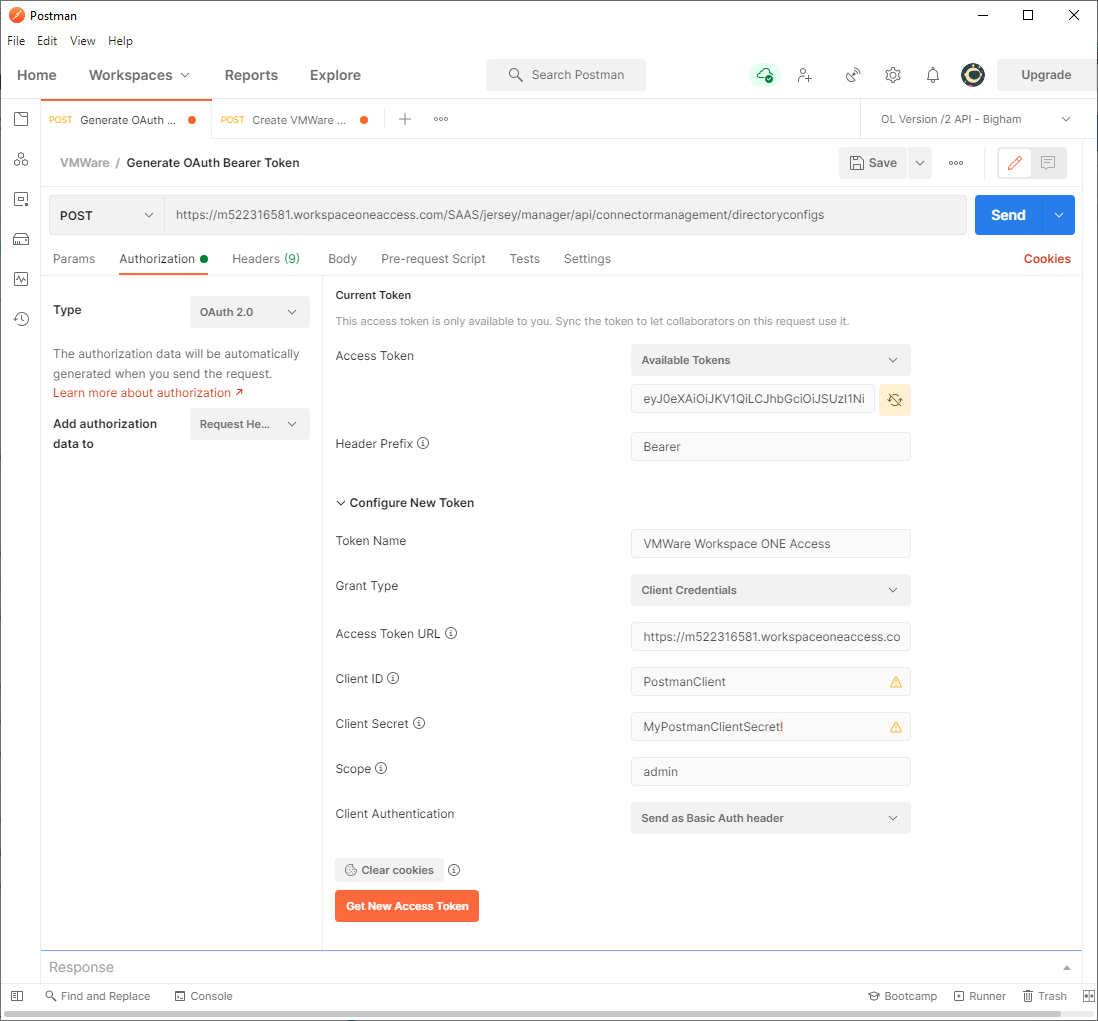
- In a new Postman tab, Create a Directory type of Other.
HTTP method: POST
URL: https://tenantURL/SAAS/jersey/manager/api/connectormanagement/directoryconfigs
Authorization:
Type: Bearer Token
Token: The OAuth Bearer Token you previously created via Postman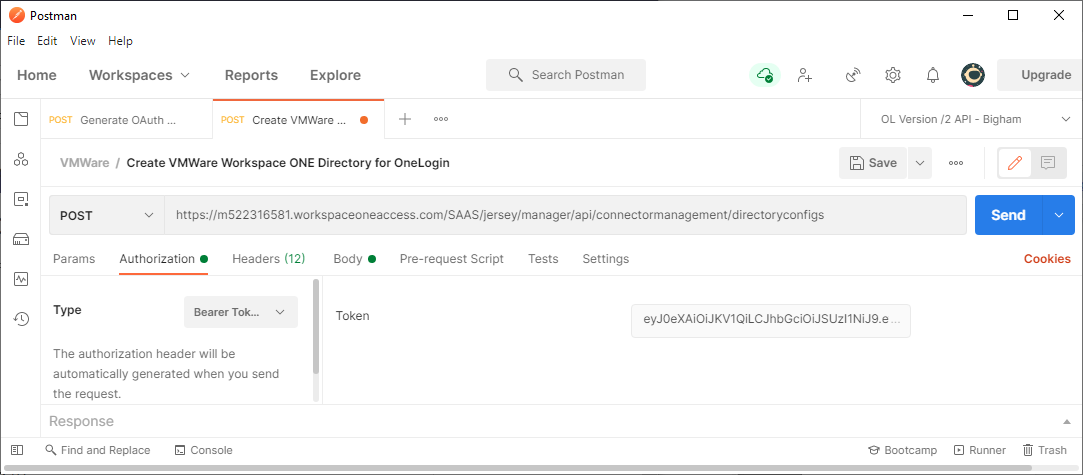
Headers
Content-Type: application/vnd.vmware.horizon.manager.connector.management.directory.other+json 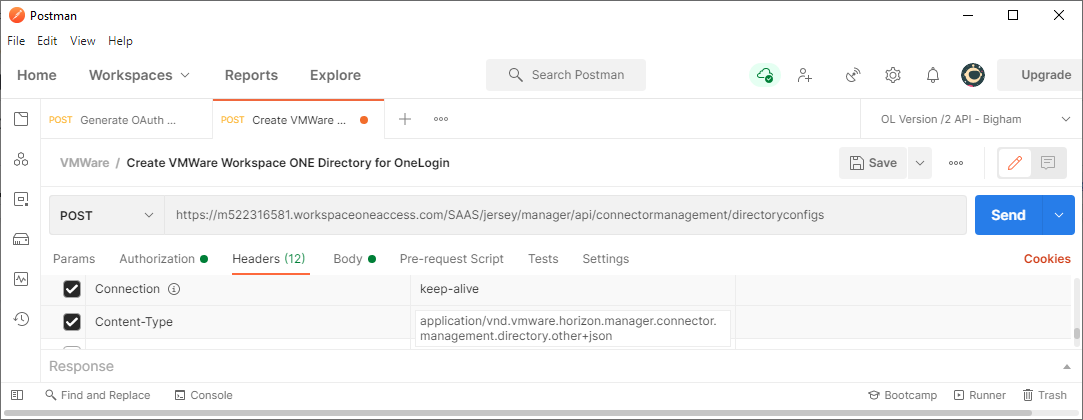
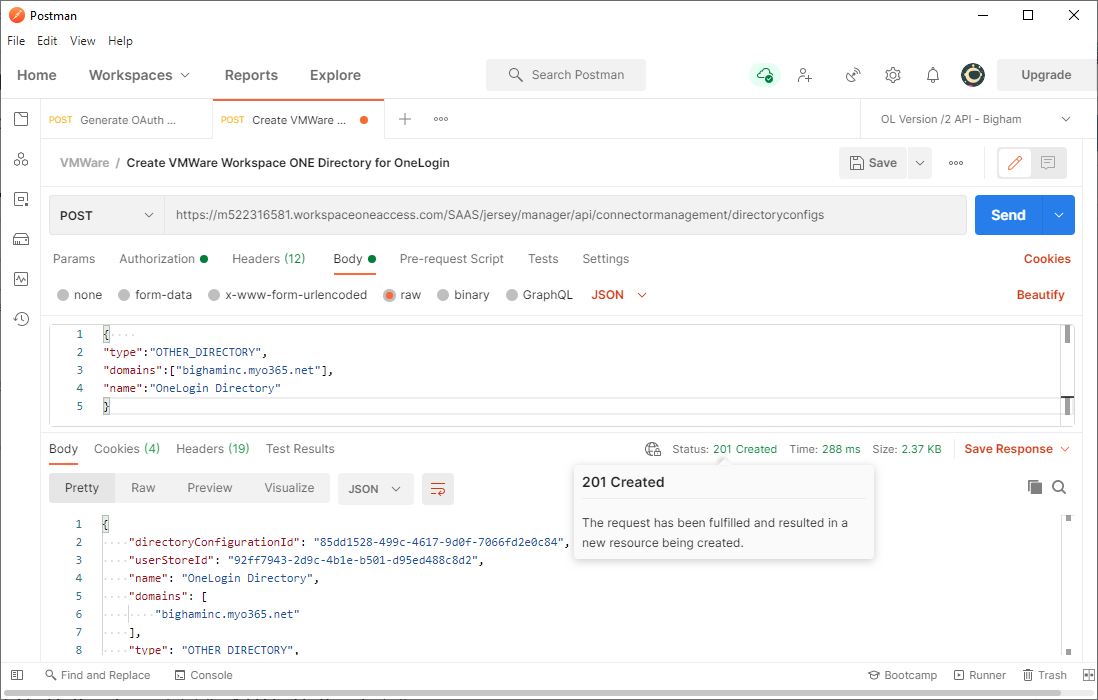
Body
Use the following template for your applicable user email domain(s) and click the Send button to create a new Other Directory. Make sure to select raw as the format.{"type":"OTHER_DIRECTORY","domains":"YourEmailDomain(s)","name":"OneLogin
Directory"}
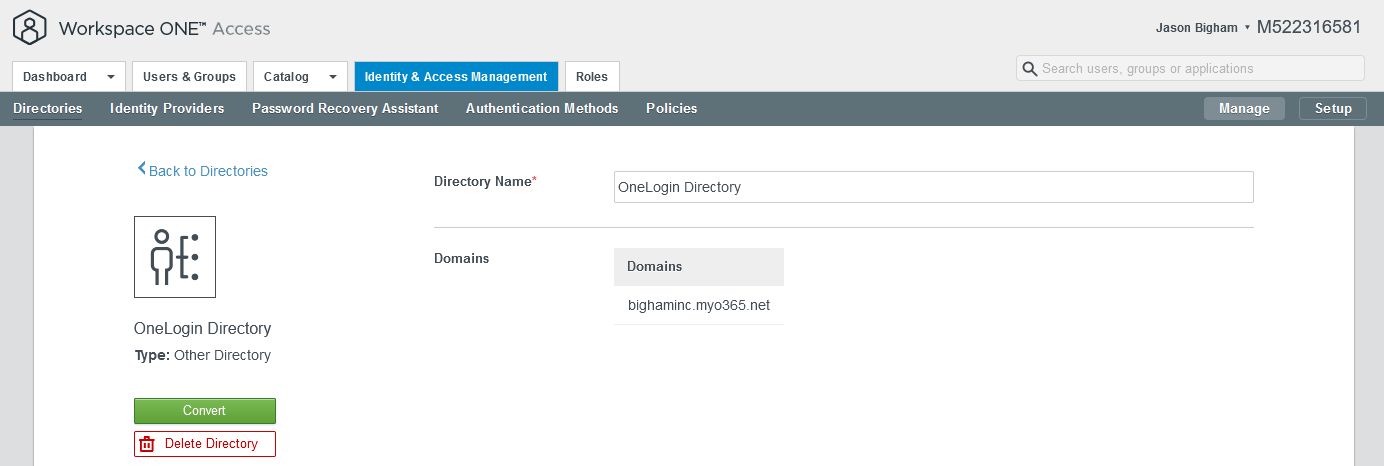
Summary view: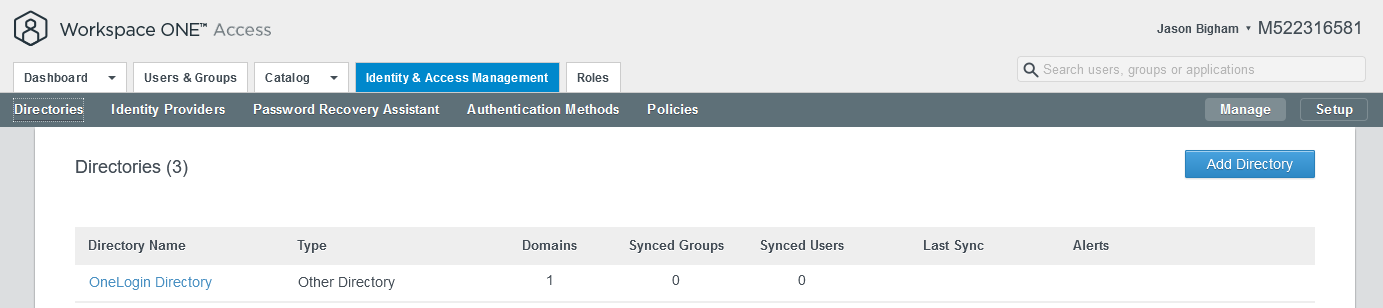
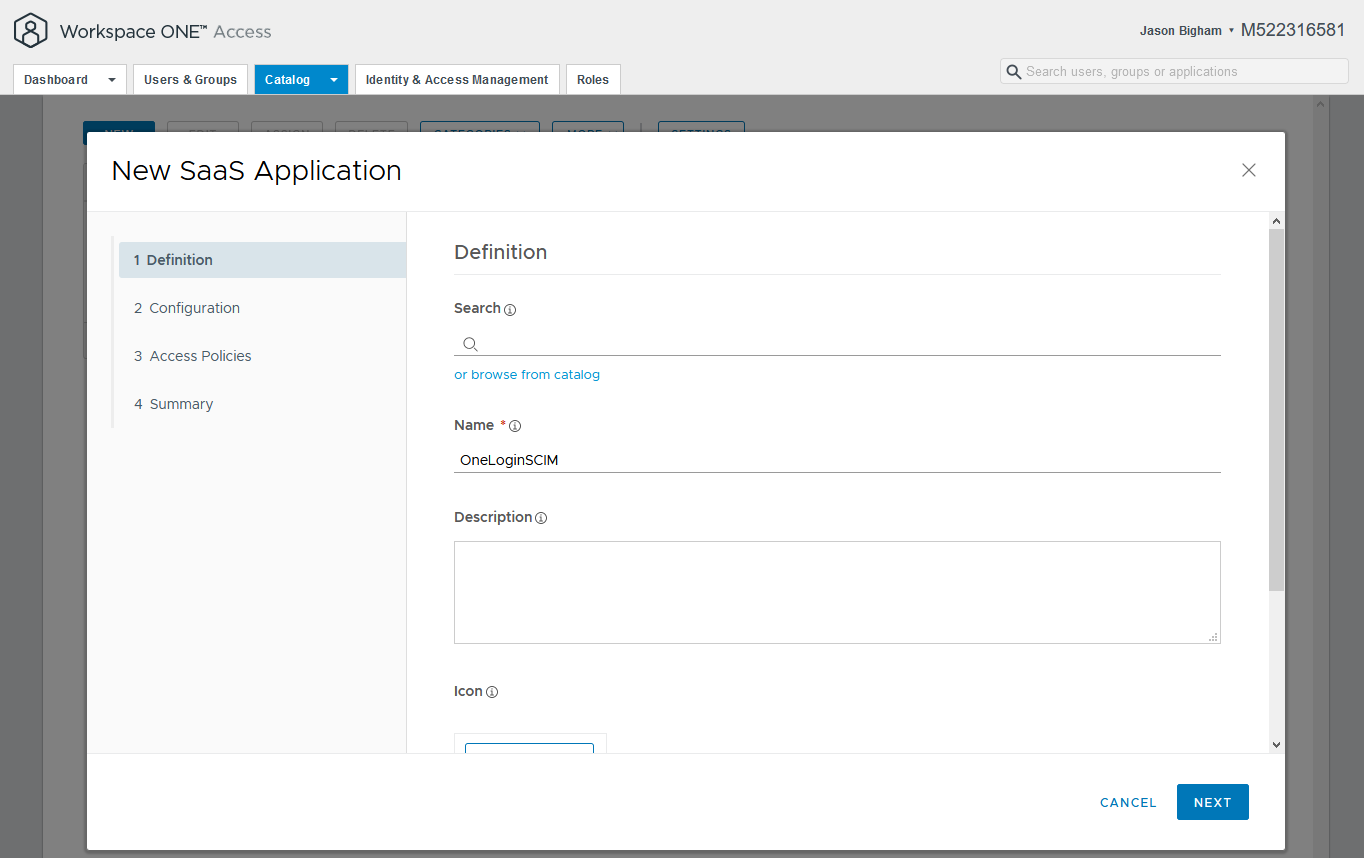
- Navigate to Catalog > Web Apps and click the NEW button.

- One the 1 Definition tab, enter a descriptive name, then click the Next button. The remaining settings on this tab are optional.
- One the 2 Configuration tab, configure the values as illustrated below and click the Next button when complete.
NOTE: Document your Client Secret before clicking the Next button as you will need this for the remaining steps within this article.
Authentication Type: OpenID Connect
Target URL: https://.onelogin.com/
Redirect URL: https://admin.us.onelogin.com/provisioning/oauth_redirect_uri
Client ID: e.g. OneLoginSCIM
Client Secret: Create a secret manually; document accordingly as you will not be able to access this Shared Secret again.
Show in User Portal: No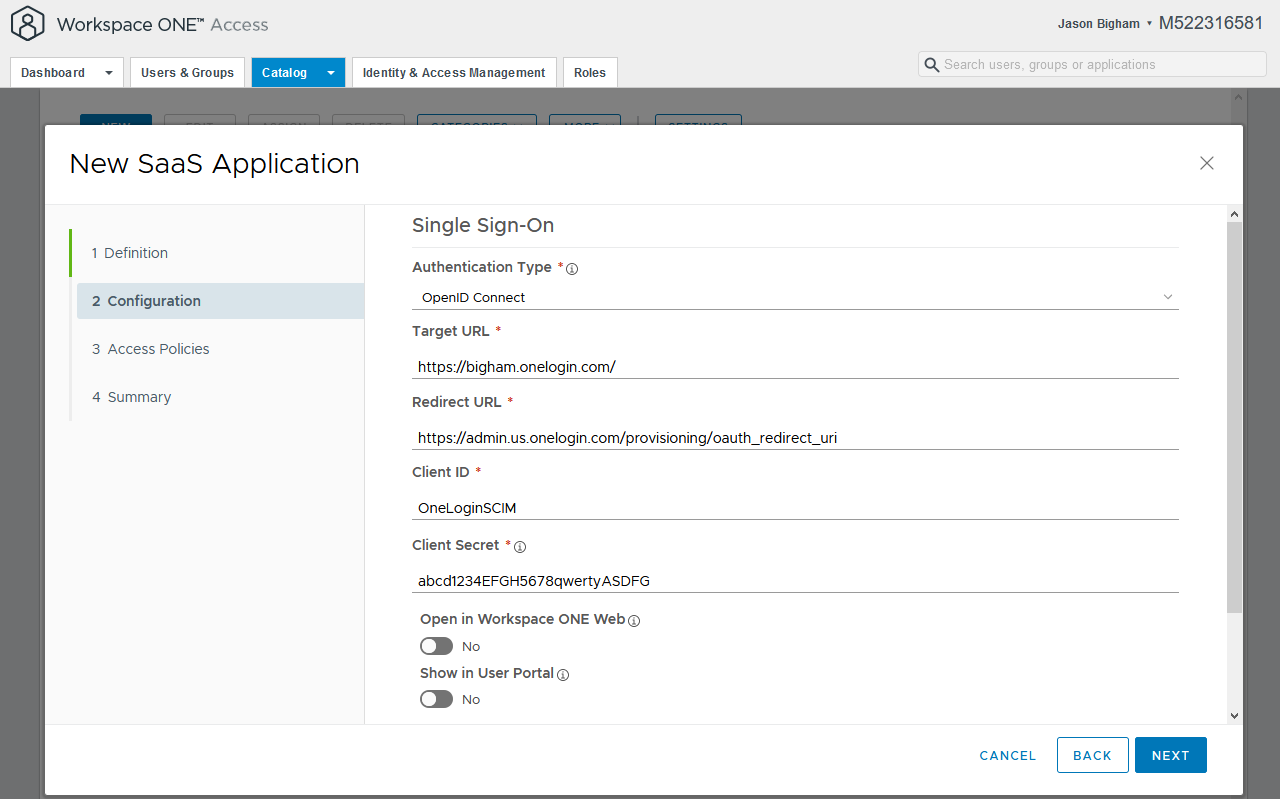
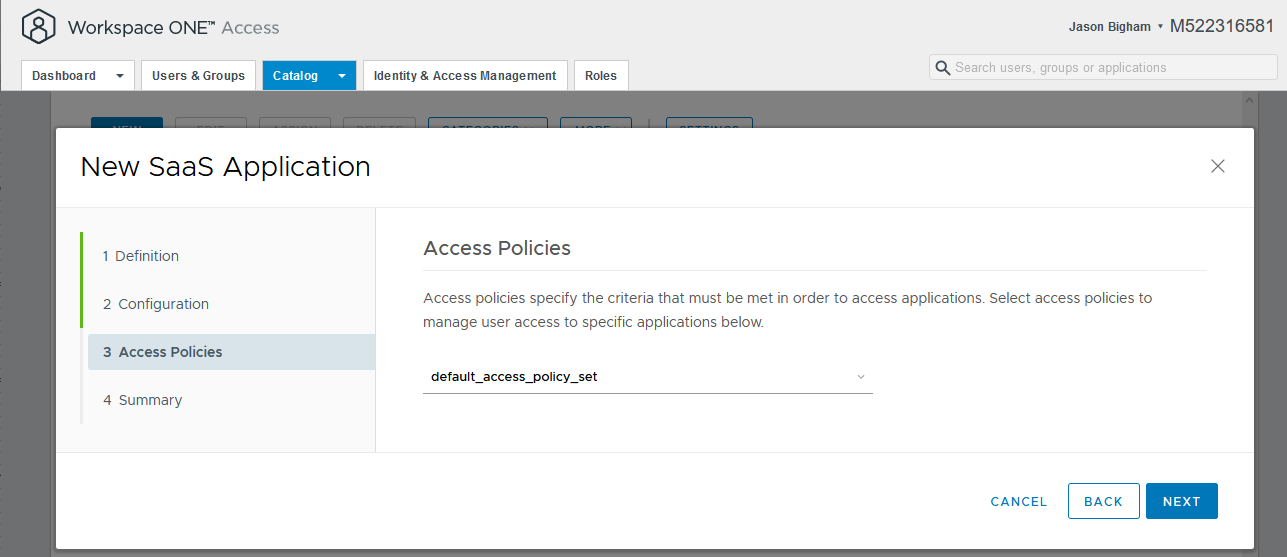
- On the 3 Access Policies tab, select your applicable Access Policy and click the Next button.
- On the 4 Summary tab, review your settings and click the Save & Assign button.

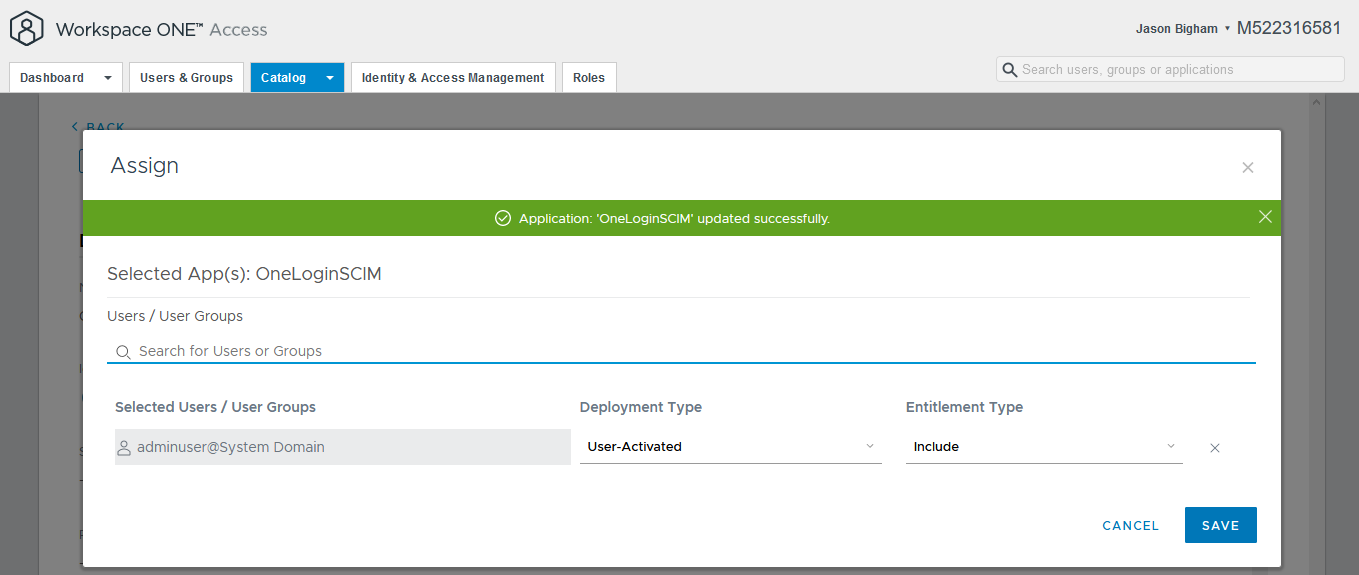
- On the Assign menu, select the applicable VMWare Workspace ONE Access service/admin account that you will use for OAuth from OneLogin, accept the defaults for Deployment Type (User-Activated) and Entitlement Type (Include), and click the Save button.

OneLogin
- Log into your OneLogin environment via a new tab, navigate to Administration > Applications > Applications, click the Add App button, search for and select VMware Workspace ONE, name the application, click Save, and configure your new SAML app.
Info tab:
Display Name: VMware Workspace ONE
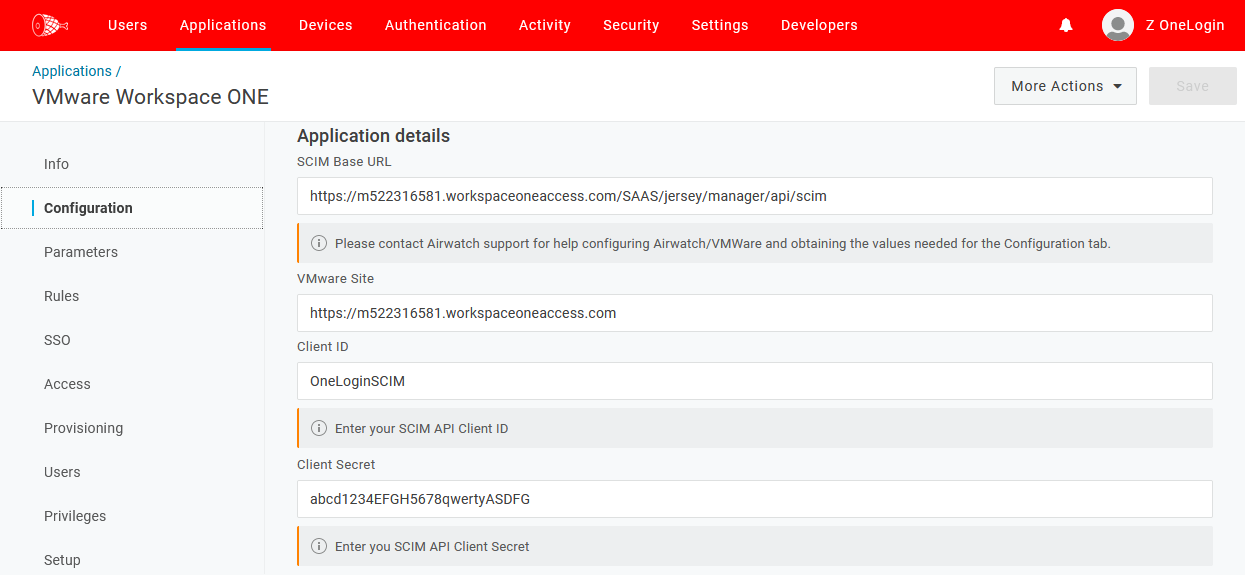
Configuration tab:SCIM Base URL: https:///SAAS/jersey/manager/api/scim
NOTE: Workspace ONE Access was formerly called VMware Identity Manager. Old tenants have the domain name vmwareidentity.com while new tenants have the domain name workspaceoneaccess.comVMware Site: https://
NOTE: Workspace ONE Access was formerly called VMware Identity Manager. Old tenants have the domain name vmwareidentity.com while new tenants have the domain name workspaceoneaccess.com.Client ID: OneLoginSCIM
Client Secret: The shared secret you previously created and documented
Sample configuration:
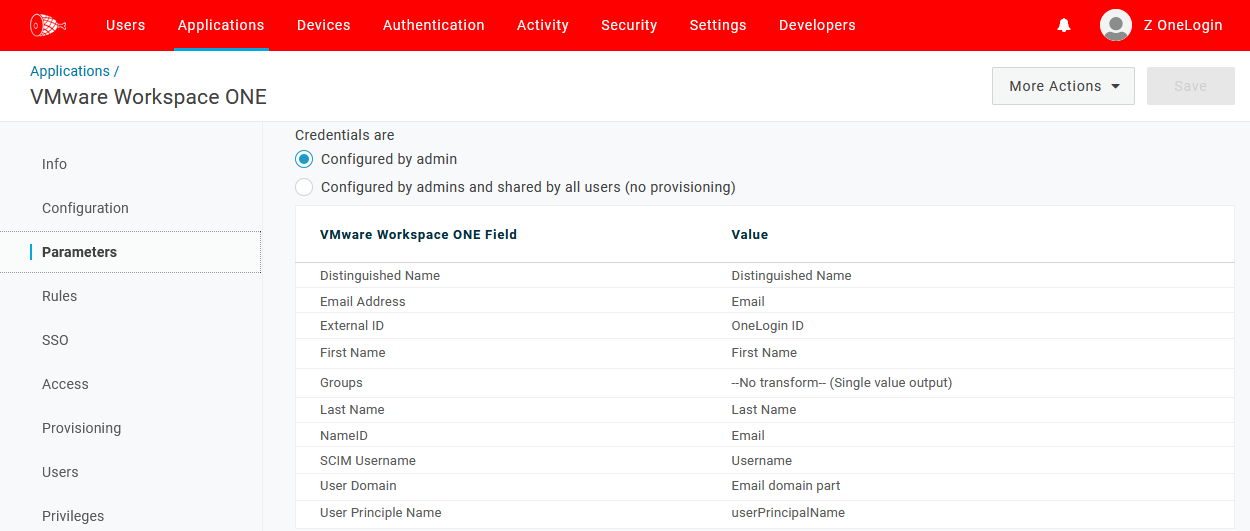
Parameters tab:
Distinguished Name: Distinguished Name
Email Address: Email
External ID: OneLogin ID
First Name: First Name
Last Name: Last Name
NameID: Email
SCIM Username: Username
User Domain Email: domain part
User Principal Name: userPrincipalName
Sample configuration:
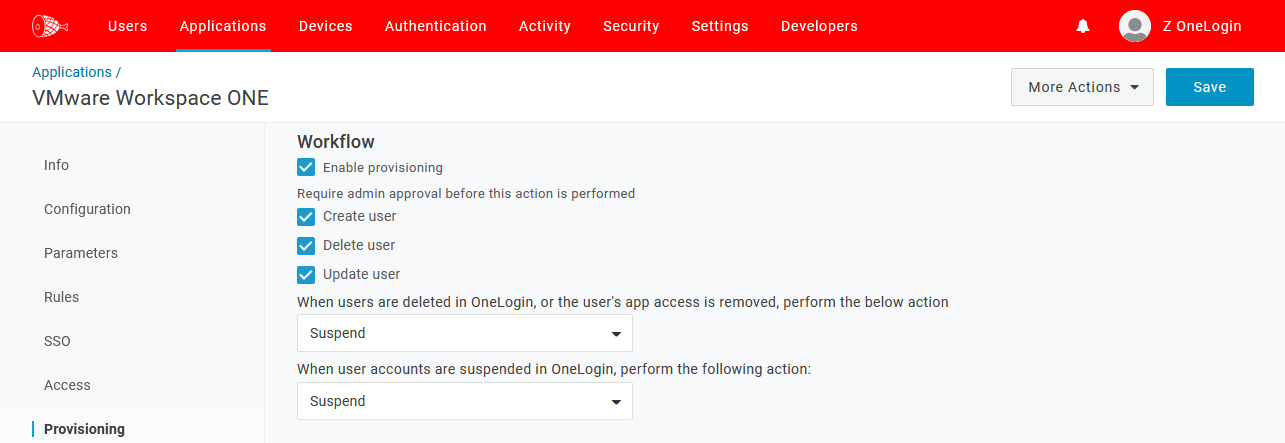
Provisioning tab:
Enable provisioning: Checked/Enabled
NOTE: The following settings are recommended until you validate SCIM functionality with your test account(s). Once verified, you may wish to disable the requirement of admin approval for some/all of these actions.
Create user: Checked/Enabled
Delete user: Checked/Enabled
Update user: Checked/Enabled
When users are deleted in OneLogin, or the user's app access is removed, perform the below action: Customer preference
When user accounts are suspended in OneLogin, perform the following action: Customer preference
Sample configuration:
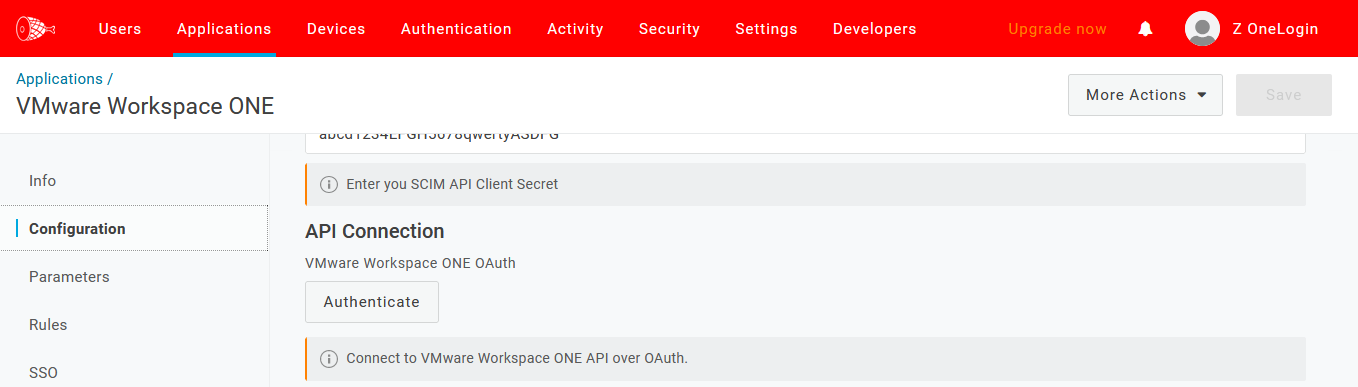
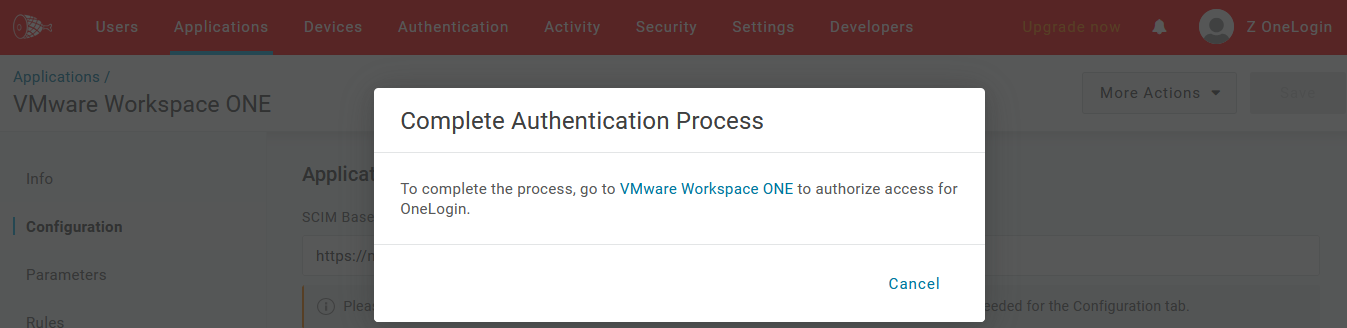
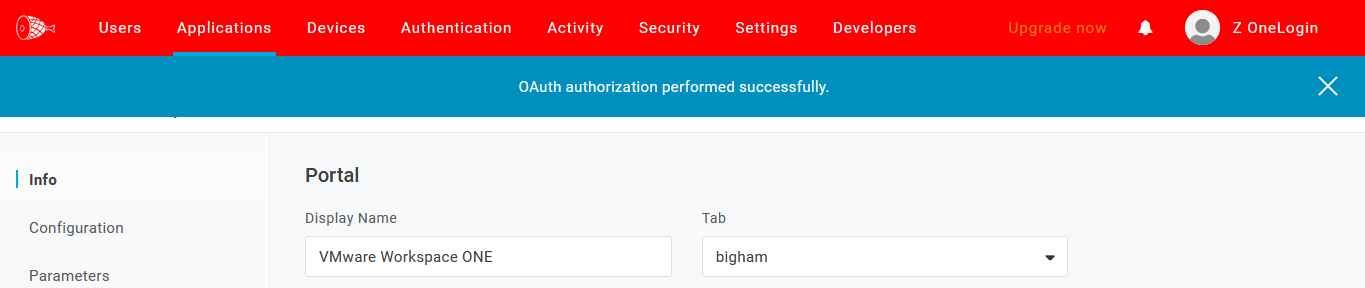
- After saving your new SAML app, navigate back to the Parameters tab, scroll down to the API Connection section, click the Authenticate button, and complete the OAuth flow using the VMWare Workspace ONE Access service/admin account you previously assigned access to. In this example, the associated user was already logged in via a new browser tab.
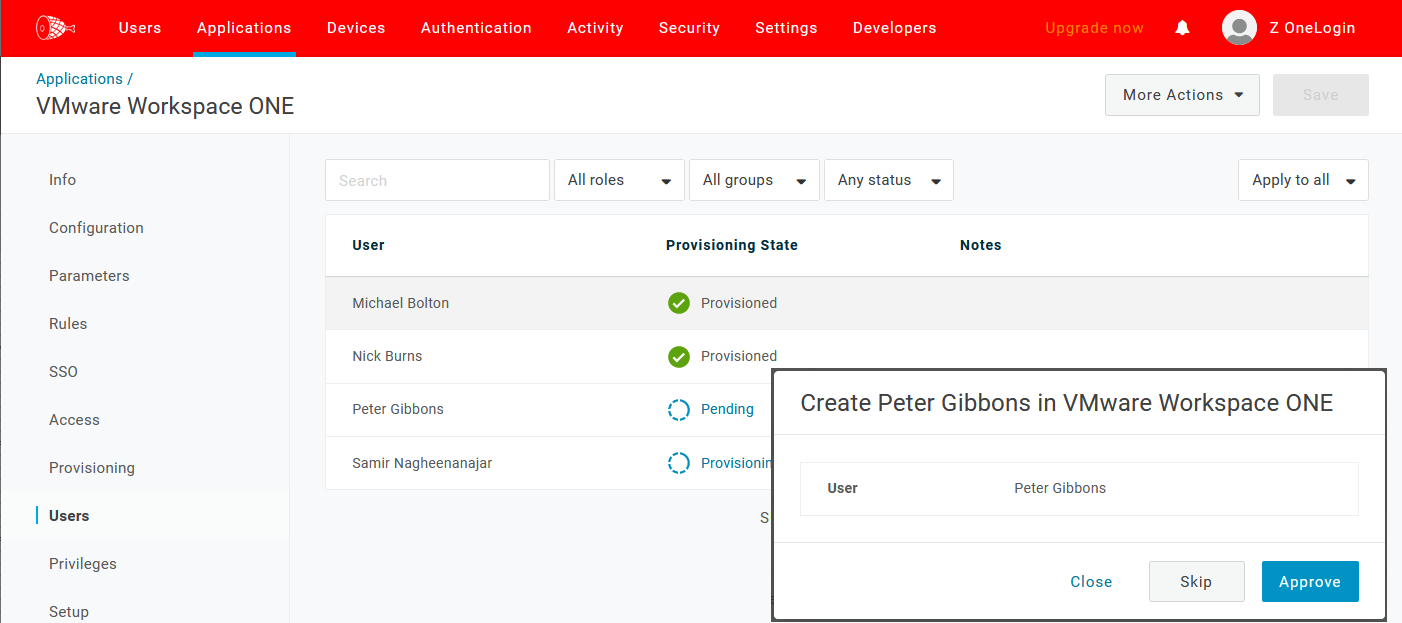
- Assign your new SAML app to the relevant test users, then navigate back to the Users tab of your new SAML app to review pending provisioning and manually process the approvals.
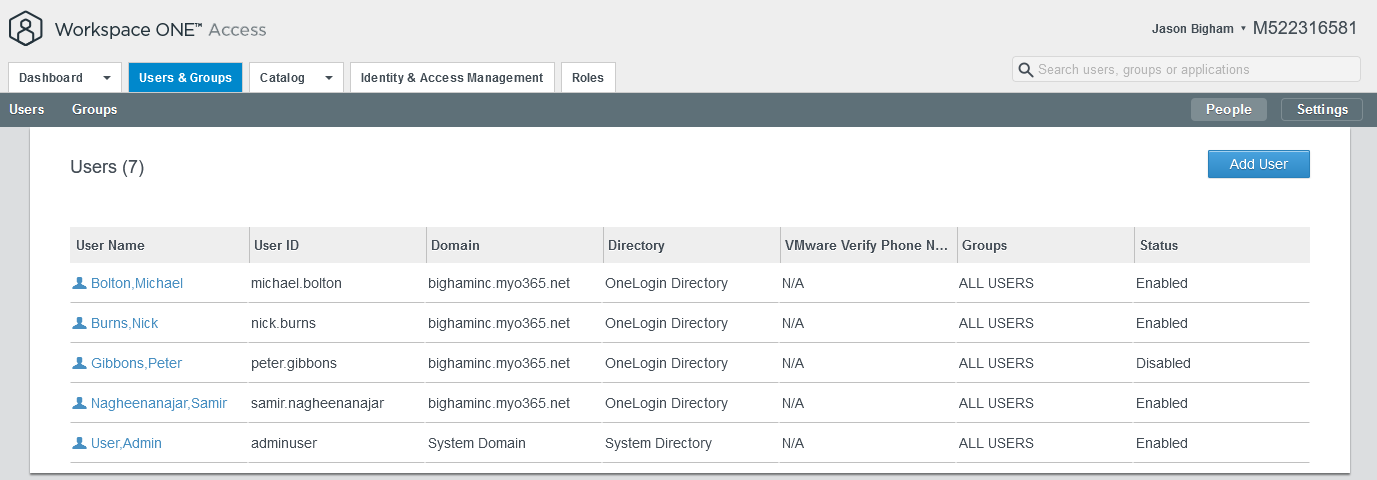
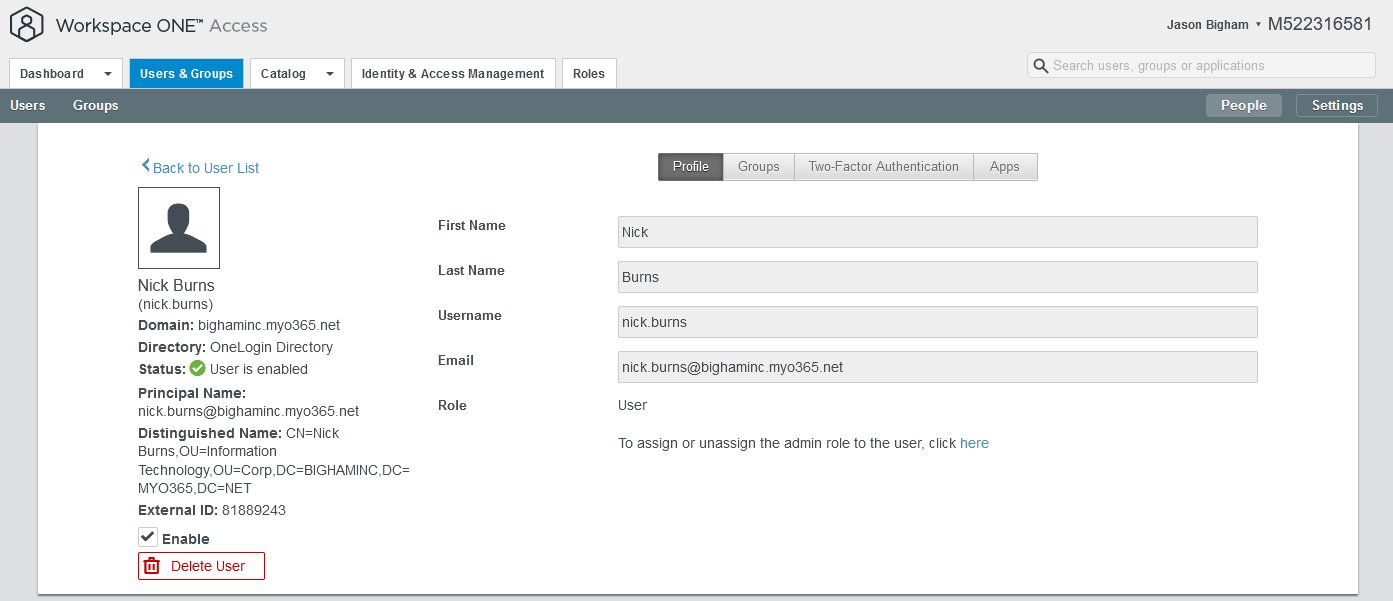
- To validate the same within VMWare Workspace ONE Access, navigate to Users & Groups for a summary view and select a SCIM provisioning user for a detailed view.
Configure SAML
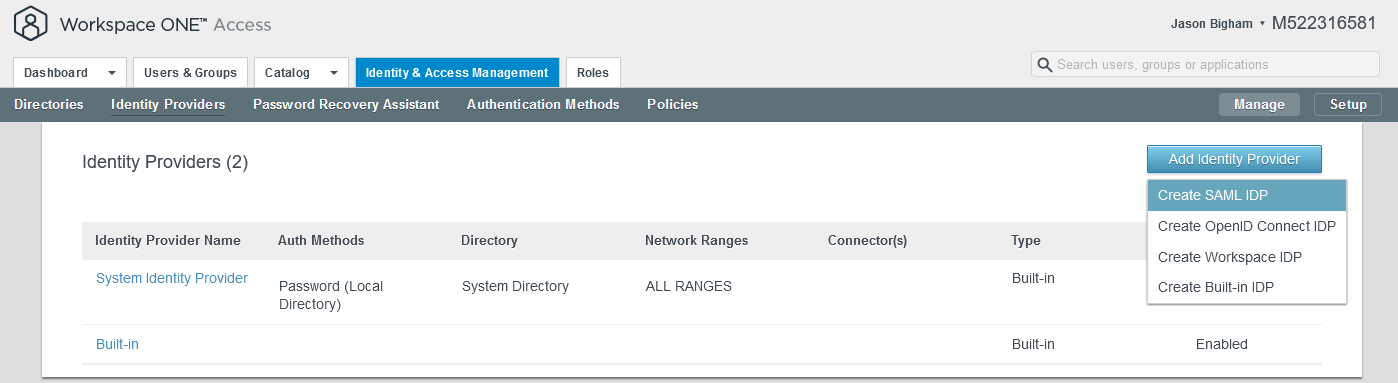
- Navigate to Workspace ONE Access > Identity & Access Management > Identity Providers, click the Add Identity Provider button, and select Create SAML IDP.
- Configure your new SAML IDP as follows and click the Add button when complete.
Identity Provider Name: OneLogin
SAML Metadata: Navigate to the SSO tab of your new OneLogin SAML app, copy the Issuer URL and paste it here, and then press the Process IdP button.
Binding Protocol: HTTP Redirect or HTTP POST
Identify User Using: NameID Element
Name ID format mapping from SAML Response | NameID Format: urn:oasis:names:tc:SAML:1.1:nameid-format:emailAddress
Name ID format mapping from SAML Response | NameID Value: emails
Name ID Policy in SAML Request: urn:oasis:names:tc:SAML:1.1:nameid-format:unspecified
Just-in-Time User Provisioning: Disabled/Unchecked
Users: You previously created ‘OTHER’ directory, e.g. OneLogin Directory
Network: ALL RANGES
Authentication Methods: e.g. OneLogin SAML
SAML Context: urn:oasis:names:tc:SAML:2.0:ac:classes:PasswordProtectedTransport
Single Sign-Out Configuration: Optional; customer preference
Sample configuration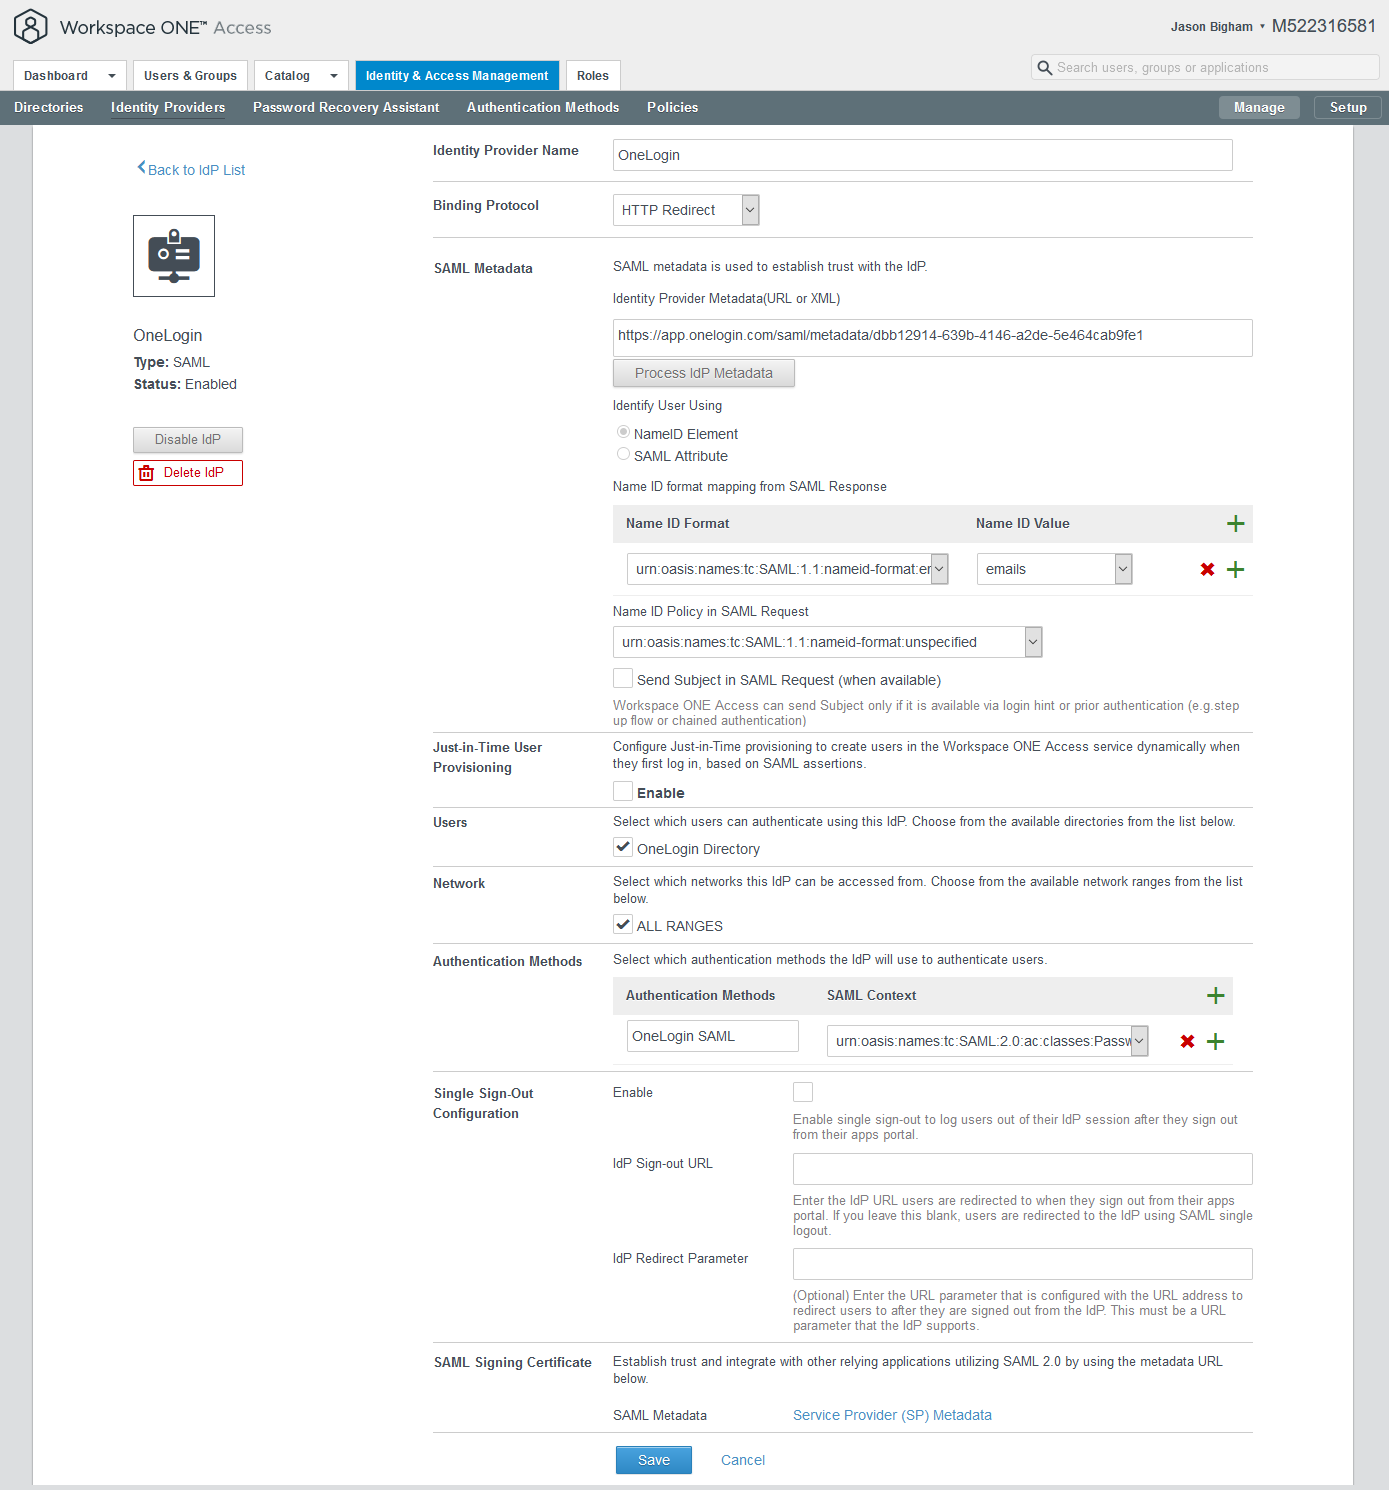
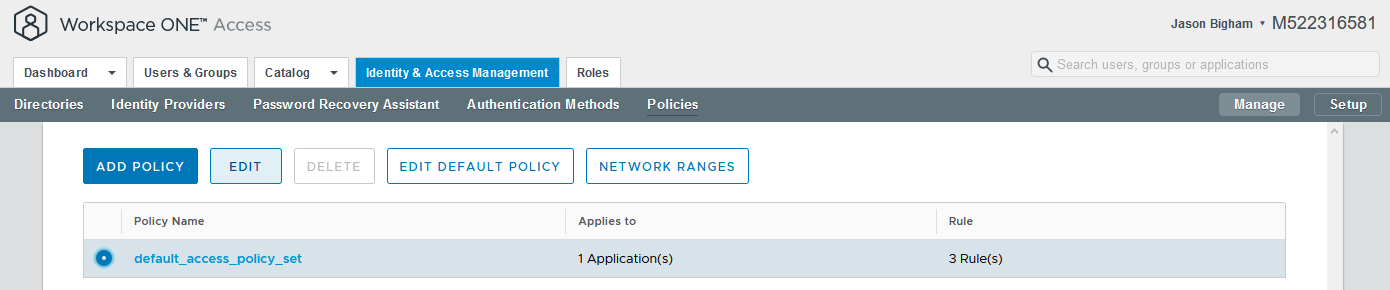
- Navigate to Workspace ONE Access > Identity & Access Management > Policies, select your relevant policy, and click the Edit button.
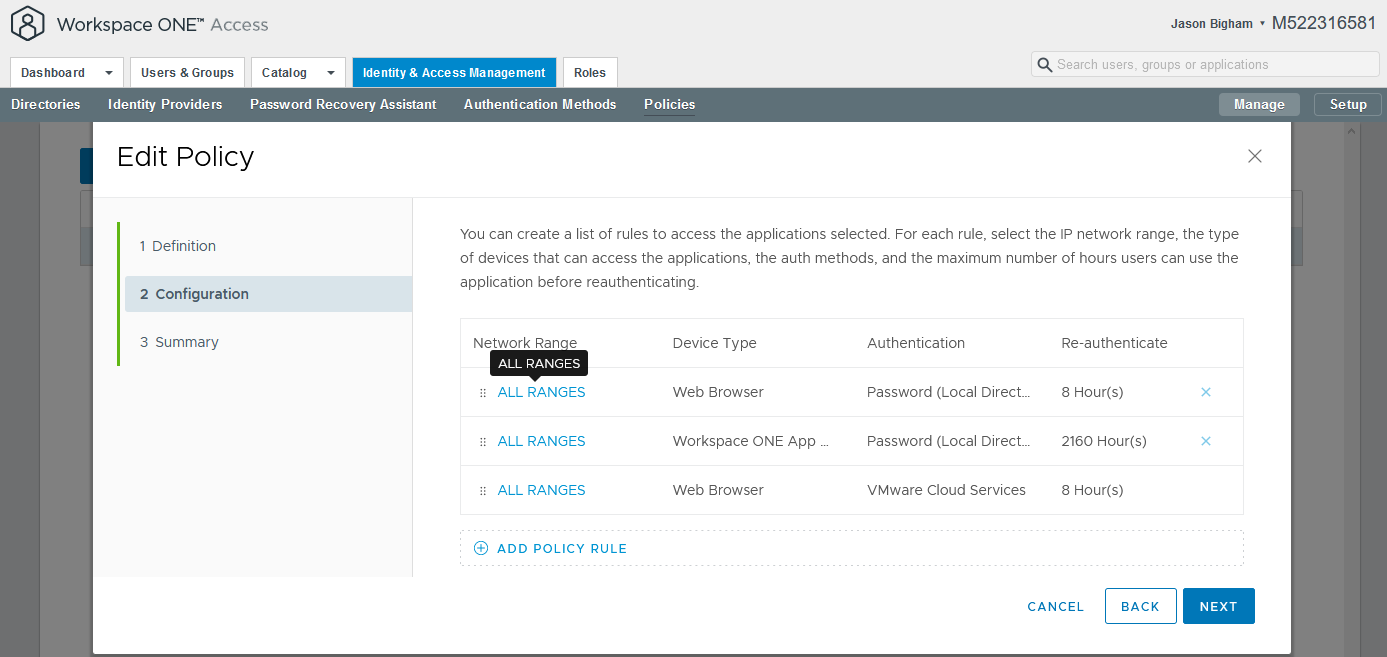
- On the 2 Configuration tab, select your relevant Device Type (e.g. Web Browser) to launch the Edit Policy Rule screen.
- Configure the following on the Edit Policy Rule screen and click the Save button when complete. If you wish to login via SAML via another Device Types, Repeat this step accordingly.
Then the user may authenticate using: OneLogin SAML
If the preceding method fails or is not applicable, then: Password (Local Directory)
NOTE: To ensure that you do inadvertently not lock yourself out of VMWare Workspace ONE Access due to a SAML misconfiguration, it is very important that you select a functional authentication failover option.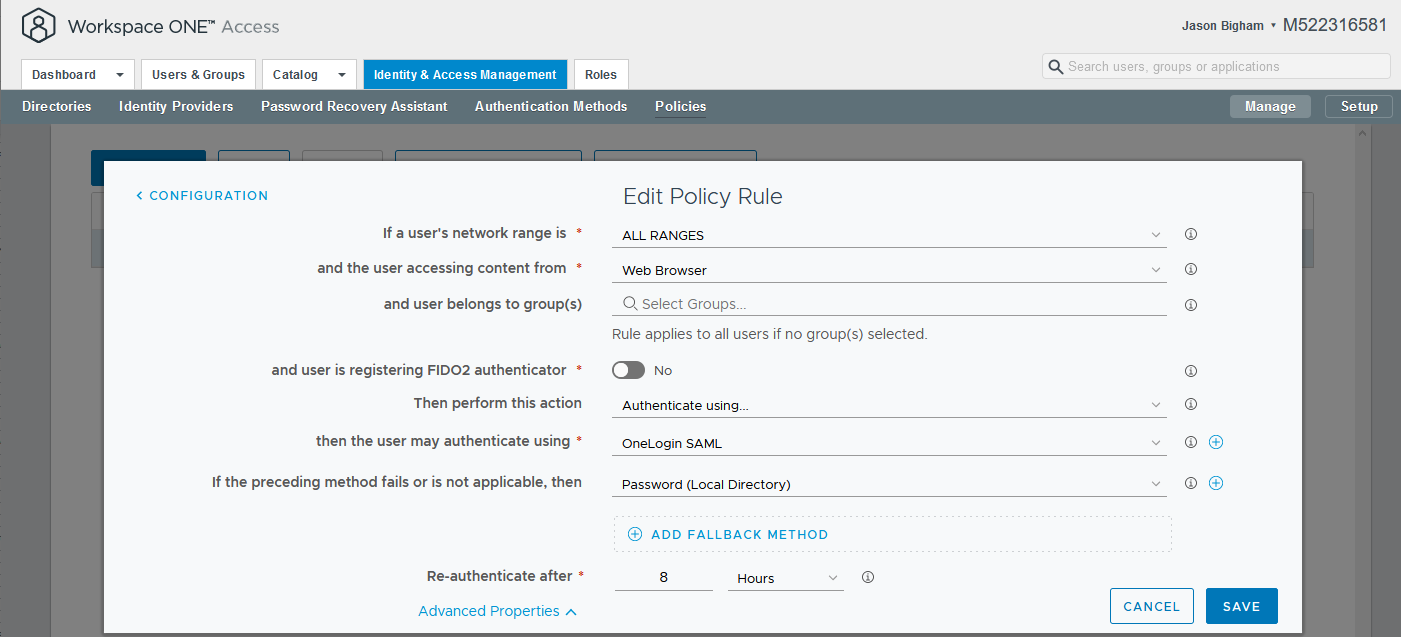
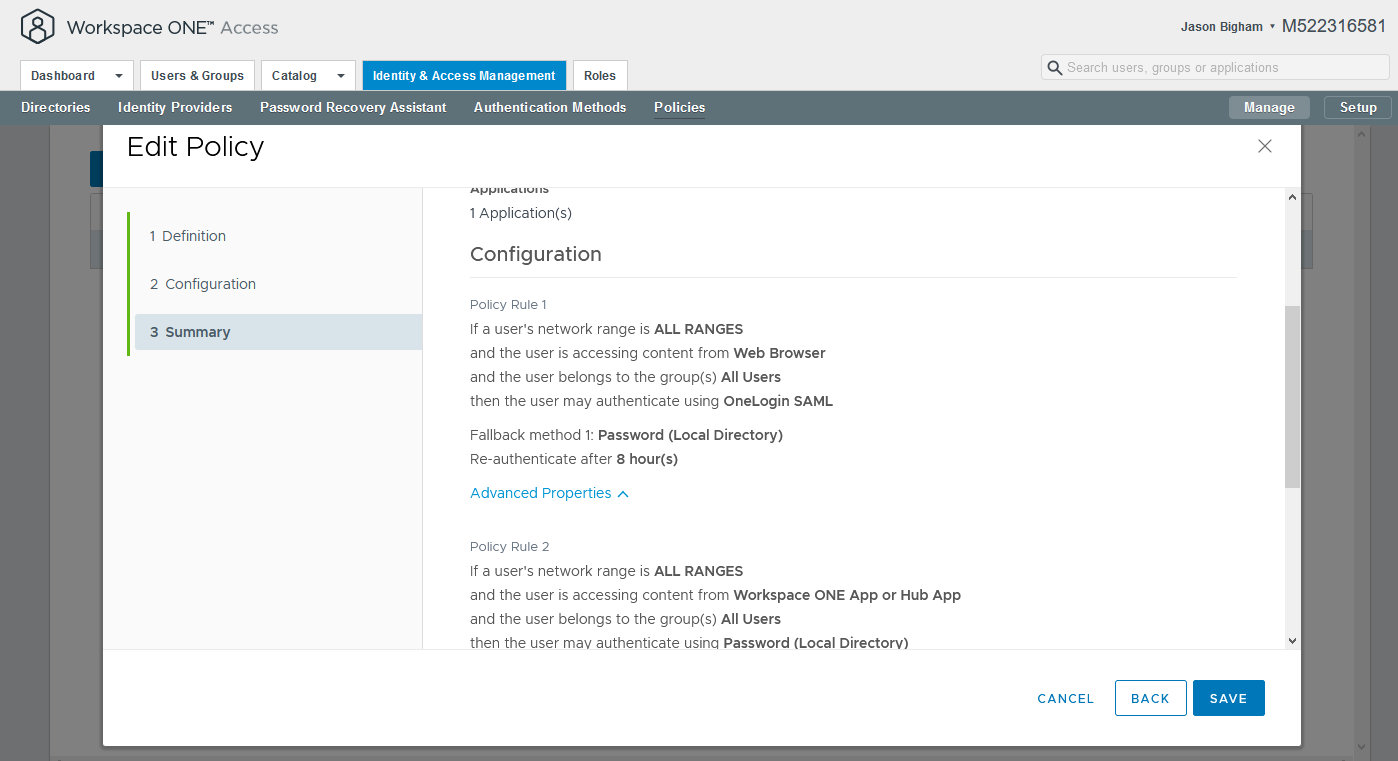
- Confirm that you see OneLogin SAML under the Authentication section for your applicable Device Type, then click the Next button.

- Review your settings and click the Save button.
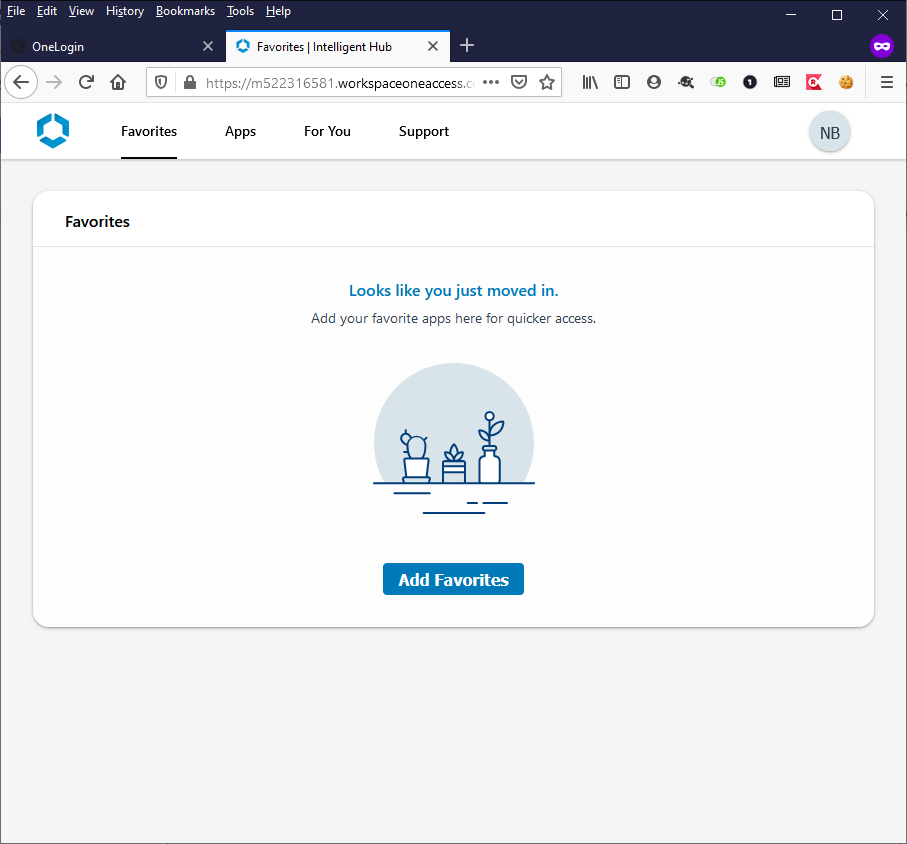
- For an SP-initiated test, via a separate browser or incognito browser session, navigate to your VMWare Workspace ONE (e.g. https://m522316581.workspaceoneaccess.com), confirm that you are redirected to OneLogin, and login with a test user.
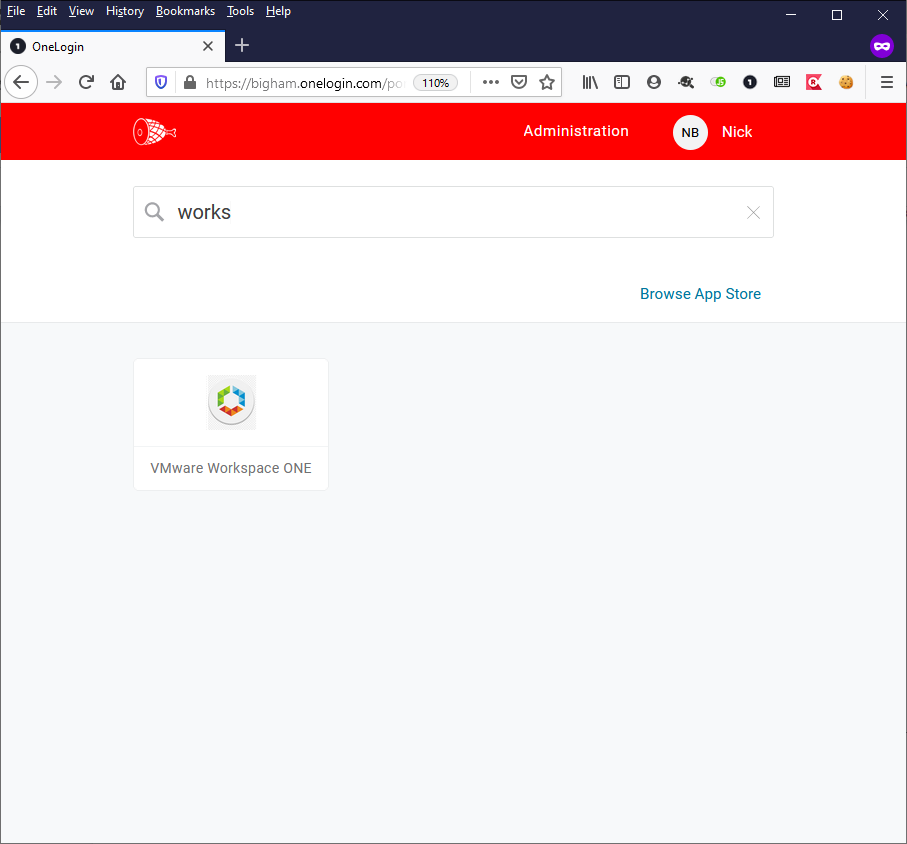
- For an IdP-initiated test, via a separate browser or incognito browser session, click the VMWare Workspace ONE app icon from your OneLogin dashboard and confirm you login with success into VMWare Workspace ONE Access.