This knowledge base article describes how to configure Cisco Identity Services Engine Sponsor Portal (known for this article as simply Cisco) to connect to OneLogin via SAML.
Questions to ask yourself before you start this SAML connector process:
- Have you identified a test user for this connection?
- Should you generate a new default certificate? You should do so every 6-12 months or 5-10 applications - click here to learn more.
- Who will be given access to this app? Do you need to modify or create a new Role to successfully do so?
- Do you have admin access to Cisco? Are you a super user or above in your OneLogin instance?
- Do you have a safe place to copy-paste values to transfer them from OneLogin to [suite] and vice-versa?
Cisco
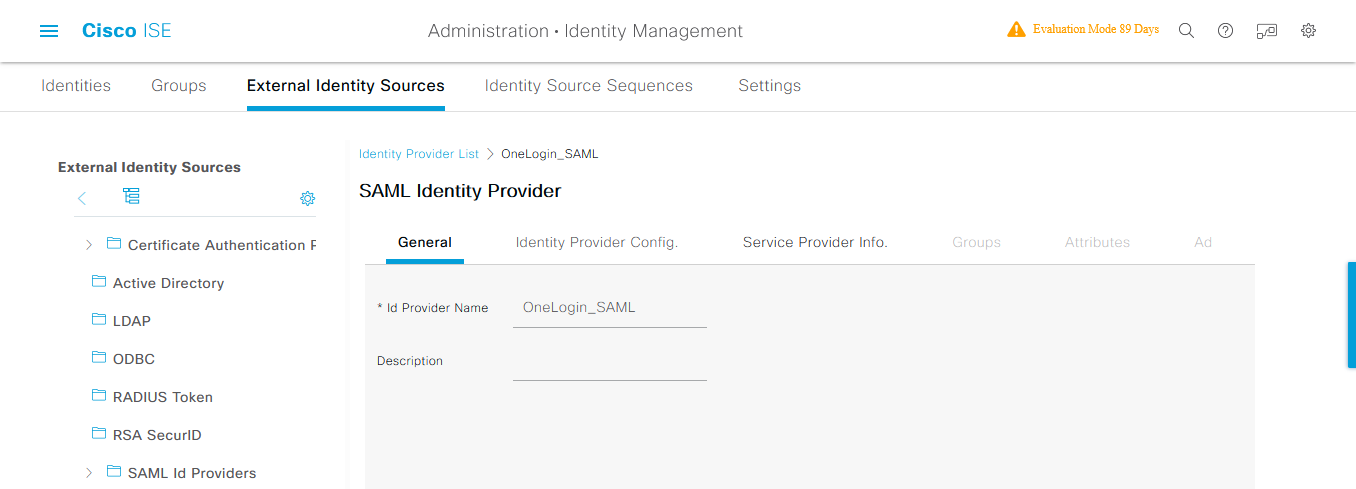
- Log in to Cisco as an admin and navigate to Administration > Identity Management > External Identity Sources > SAML Id Providers, then click the Add button and enter an Id Provider Name. Click Submit.
- Navigate to Work Centers → Guest Access → Portals & Components → Sponsor Portals to select (or create) a Sponsor Portal. Expand the Portal Settings dropdown. Enter the FQDN of your Sponsor Portal and select the Id Provider Name you previously created as the Identity source sequence setting. Then click the Save button.
Example Sponsor Portal named Sponsor Portal (default) with portal.bighaminc.gq as the FQDN and OneLogin_SAML selected as the Identity source sequence: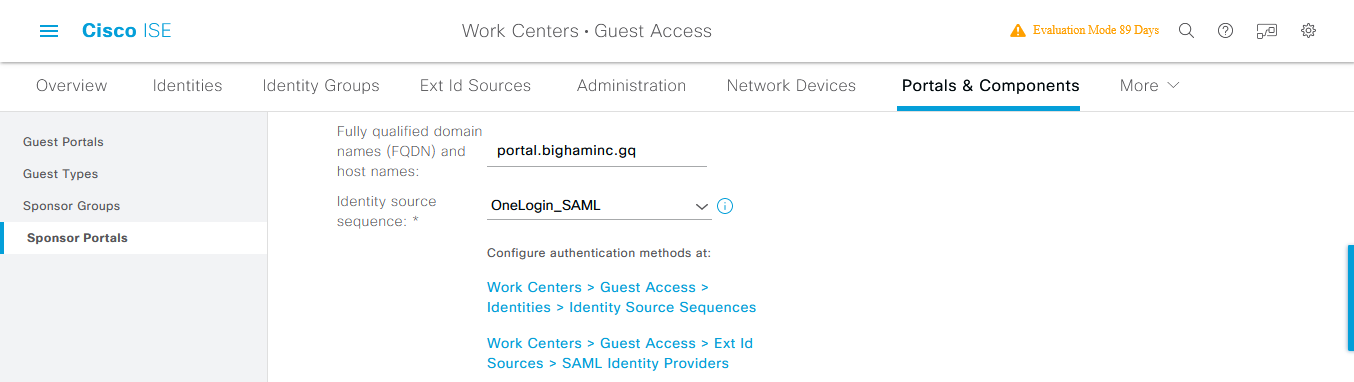
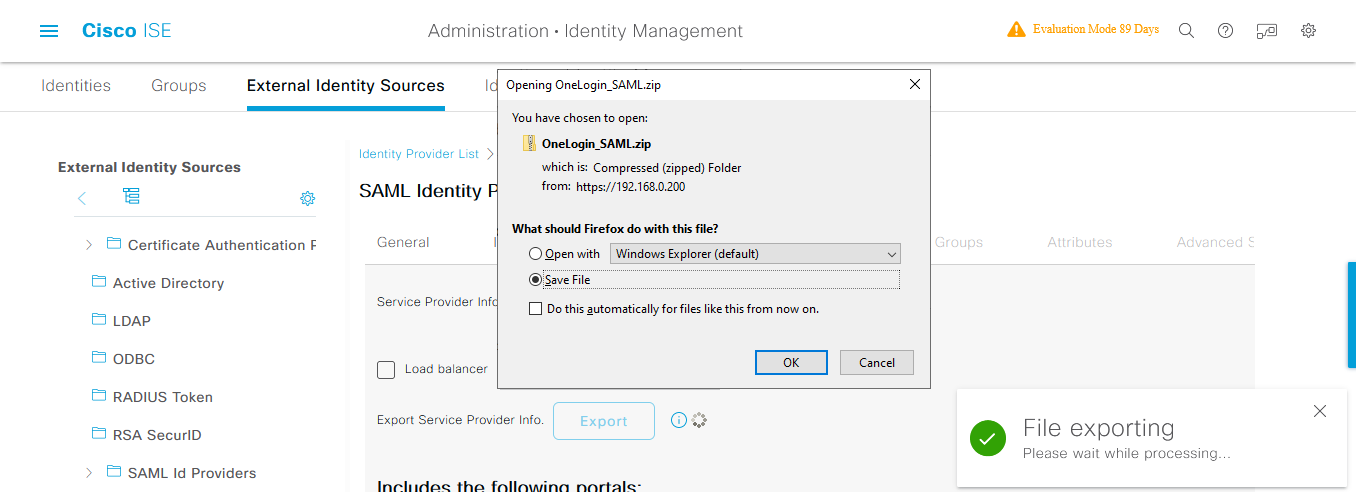
- Navigate to Administration > Identity Management > External Identity Sources > SAML Id Providers and select the SAML Provider you created, then select the Service Provider Info tab and then click the Export button. Save/extract the Zip file to your local workstation.
OneLogin
- Navigate to Administration > Applications > Applications, click the Add App button, and search for SAML Multi ACS Index Connector.
- Select the app and name it something like Cisco ISE, then change the icon if you wish (noting that end users will see it) and click Save.
- Click Configuration and enter the following values, then click Save:
Assertion Consumer Service (ACS) URL list All of the AssertionConsumerService (ACS) values from the Cisco ISE XML file that you previously downloaded. Note: These must be entered in the same order as listed within the XML file and there are usually at least two ACS URLs. Audience The entityID value from the XML (zip) file that you downloaded from your Cisco ISE appliance Login URL https:// Recipient https://:/sponsorportal/SSOLoginResponse.action 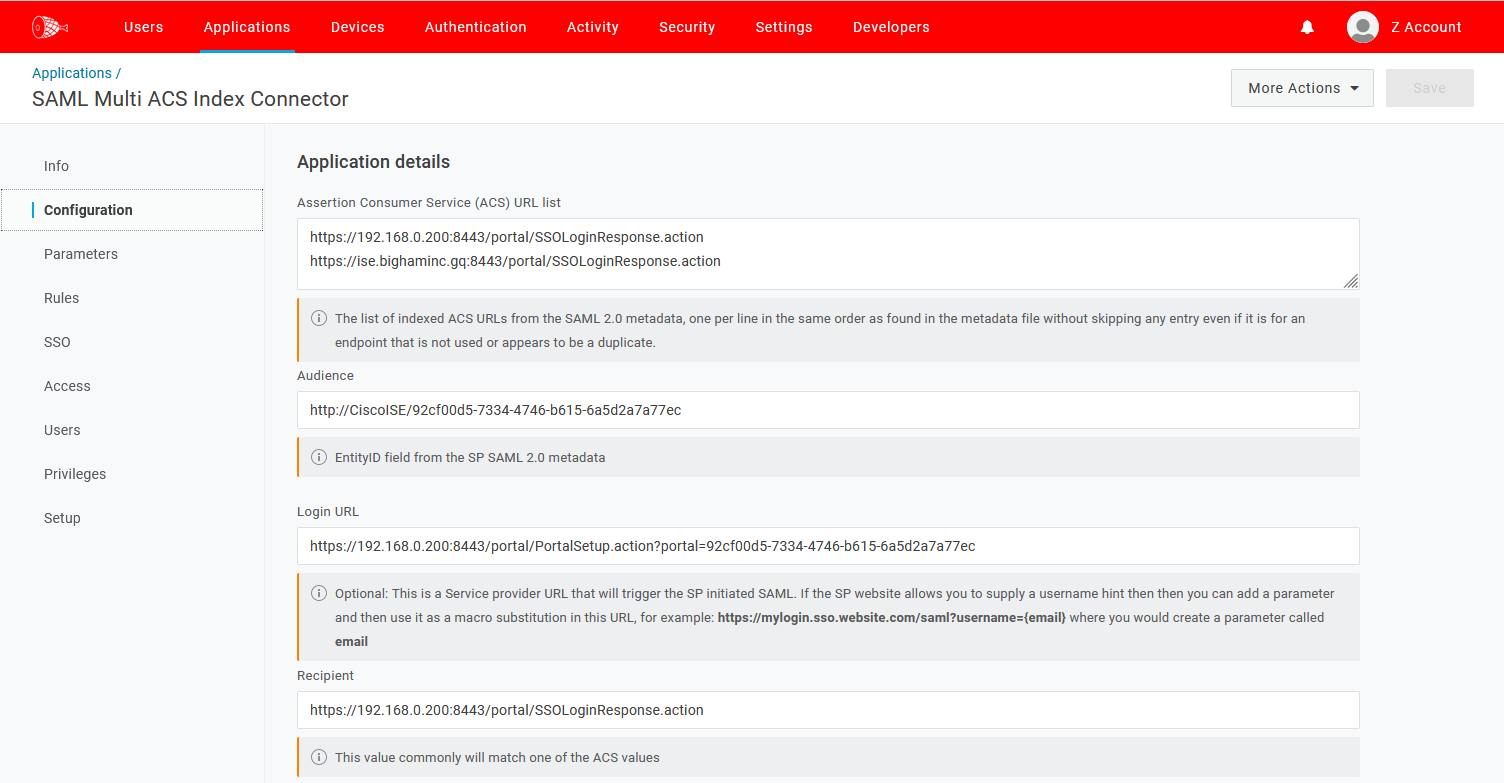
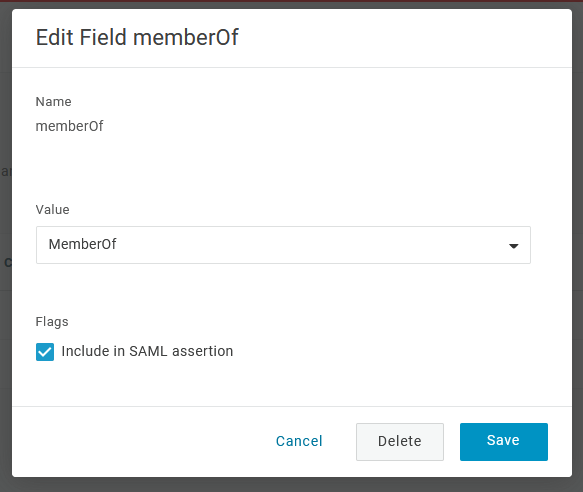
- Navigate to Parameters and ensure that the SAML Assertions in Cisco are properly reflected in OneLogin, ensuring that Include in SAML Assertion is also enabled. In the example below, the memberOf attribute from Active Directory corresponds to the MemberOf value from OneLogin.
- In the top-right dropdown, choose the option to Download SAML Metadata.
- Click the Access tab and select which OneLogin role you want to grant to your users, then click Save.
Cisco
- Navigate to Administration > Identity Management > External Identity Sources > SAML Id Providers and select the SAML Provider you created.
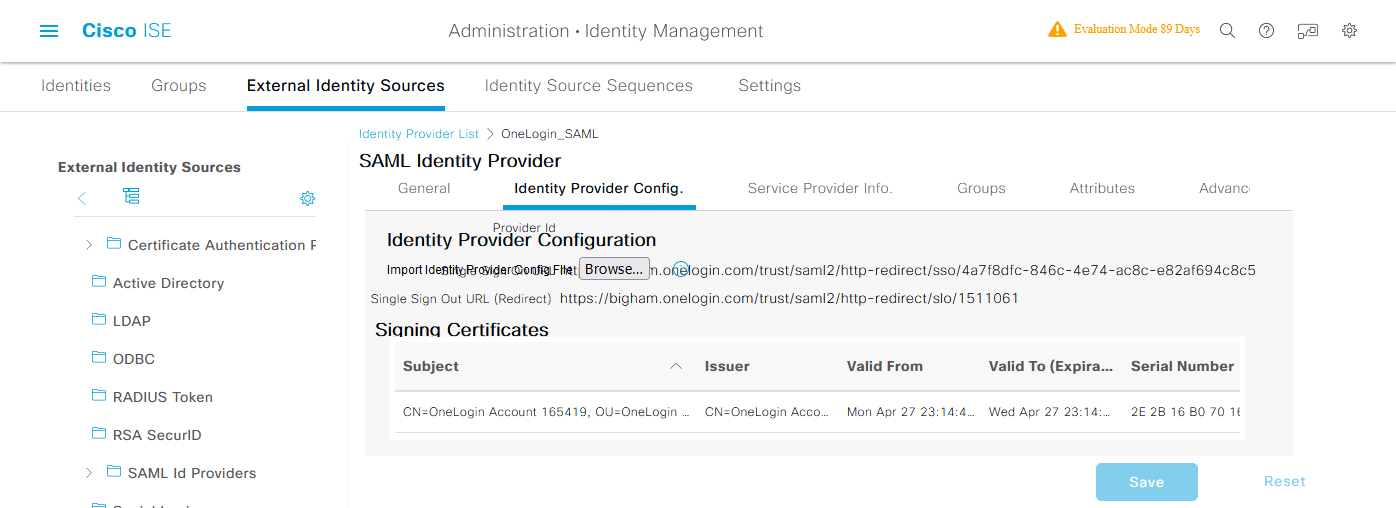
- Click the Identity Provider Config tab, then choose the Browse button next to Import Identity Provider Config File and import the OneLogin metadata you previously downloaded. Click Save.
- Navigate to the Groups tab, enter your applicable Group Membership Attribute value(s), and click Add to configure it. Click Save when you're done. For more information about Group Membership Attributes, see the Cisco ISE documentation.
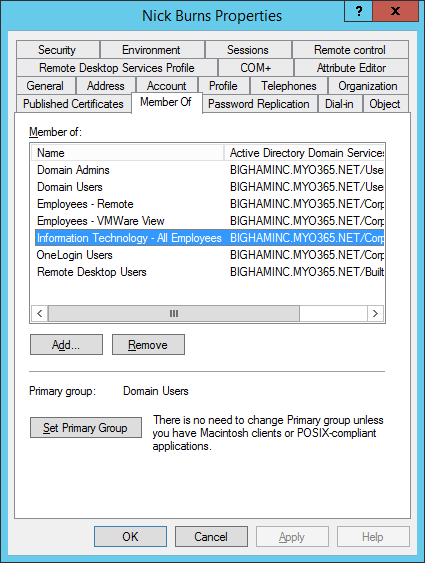
The test user below was provisioned from Active Directory and is a member of Information Technology - All Employees.
Group Membership Attribute: memberOf
Name in Assertion: The DN of your Active Directory group
Name in ISE: A friendly name to reference your Active Directory group

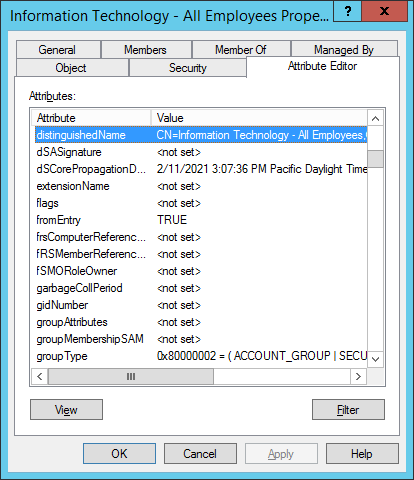
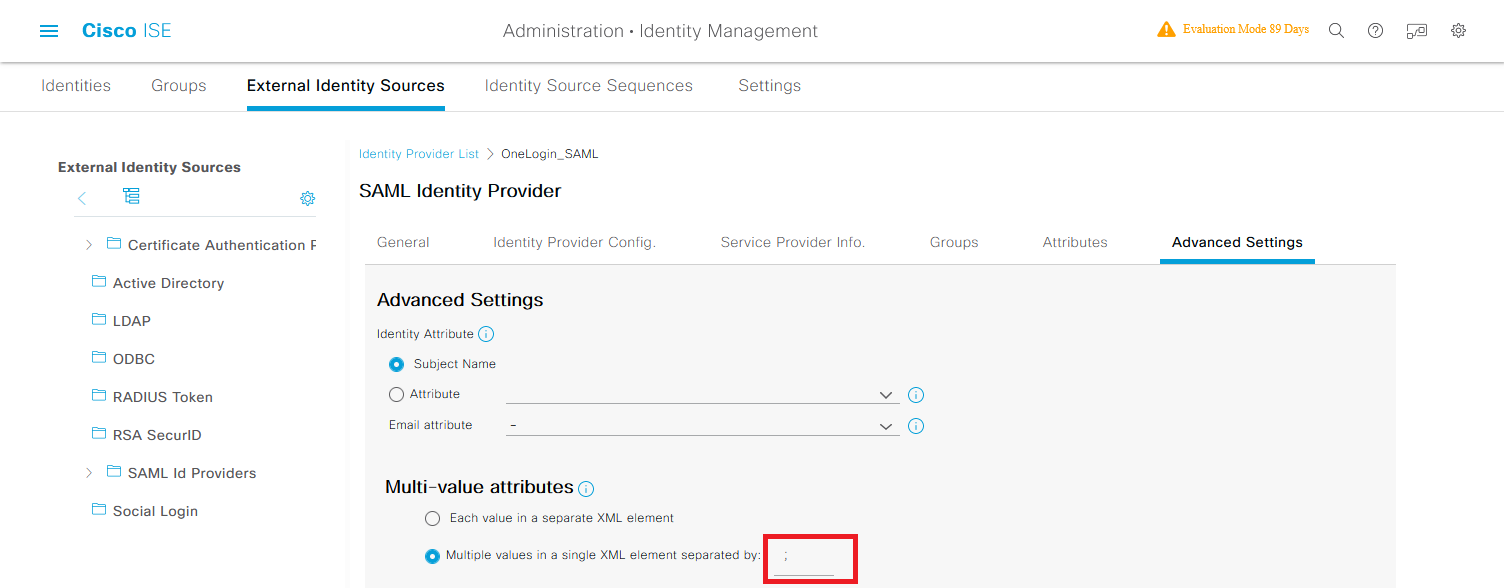
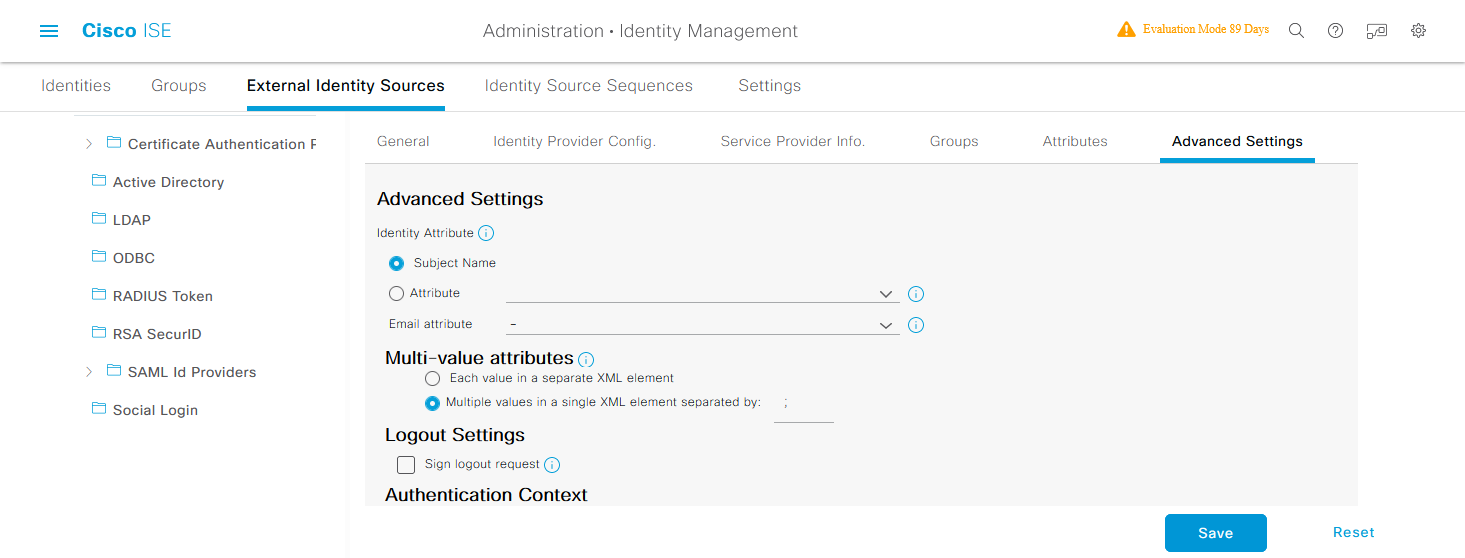
- Select the Advanced Settings tab and configure them for your use case. For more information about Advanced Settings, see the Cisco ISE documentation. In the example below, we need to add the corresponding delimiter from OneLogin since we are using the Active Directory memberOf attribute.
- Under the Multi-value attributes section, select the radio button for Multiple values in a single XML element separated by and enter a semicolon. Click Save.
- Navigate to Work Centers > Guest Access > Portals & Components > Sponsor Groups, then select/create your applicable Sponsor Group(s) to edit. The example below uses a Sponsor Group named ALL_ACCOUNTS (default).
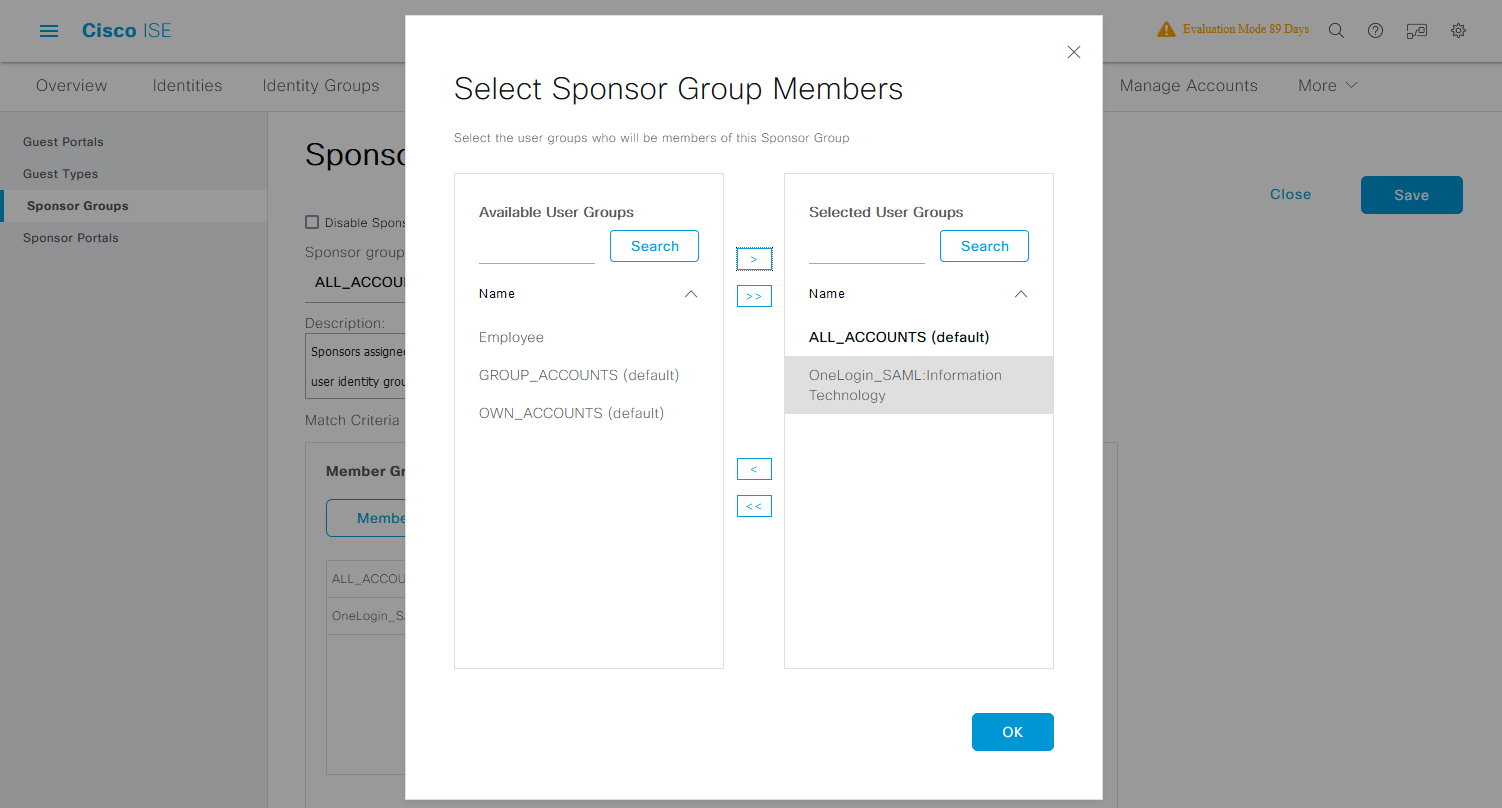
- Click the Members button and add the SAML User Group(s) you previously created (e.g. Information Technology), then click OK and then Save.
You can now test your connection.
- For an IdP-initiated test, via a separate browser or incognito browser session, login as your test account and click the Cisco ISE Sponsored Guest Portal app icon from your OneLogin dashboard.
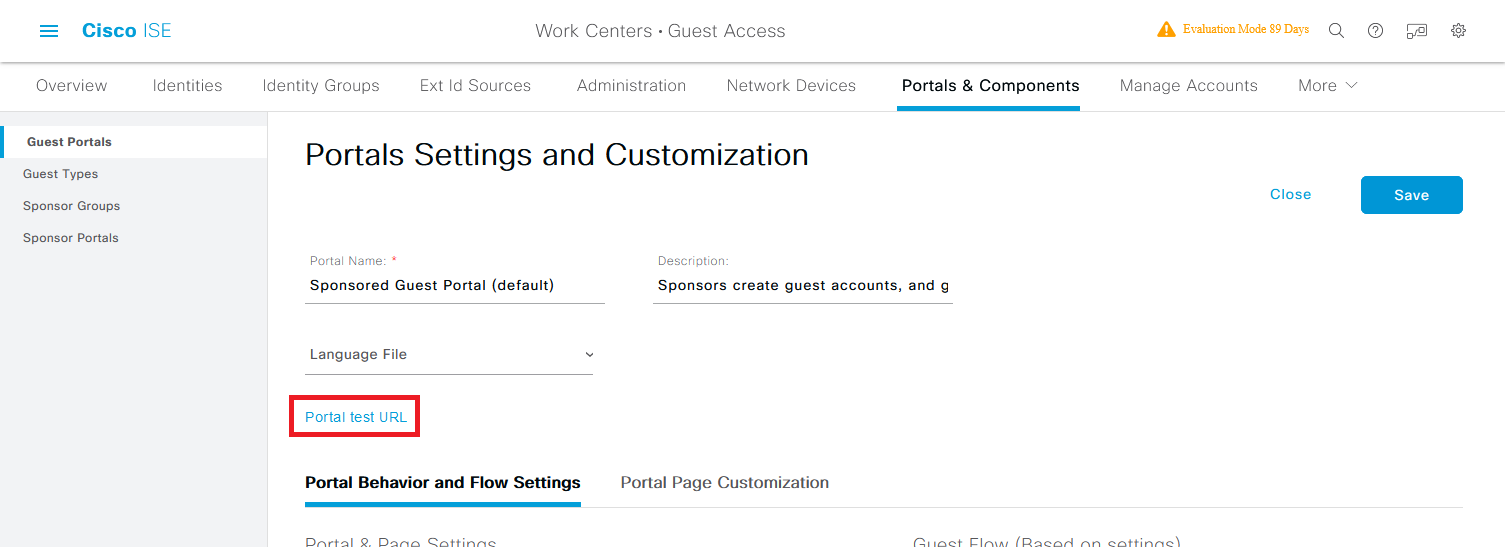
- For an SP-emulated test, via a separate browser or incognito browser session, navigate to your Cisco ISE Sponsor Portal (e.g. https://192.168.0.200:8443/portal/PortalSetup.action?portal=92cf00d5-7334-4746-b615-6a5d2a7a77ec) and login as your test account.
Your URL is at Work Centers > Guest Access > Portals & Components > Guest Portals. Select your Guest Portal and copy your Portal test URL value.
Troubleshooting
Navigate to Operations → Troubleshoot → Debug Wizard and configure/enable at least the following (disable when complete):
https://www.cisco.com/c/en/us/support/docs/security/identity-services-engine/212594-debugs-to-troubleshoot-on-ise.htmlComponent Name Log Level Description Log file Name guestaccess DEBUG Guest Access API Services debug messages guest.log portal-web-action DEBUG Base Portal debug messages guest.log saml TRACE openSAML messages ise-psc.log Sample command to review logs via a CLI/SSH session
show logging application ise-psc.log tailIssue
- 2021-08-04 22:16:37,256 DEBUG [https-jsse-nio-192.168.0.200-8445-exec-7][] cpm.saml.framework.impl.SAMLFacadeImpl -::::- AuthenticatePortalUser - Session:null IDPResponse: SAML Exception:SAML message intended destination (required by binding) was not presentUserRole : SPONSOR
Possible Resolution
- The Recipient value within the OneLogin application is incorrect/missing
Issue
- 2021-08-04 20:56:19,521 DEBUG [https-jsse-nio-192.168.0.200-8445-exec-10][] cpm.saml.framework.impl.SAMLAttributesParser -::::- [parseAttributes] attributeName=, not received in response, caching with default value=<>
Possible Resolution
- The OneLogin application parameter/value for the users group is incorrect and/or is missing the Include in SAML assertion checkbox.
Issue
- 2021-08-04 22:21:50,774 DEBUG [https-jsse-nio-192.168.0.200-8445-exec-8][] cpm.saml.framework.impl.SAMLAttributesParser -::::- [parseAttributes] Delimeter not configured, Attribute= add value=<CN=Administrators,CN=Builtin,DC=BIGHAMINC,DC=MYO365,DC=NET;CN=Denied RODC Password Replication Group,CN=Users,DC=BIGHAMINC,DC=MYO365,DC=NET;CN=Domain Admins,CN=Users,DC=BIGHAMINC,DC=MYO365,DC=NET;CN=Employees - Remote,OU=Corp,DC=BIGHAMINC,DC=MYO365,DC=NET;CN=Employees - VMWare View,OU=Corp,DC=BIGHAMINC,DC=MYO365,DC=NET;CN=Information Technology - All Employees,OU=Information Technology,OU=Corp,DC=BIGHAMINC,DC=MYO365,DC=NET;CN=OneLogin Users,OU=Corp,DC=BIGHAMINC,DC=MYO365,DC=NET;CN=Remote Desktop Users,CN=Builtin,DC=BIGHAMINC,DC=MYO365,DC=NET>
Possible Resolution
- The group value is delimited but the Multiple values in a single XML element separated by is not configured with the delimiter