This article is an add-on to our SAML configuration guide, supplementing the process described there with specific details and additional information unique to configuring SAML for the Splunk Enterprise SAML 2.0 app connector in OneLogin's app catalog.
Prerequisites
- Administrative access to enable SAML in Splunk Enterprise; you should follow the Splunk Enterprise SAML process described there in conjunction with your OneLogin setup, as you will be exchanging some details between your accounts during the configuration
- Valid certificate and private key in PEM format.
- Open inbound port on e.g. 8088 TCP towards to Splunk Enterprise Server (for data ingress from OneLogin). Make sure your server is correctly configured and in sync with your domain, or you may get SAML errors.
Table of Contents
Certificate
In the main navigation menu, go to Security > Certificates > New to create a designated certificate in OneLogin for Splunk. Set Signature to SHA256 and ensure that Set the CA flag in the Basic Constraints extension to "true" and keyCertSign bit for KeyUsage is checked.
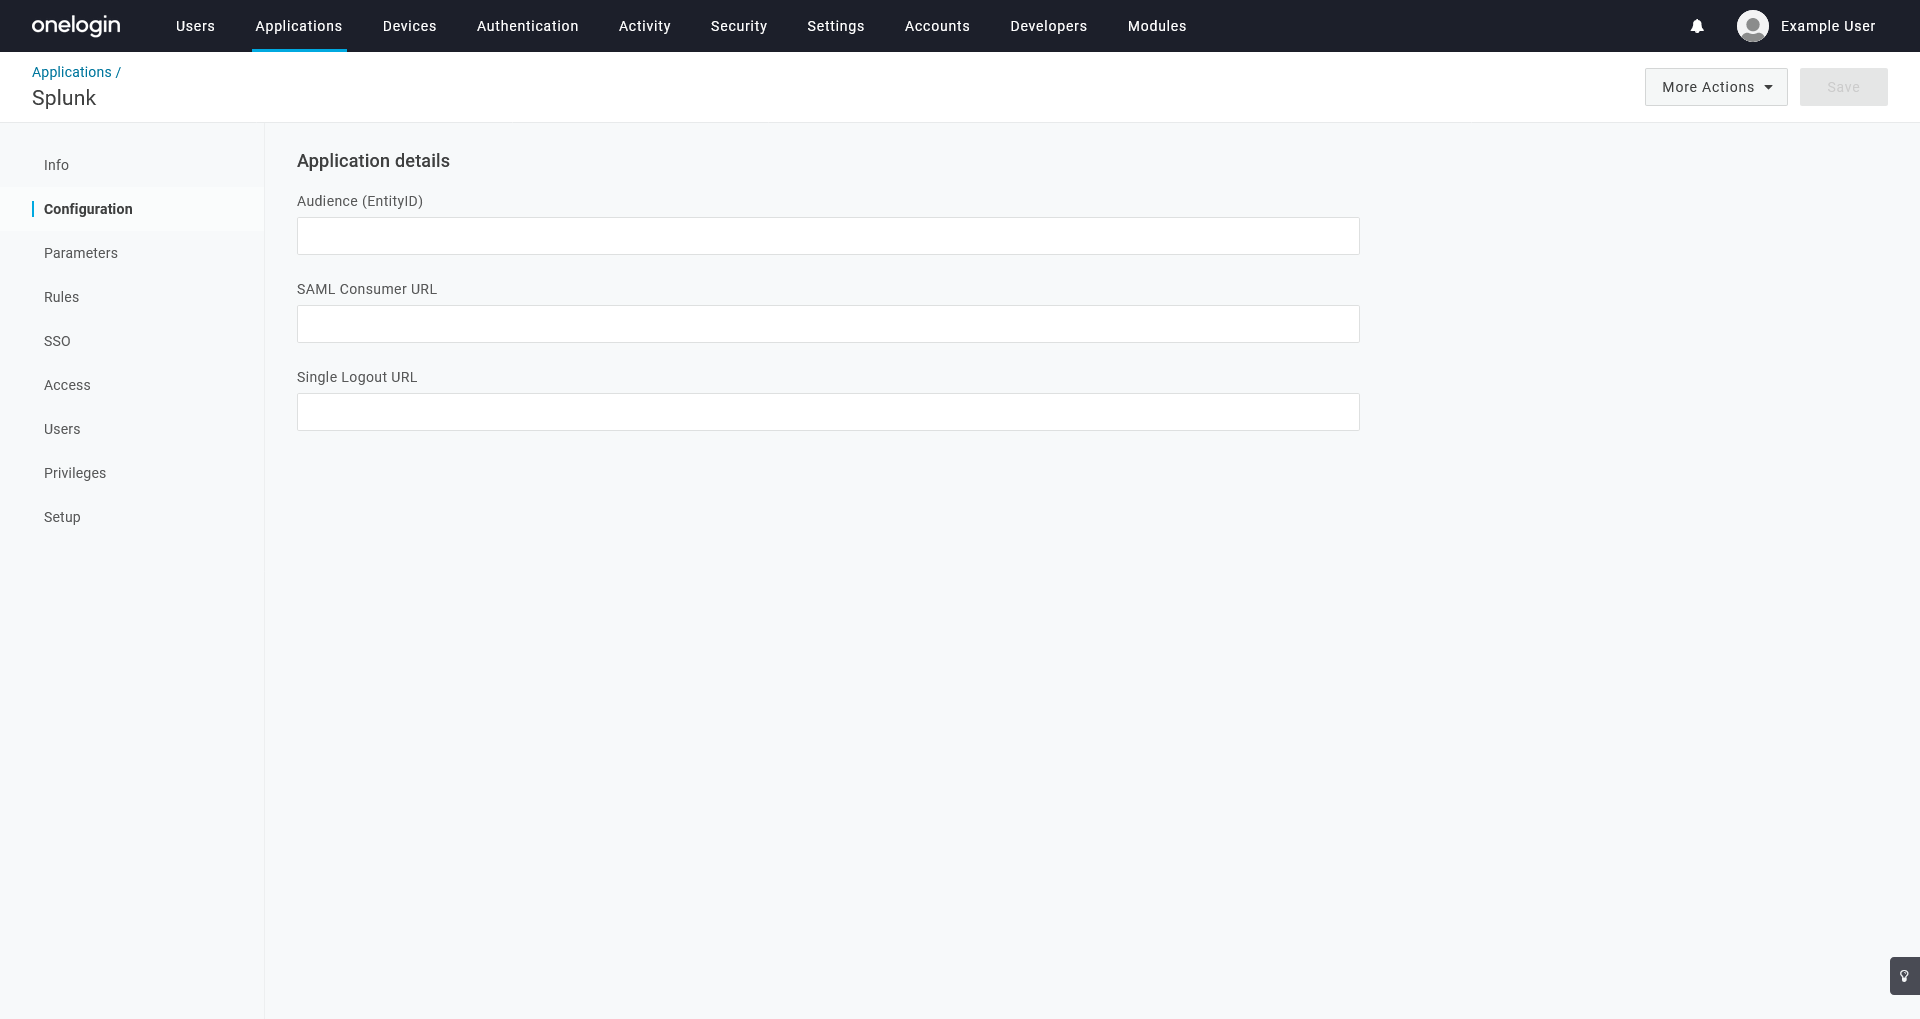
Configuration
|
Audience (EntityID) |
Any string, e.g. splunk-saml. |
|---|---|
|
SAML Consumer URL |
https://{fqdn-server-name}:8000/saml/acs |
|
Single Logout URL |
https://{fqdn-server-name}:8000/saml/logout |
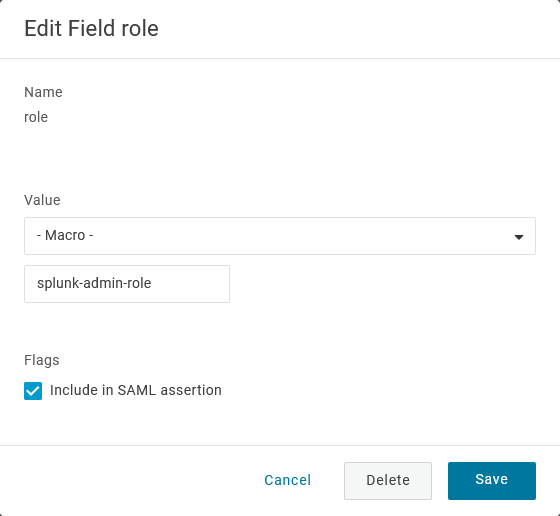
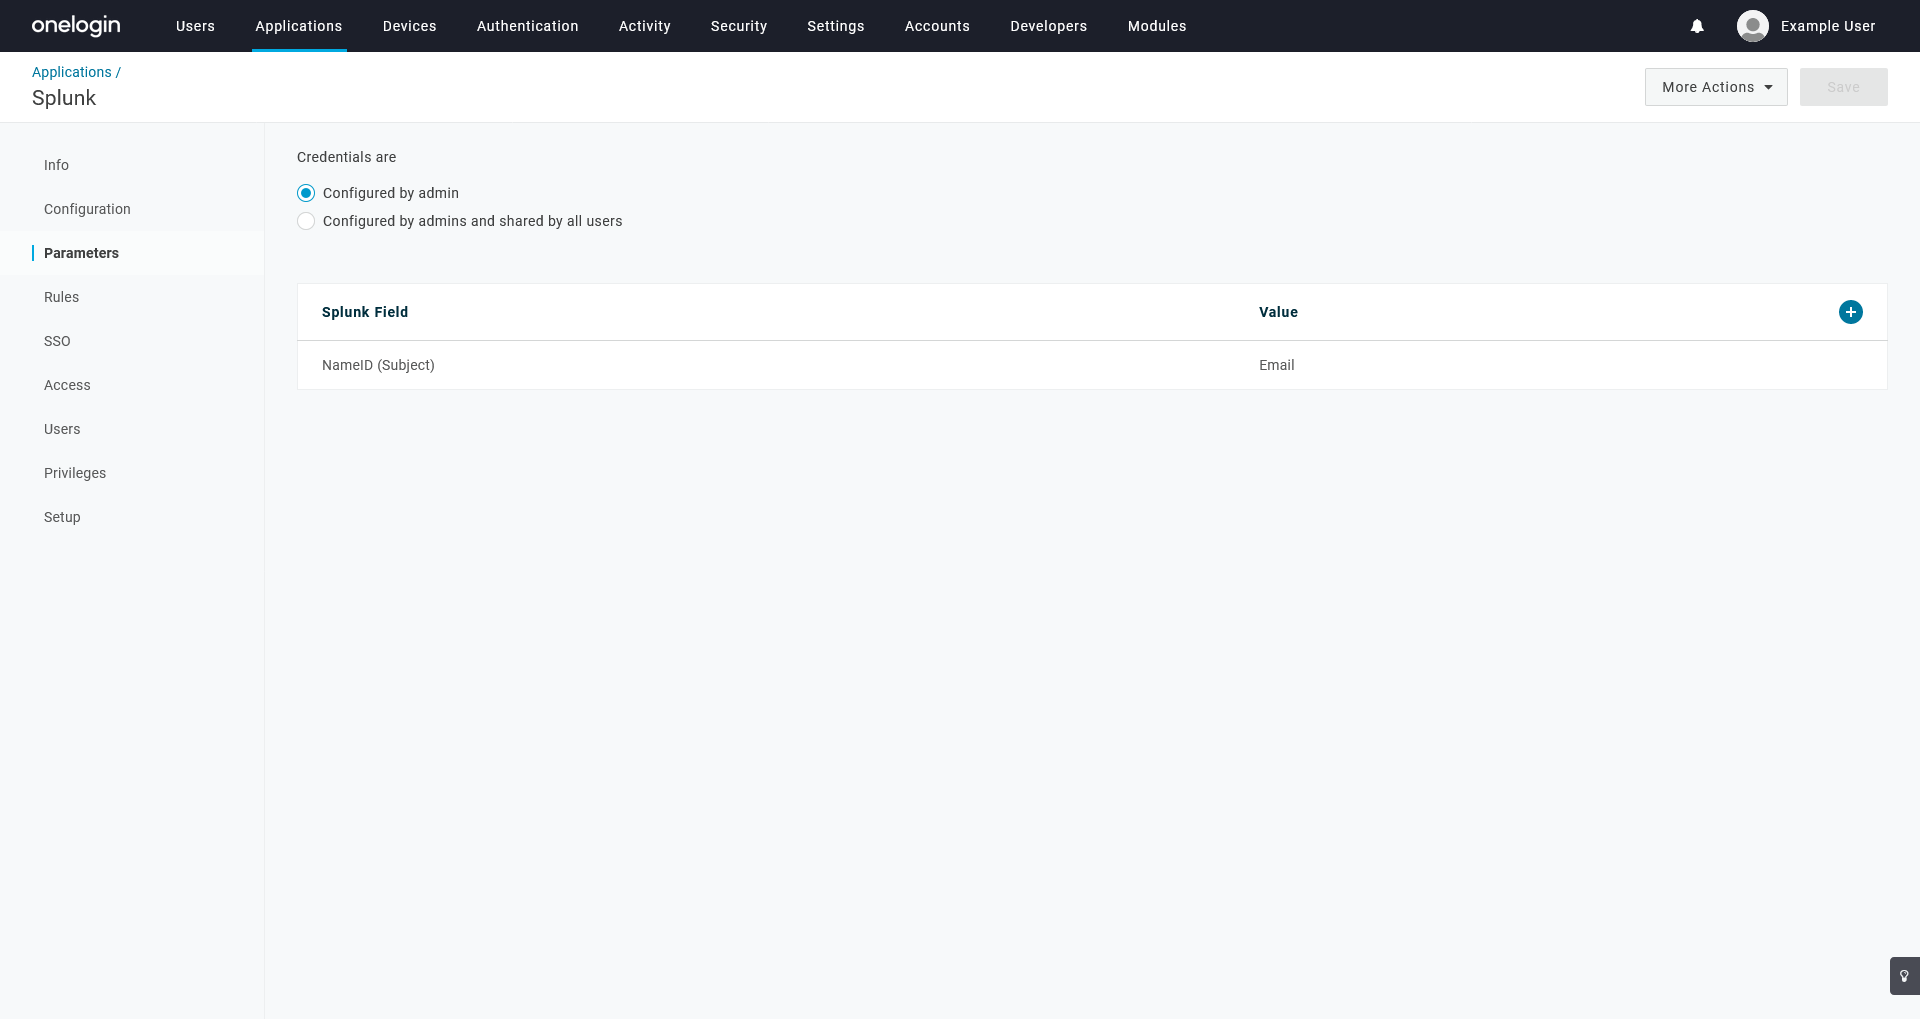
Parameters
Add a parameter with the following settings, then save:
|
Name |
role This value is case-sensitive; be sure to enter it exactly as shown, in lowercase. |
|---|---|
|
Value |
- Macro - splunk-admin-role This value is case-sensitive; be sure to enter it exactly as shown, in lowercase. |
| Flags | Toggle Include in SAML assertion |
Install Splunk Enterprise
- Download Splunk Enterprise and run the installer, leaving the defaults as-is. Note your admin credentials.
- Launch Splunk Enterprise and login with the admin credentials.
- Go to Indexes and create a New Index: e.g. “onelogin”
- Go to Settings > Server settings > General settings.
- Enter the server’s name to match a the FQDN URL in the Splunk Server name and Index Host name.
- Check Enable SSL (HTTPS) in Splunk Web?
- Directly on the server, open CMD and change into C:\Program Files\Splunk\bin. Run splunk restart.
- Stop Splunk again by running splunk stop.
- Copy/paste your PEM certificates (certificate and private key) to C:\Program Files\Splunk\etc\auth\splunkweb. Rename the existing *.PEM to *PEM.OLD. Rename your copied PEM files and rename them to match the cert.pem and privkey.pem names.
- In CMD, run splunk start.
- At this stage, you can create a form-based connector in OneLogin to use this url: https://{FQDN-server-url}:8000/en-US/account/login?. At this point you should be logged in via the form admin/password.
- Go to Settings > Authentication methods.
- Select SAML from the External list and click Configure Splunk to use SAML.
- Click SAML Configuration and:
- Import the OneLogin Metadata XML file.
- Enter the value from the OneLogin Audience field into the Entity ID field, e.g “splunk-saml”
- In the Advanced Settings section on the bottom of the page, enter the FQDN of the server.
- This needs to match the Configuration details in OneLogin, e.g. “https://{fqdn-server-name}”. Leave any other option as such.
- Save and return in the SAML Configuration and download the SP Metadata File to double check we have the same values.
- Click on New Group and create a new SAML group. Name it exactly as you have named your role parameter in Splunk (case-sensitive).
- Click settings > Authentication methods > Reload Authentication.
If you get errors, your certificates are not clean.