|
This topic describes how to configure OneLogin as the federation service that provides SSO for Office 365.
Prerequisites
- A OneLogin subscription that includes Single Sign-on.
- An Office 365 implementation not using ADFS or another identity provider for federation. See Disabling ADFS Federation to Enable OneLogin SSO With Office 365 if you are trying to switch from ADFS to OneLogin.
- You are using Office 365 Connector V2. If you added Office 365 before February 1, 2018, you need to upgrade to V2.
- Your organization's domain is registered with your Office 365 account. Your OneLogin domain (typically your organization's domain, such as acme.com) must match the domain you use for Office 365, and all users must share the same Office 365 and OneLogin email addresses, using this domain. For more information about registering your domain in Office 365, read Microsoft's guide to adding your domain.
- Note: Microsoft does not allow you to federate an onmicrosoft.com domain (such as acme.onmicrosoft.com)
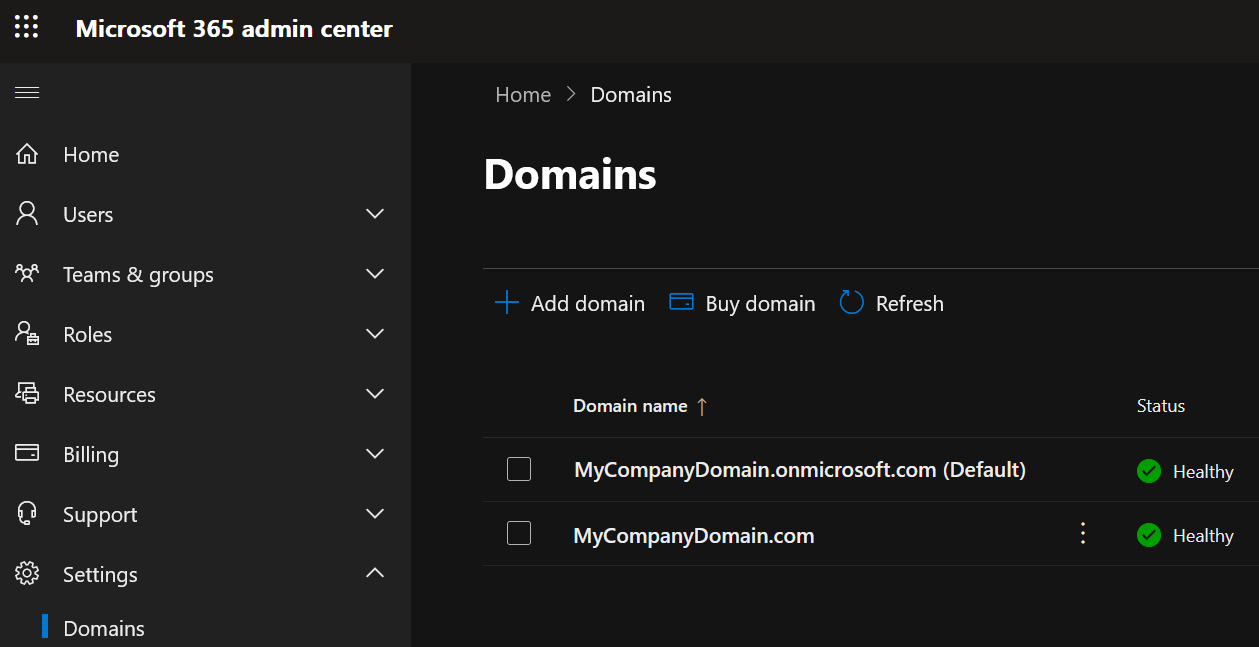
- The domain you want to federate is not your primary domain (set to Default) in Office 365. You can't federate your primary domain; you must switch the Office 365 default domain to another domain, such as onmicrosoft.com. For more information about switching the default domain in Office 365, see here.

- You have a global administrator account that lies outside of a federated domain. We recommend that you use an onMicrosoft account, e.g. admin@acme.onmicrosoft.com.
- You have Azure AD Connect or OneLogin provisioning enabled.
- You must have either DirSync (now Azure AD Connect) or OneLogin provisioning enabled for Office 365 federation (SSO) to work. If you are not using Azure AD Connect, or if you want to switch from Azure AD Connect to the OneLogin provisioning engine, follow the instructions at the above link. For a comparison of the benefits of Azure AD Connect and OneLogin Provisioning, see Introduction to Office 365 Integration with OneLogin.
- If you intend to configure both SAML and provisioning for Office 365, you must enable provisioning first before completing your SAML configuration.
Configuration
|
Enable WS-Trust
|
If you have Entra-joined or hybrid-joined Windows machines in your infrastructure, then you must enable WS-Trust. For more information on securing your Office 365 / Entra ID environment , see Recommended Security Configurations for Office 365.
If you do not have Entra-joined or hybrid-joined Windows machines in your infrastructure, One Identity strongly recommends disabling WS-Trust.
|
|
Enable user search using UPN (Ws-Trust)
|
When enabled, users will be searched by the User Principal Name (UPN) set at the app level if the user cannot be searched by the email set at the user level
|
|
API Connection
|
Enter the domain (yourdomain.com) you want to federate with Office 365 and click Verify. All users must share the same Office 365 and OneLogin email addresses, using this domain.
|
|
Office 365 V2(Azure Graph) OAuth
|
Click Authenticate to get the API access token.
|
If you haven’t previously authorized, you will receive a consent request that enables OneLogin to access the Windows Azure Active Directory for Office 365.
|
|
Office 365 V2(Microsoft Graph) OAuth
|
Click Authenticate to get the API access token.
|
A dialog will prompt you to complete the authentication process by authorizing access for OneLogin. Select your Office account name and choose your account (or sign in if prompted). Once you authenticate, the Authenticate button becomes Clear Token, which allows you to clear the bearer token and reauthenticate.
Parameters
Required Parameters
| Field |
Value |
Type |
| ImmutableID |
Set to AD ID. If OneLogin is not integrated with Active Directory (AD), and there is no ImmutableID to provision from AD to Office 365, OneLogin generates a unique AD ID value to map to the Office 365 ImmutableID.
The ImmutableID parameter is provisioned bi-directionally. If a OneLogin user is provisioned into Office 365, and that user exists with an assigned Immutable ID, OneLogin will copy that value back into the ImmutableID parameter. If the value in Office 365 differs from the value in OneLogin, we copy the value from Office 365 into OneLogin ImmutableID parameter. For this reason, we recommend you create a custom parameter to safely store Immutable IDs.
The correct ImmutableID is required for SSO to function. SSO will fail if the wrong ImmutableID is stored in OneLogin.
Important! ImmutableID is immutable! You can't change it once it's set.
|
string |
| Sharepoint Online Persistent Sessions |
Enable (set macro to True to allow single sign-on sessions to persist for 5 days. |
string |
| UsageLocation |
A two letter country code (ISO standard 3166). Required for users that will be assigned licenses due to legal requirement to check for availability of services in countries. Examples include: "US", "JP", and "GB". |
string |
| User Principal Name |
Email |
string |
Optional Parameters
| Field |
Value |
Type |
| Display Name |
Can be set to AD ID, AD user name, or company. AD ID maps to the mS-DS-ConsistencyGUID field in AD, while AD user name maps to sAMAccountName field. |
string |
All other attributes are used only when provisioning users to Office 365.
Configuring WS-Federation
While manual federation is available, you can also tell OneLogin to exchange certificates with Office 365 and configure WS-Federation automatically.
If you are federating multiple domains with Office 365, it is best practice to use a separate X.509 certificate for each domain. You must create any new certificates before you configure your Office 365 connectors. Go to Settings > SAML and click New to create new certificates. Before you perform the following steps, go to the Manual Configuration sub-tab, click the Change link and select a new certificate from the drop-down. Return to the Automatic Configuration sub-tab to initiate automatic federation configuration.
- Turn on the Enable automatic SAML configuration toggle to open the One Click dialog.
- Follow the prompts to complete the WS-Federation configuration.
- If WS-Federation configuration fails, the dialog will tell you. If retrying fails, make any modifications suggested by the error message or check your settings on the Configuration, Access, and Parameters tabs and try again. If automatic configuration continues to fail, you can try manual configuration.
- If WS-Federation configuration succeeds, the dialog tells you it’s done and prompts you to verify the configuration.
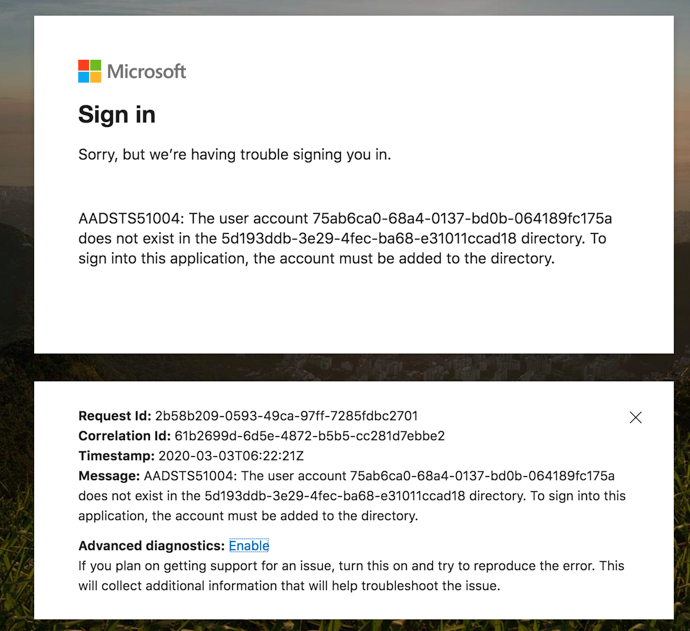
Note: the default wizard requires you to press Verify to launch a new tab, but for 30 minutes you may receive an error screen from Microsoft (see image). Ignore it and close the tab.

- If you have not already assigned yourself access to this app, the Done page will display Next; select Next to display a verification page.
- Open a new browser window or tab. Assign this app to a OneLogin user with an Office 365 account, then log in to OneLogin as the user and try to launch Office 365 from App Home. If the app launches successfully, return to the One Click dialog and click Yes. I'm Done. Wait 30 minutes as Microsoft proagates your admin setup commands across all its servers and then open a new browser window or tab.
- OneLogin returns you to the SSO tab, where you can confirm that Enable automatic SAML configuration is turned on. If you ever need to turn off OneLogin SSO for Office 365, simply click the toggle off.
Meeting Microsoft's MFA Requirements
Microsoft has recently announced that they will enforce mandatory multi-factor authentication (MFA) for all Azure sign-in attempts to many administrative portals and applications throughout 2024 and 2025, and that those using a federated Identity Provider (IdP) directly integrated with the MFA provider, such as OneLogin, must have the federated IdP configured to send an MFA claim.
To comply with these requirements, OneLogin must be configured to issue the MFA claim and Entra ID to accept the MFA claim so that users do not need to perform MFA a second time directly in Entra ID.
- Using the Microsoft Graph API, call Get internalDomainFederation to check your current settings for your federated domain.
- Make a note of all values (in case you need to roll-back.) In particular, note the values of federatedIdpMfaBehavior and promptLoginBehavior.
- Using the Microsoft Graph API, call Update internalDomainFederation to update your federated domain. Set the value of federatedIdpMfaBehavior to enforceMfaByFederatedIdp.
OneLogin will now issue the MFA claim when acting as an Identity Provider to your federated Entra ID domain. As a OneLogin administrator, you should ensure that the user policy, or the app policy applying to the Office 365 app, is configured to require MFA. Optionally, you can set the conditions under which a user does not need to perform MFA (such as allow-listed IPs). For both cases, OneLogin will issue the MFA claim.
Note that this approach can also be used if you have conditional access policies in Entra ID that require a user to perform MFA and want the user to perform MFA in OneLogin and not in Entra ID. |