This article describes how to configure OneLogin to provide SSO for Asana using SAML.
-
Log into OneLogin as a Super user or Account Owner.
-
Go to to Apps > Add Apps.
-
Search for Asana and select it.
-
On the initial Configuration tab, click Save to add the app to your Company Apps and display additional configuration tabs.
The Info tab appears.
-
Go to the Parameters tab to confirm the mapping of OneLogin values to Asana attributes.
NameID (Subject) is included in the SAML assertion passed by OneLogin to Asana. You should keep the default OneLogin value of Email.
The SCIM Username is used for provisioning. See Provisioning for Asana.
In most cases, you should keep the Configured by admin default. For more information, see Setting Credential Configuration Options.
-
Go to the SSO tab to copy the SAML 2.0 Endpoint (HTTP) and X.509 Certificate; you will provide these to Asana in the next step.
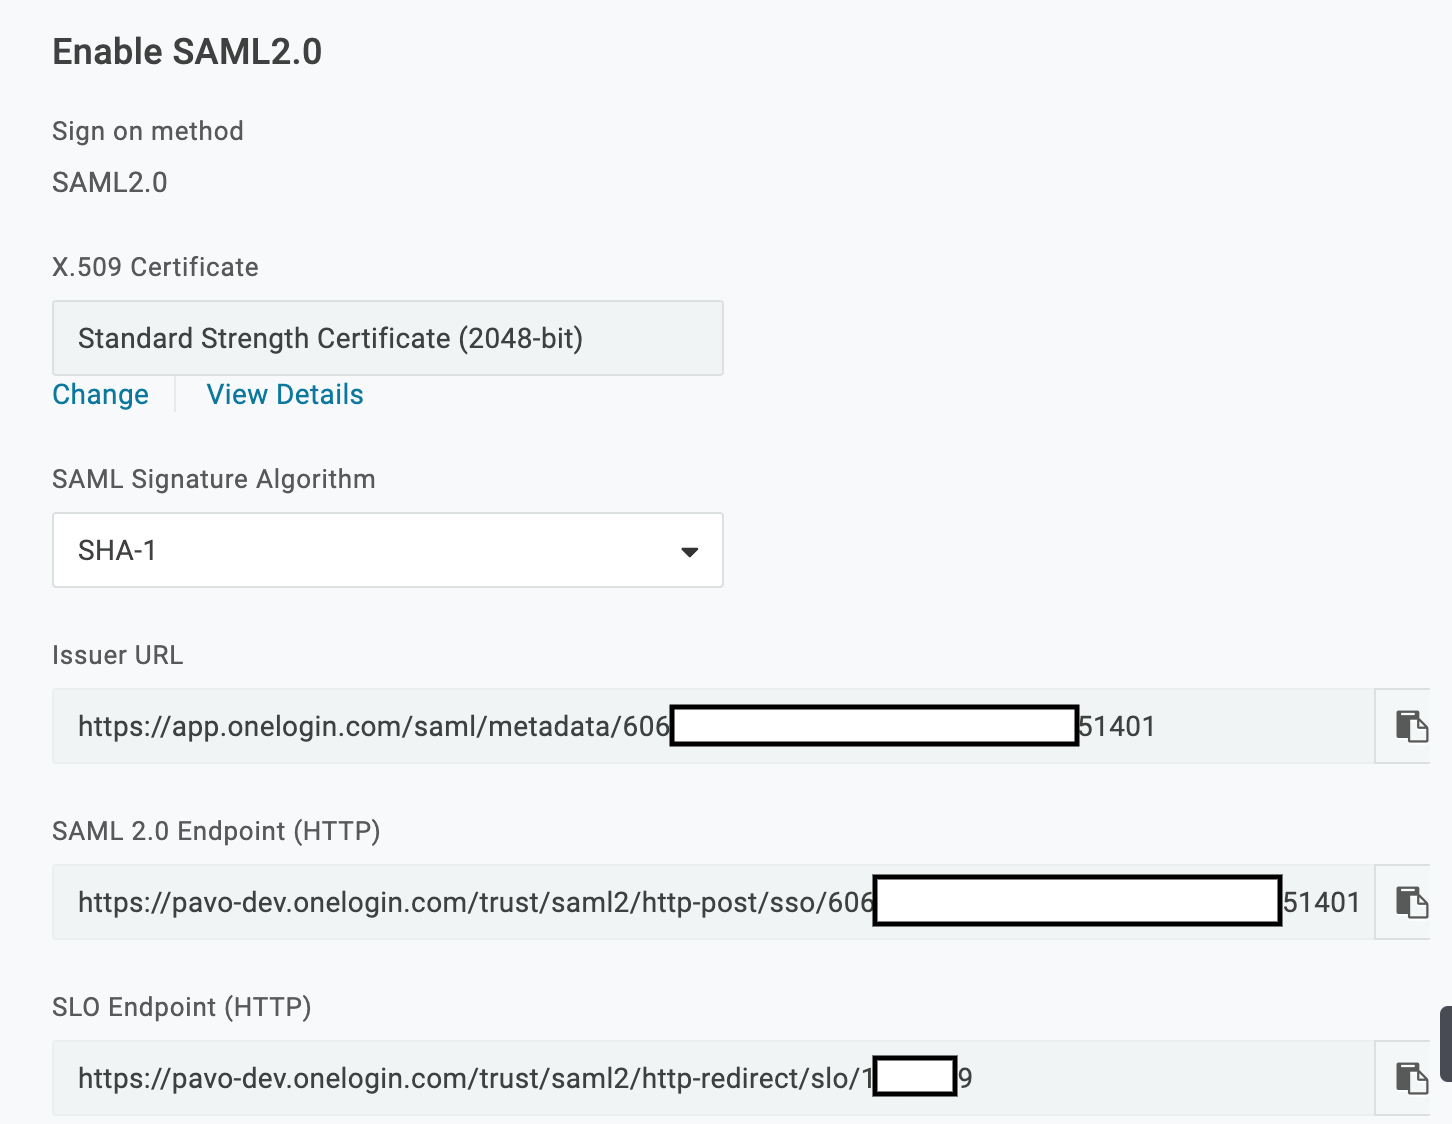
To copy the X.509 Certificate, click View Details to launch the certificate edit page and then copy the entire contents of the X.509 Certificate field, including "----BEGIN CERTIFICATE----" and "----END CERTIFICATE----".
If you want to change the certificate before copying, click Change under X.509 Certificate and follow the prompts.
-
In another browser tab or window, go to your Asana account to configure OneLogin as an IdP.
Note. Asana can change this process at any time. For the most up-to-date instructions, see the Asana documentation at https://asana.com/guide/help/premium/authentication#gl-saml.
-
Log in as an admin.
-
Click your profile photo and select Organization Settings from the drop-down menu.
-
Go to the Administration tab.
-
Select the Members must log in via SAML option.
-
Paste the your OneLogin SAML 2.0 Endpoint (HTTP) value in the Asana Sign-in page URL field and the X.509 certificate in the X.509 Certificate field.
-
Click Save.
-
Return to OneLogin and go to the Access tab to assign the OneLogin roles that should have access to Asana and provide any app security policy that you want to apply to your Asana users.
You can also go to Users > All Users to add the app to individual user accounts.
Note. You may want to give access to yourself or a test account and test your completed OneLogin SAML integration with Asana before you assign additional roles on this tab. See step 10, below.
-
Click Save.
-
Test the SAML connection.
-
Ensure that you have a user account in both OneLogin and Asana that uses the same email.
You can create a test user, or you can use your own account if you choose.
-
Make sure that you are logged out of Asana.
-
Log in to OneLogin as an admin and give the test user (or yourself) access to the Asana app in OneLogin. (See step 7 above)
-
Log in to OneLogin as the test user.
-
Go to your Asana login page before your OneLogin session ends.
If the test user is granted access to Asana without having to provide login credentials, then SAML works.
Next steps:
Provisioning for Asana |