Provisioning is a key component of Identity Lifecycle Management in OneLogin that makes it easy to create, update, and delete users in the applications that your organization uses. This means that you can quickly add new users to multiple apps and de-provision users from those apps instantly when they change roles or leave your organization.
This article provides a general overview of how to configure any provisioning-enabled app, and can be used as the framework for the details provided in our app-specific provisioning instructions.
This feature requires a OneLogin subscription that includes Identity Lifecycle Management. Speak with your account representative for more information.
Introduction
In a basic provisioning workflow, you add an app to a OneLogin role and map OneLogin attributes or entitlements like Email, AD user name, Title, or License level to analogous app attributes. Then, whenever a new user is added to that role, they're created in the app — and whenever their OneLogin attributes change, they're updated in the app as well!
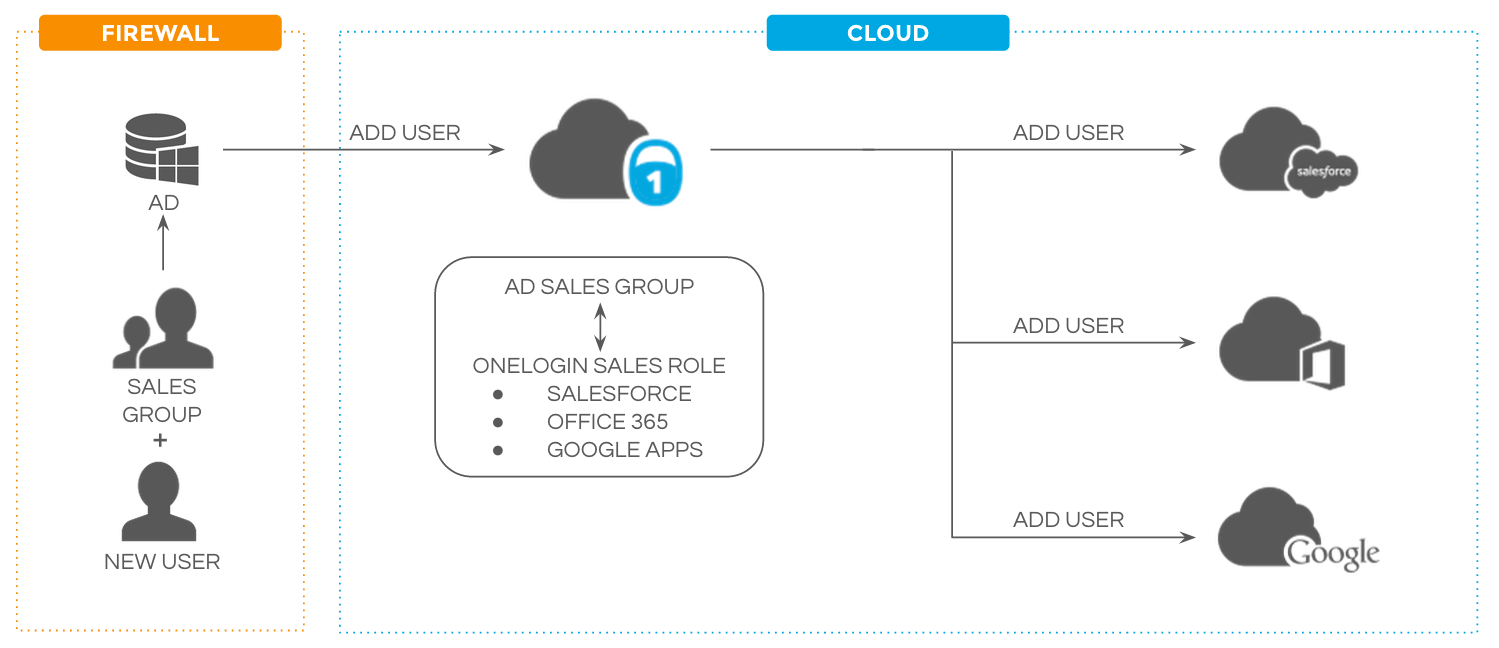
For example, you might map the Department attribute "Sales" in OneLogin to "Sales and Marketing" in an app's Group attribute. Whenever a user in the "Sales" Department in OneLogin is added to a role that includes the app, they're provisioned to the app as a member of the app's "Sales and Marketing" Group. If their OneLogin Department is later changed, OneLogin's provisioning engine updates the user's Group in the app accordingly.
When it's time to de-provision a user from their apps, you simply disable the user in either OneLogin or a third-party directory like Active Directory, and the user's accounts in all OneLogin-managed apps will be deleted or suspended, depending on your settings.
Provisioning in OneLogin uses Safe Entitlements, meaning that when you use provisioning with a third-party directory that may have a large number of users in it, OneLogin can intelligently detect which users were created in this directory by OneLogin and which were created directly in the other platform, then leaves those third-party users untouched. This frees you up to allow two common user creation workflows without having to worry that one will delete users created by the other.
Not all apps support provisioning through OneLogin, but OneLogin supports SCIM (System for Cross-domain Identity Management), a provisioning standard that provides full support for creating, deleting, and updating users in any cloud or on-prem app. Several major directories, such as Microsoft Entra ID and Amazon Web Services support SCIM integrations, and it's easy to develop for your own applications as well.
SAML Provisioning
Unless stated otherwise, OneLogin user provisioning refers to user provisioning performed via an API connection. However, as an alternative to API-based provisioning, some apps in OneLogin provide SAML-based "just-in-time" (JIT) provisioning. With JIT provisioning, instead of creating user accounts in apps manually or using an API connection, the first time a user logs into an app via OneLogin SAML SSO, the app takes user information in the SAML assertion and creates the user's app account on the fly.
For example, when a user without an account in Docker Hub logs in to Docker Hub via OneLogin SAML SSO for the first time, a new Docker Hub user account is immediately created for them.
However, while API-based provisioning can keep user information between OneLogin and the app in sync beyond the initial user account creation, JIT provisioning only works to create the initial user account and does not stay synced with OneLogin beyond that point.
Note: When configuring both and provisioning for an application, you should always enable provisioning first, and only then complete your SAML configuration.
Enabling Provisioning
These steps are typical for the majority of apps in OneLogin, but specific app configurations may vary. Consult the app's own documentation and OneLogin's app-specific documentation for details.
-
After adding your app to OneLogin, go to Configuration. Under API Connection, enter your admin username and password for the app and click Enable to allow OneLogin to connect to the app's API.
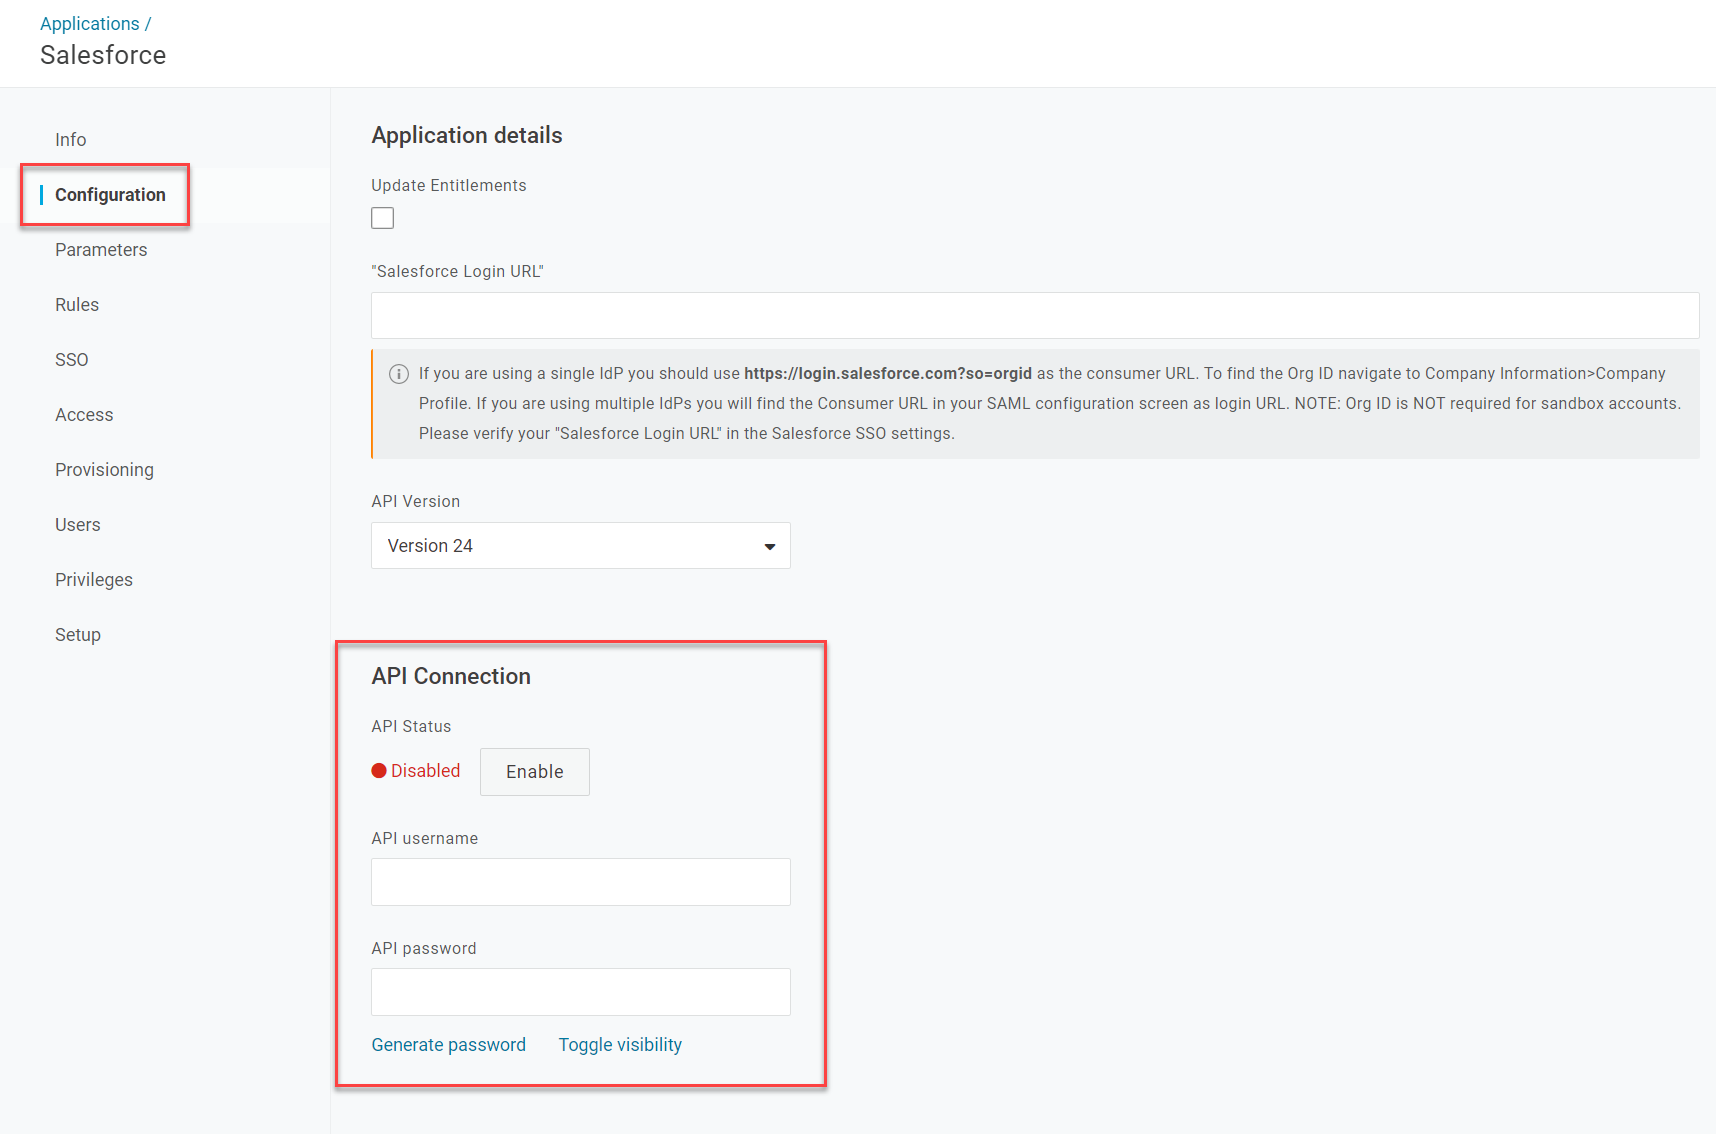
Some applications may instead prompt you to Authenticate, then redirect you to the app's platform to authenticate your admin credentials before enabling the API connection.
-
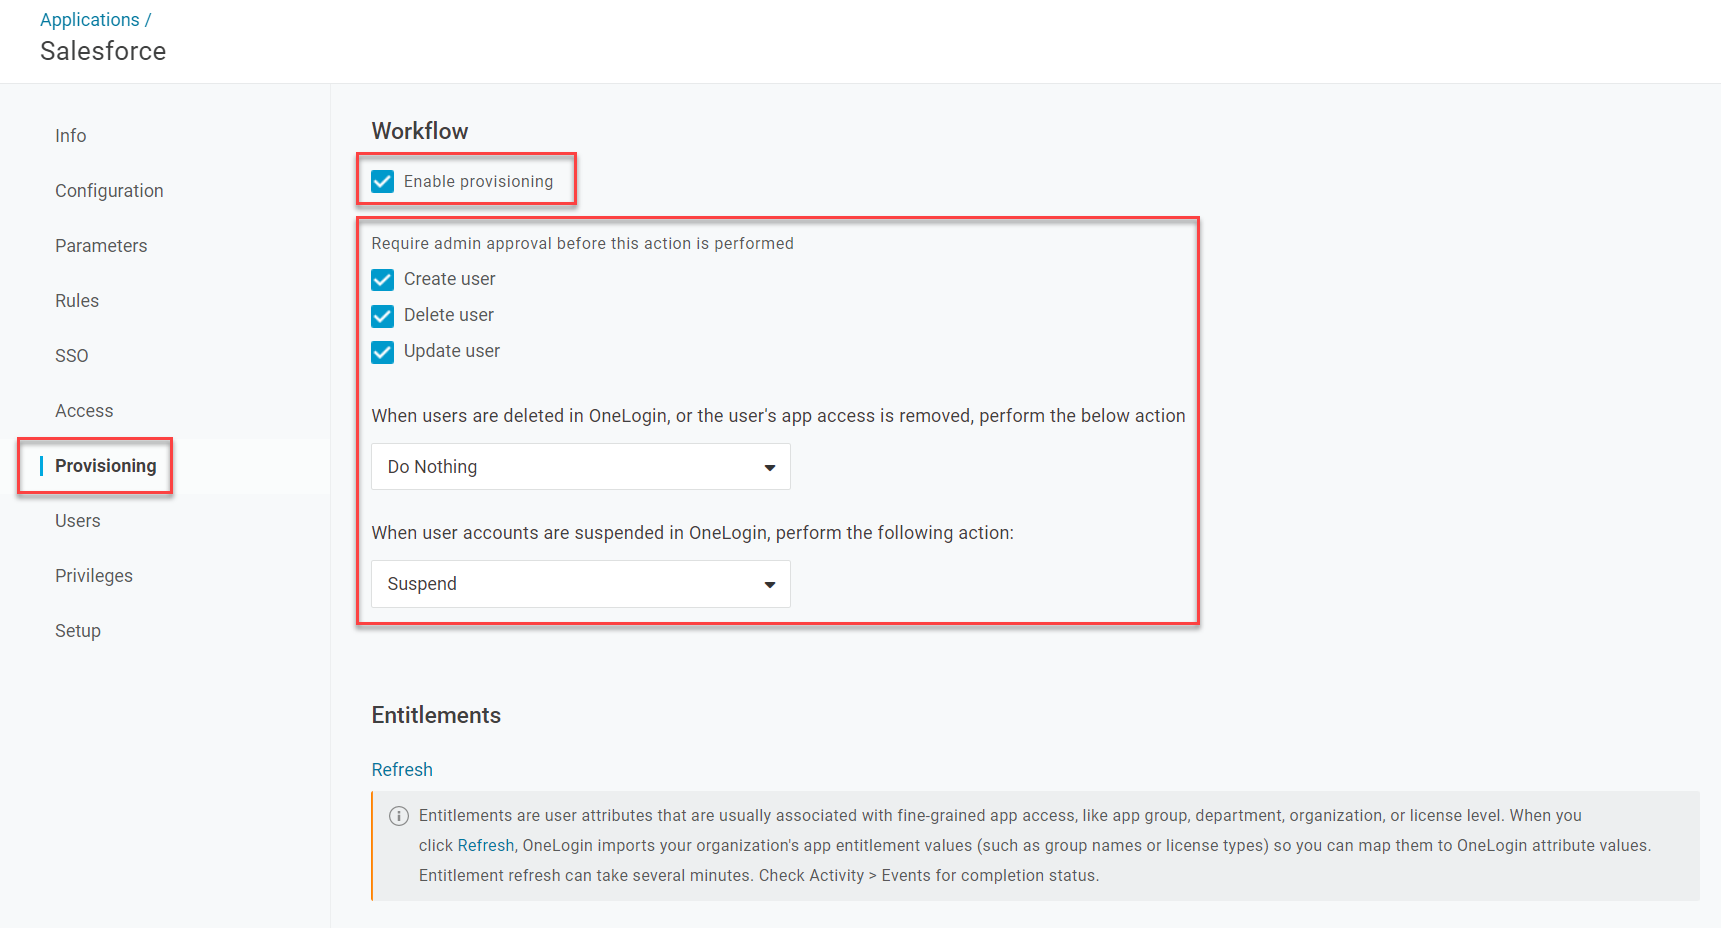
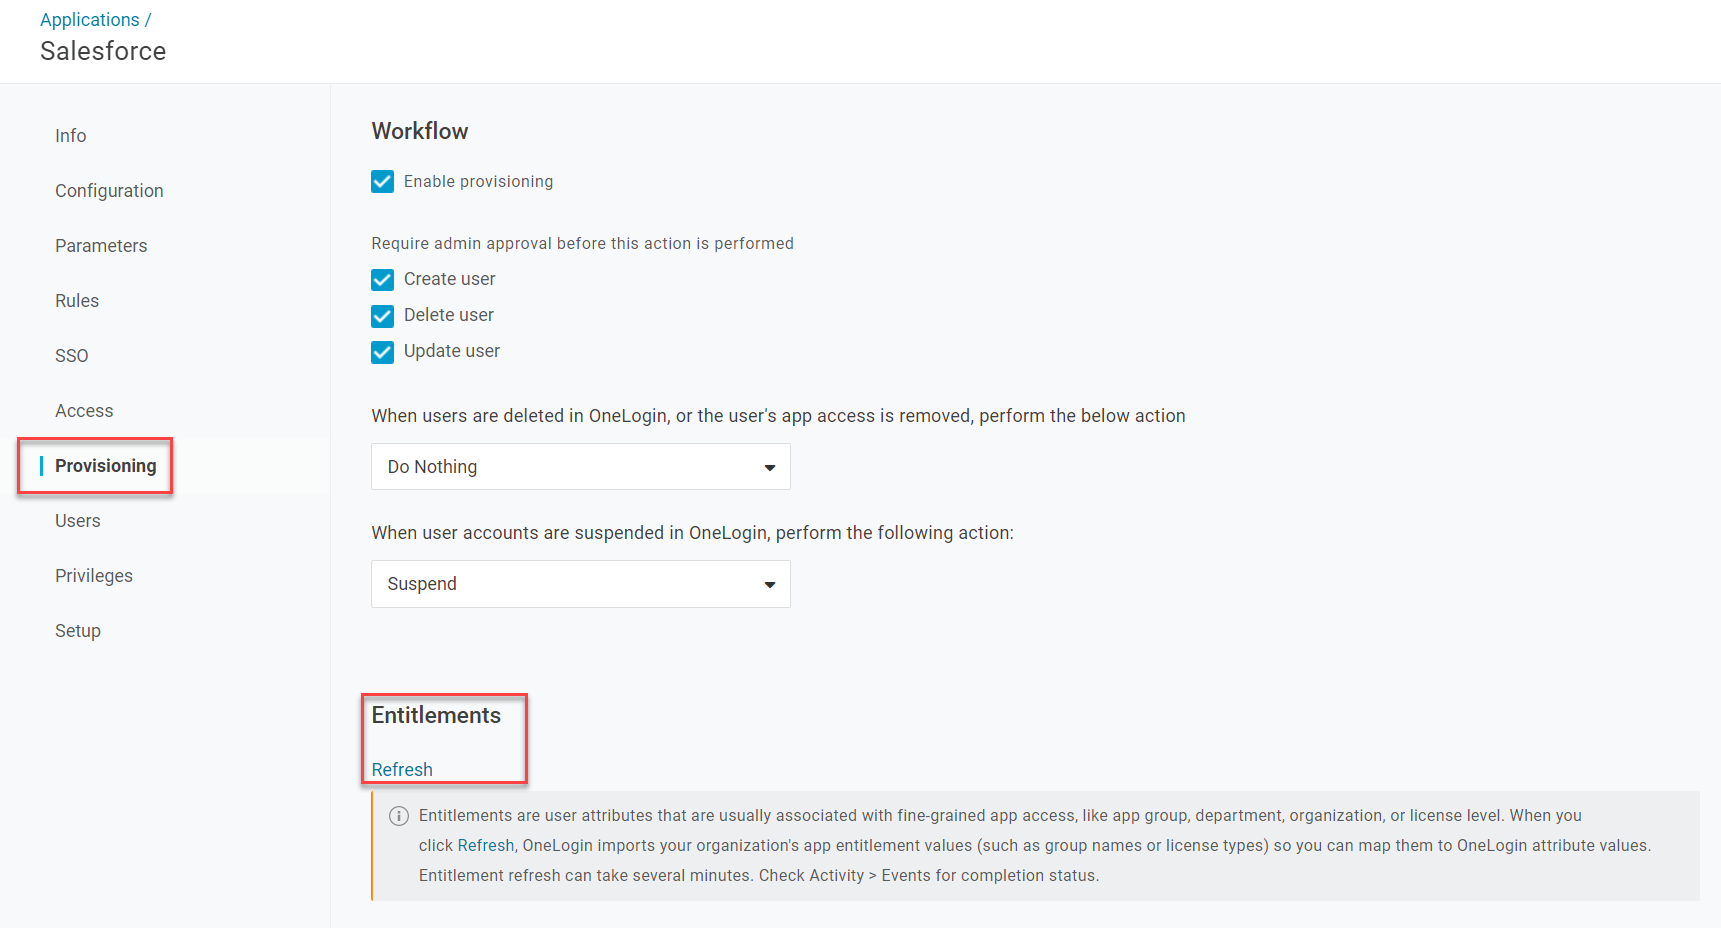
Go to Provisioning and check Enable provisioning. Select which actions you want to require admin approval and what you want to happen to user accounts in the application when they're suspended or deleted in OneLogin.
-
Save your changes. OneLogin will now be able to provision users to the app; at this point, you may now enable SSO integration or configure any other app settings necessary.
-
If available, you can choose to enable entitlement provisioning. Entitlements are user attributes that are typically associated with fine-grained app access, like groups, departments, or license levels within the app.
Entitlement provisioning is not available for all applications. If the following options don't appear in OneLogin, the app does not currently support provisioning entitlements. Contact the app developers for more information.
-
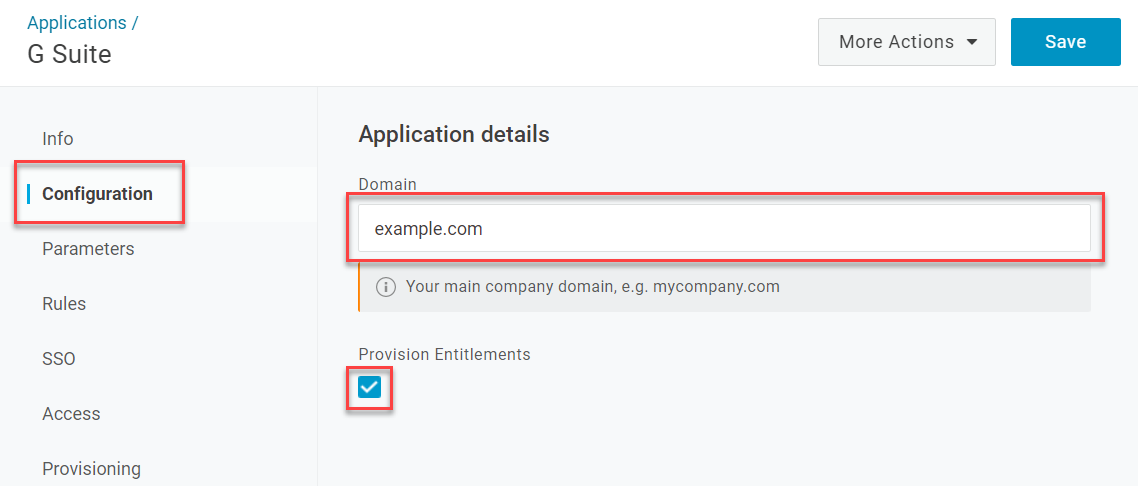
Return to Configuration. Enter your organization's domain and check the box for Provision Entitlements.
-
Return to Provisioning and click Refresh under Entitlements to import the entitlement values from the app to OneLogin. This may take several minutes to complete.
-
Go to Parameters and select Configured by admin, then choose how to map your users' OneLogin attributes to their counterparts in the application. The specific attributes available will vary by application, but it's generally safe to accept the default parameter values unless otherwise indicated by the app's documentation.
Take special note of the Password parameter if it's available for your application. You can leave - No default - selected to enable your users to set the app passwords in the app itself, or select SSO Password to use your users' OneLogin passwords as their app passwords. If you choose to do this, your account settings must have Enable password mapping allowed. Be aware that if SSO Password is selected, your users will be unable to update their ServiceNow Express passwords themselves.
-
After mapping your parameters, go to Rules to create any rules necessary to fine-tune the groups of users who receive given attributes in the app.
- Your provisioning setup is now complete!
Monitoring User Provisioning
To monitor the current status and event history of user provisioning events in OneLogin or to approve any pending provisioning actions requiring admin approval, go to Users > Provisioning. You can search for a particular user, select a specific app, or filter the events by their event status.
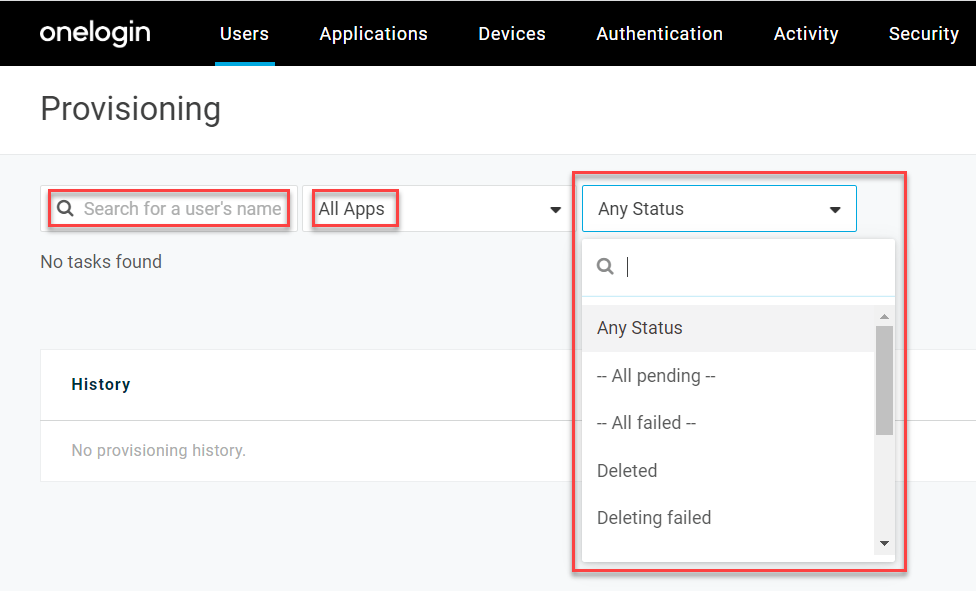
Tip! You can also monitor provisioning events for a specific app by going to Users in its app connector page in OneLogin, or for a specific user by going to Applications in their user settings page.
User Provisioning Statuses
|
|
Pending
|
This is the first step in the provisioning workflow if you opted to require manual admin approval for user provisioning. Click the status to approve or reject the provisioning event.
|
|
Provisioning
|
The user is currently in the process of being provisioned to the app.
|
|
Modifying
|
The user is currently in the process of being modified or updated in the app.
|
|
Provisioned
|
The user was successfully provisioned to the app.
|
|
Failed
|
The user could not be provisioned to the app. Click the status to view the reason for failure, such as Invalid authentication, which often indicates that OneLogin's connection to the app's provisioning API needs to be refreshed or re-authenticated in the app connector's Configuration page.
|
|
Deleting
|
The user is currently being deleted from the app.
|
|
Unknown
|
This is likely caused by using using the Disassociate login option on the app login for the user. To resolve this status, click the user's name and select Rematch login to match the user with the correct login information.
|
|