|
This article describes how to set up single sign-on (SSO) for Amazon Web Services (AWS) so that users can choose from among multiple AWS roles in multiple AWS accounts when they sign in to OneLogin.
Check out this video for a quick overview on multi-step and multi-role provisioning for OneLogin's integration with AWS:
Prerequisites & Recommendations
- A OneLogin subscription that includes provisioning.
- SAML assertions sent to AWS by OneLogin are limited to 100,000 characters.
- For users connecting to an AWS instance in GovCloud, use the GovCloud version of this application in the OneLogin app catalog. We don't support connections to both GovCloud and regular AWS accounts with the same OneLogin application. A separate application connector must be used for each type.
- If you have thousands of AWS roles, we recommend that you distribute roles over multiple connectors or instead use the legacy method of configuring AWS with multiple accounts and roles.
Adding the AWS Multi-Account App to OneLogin
-
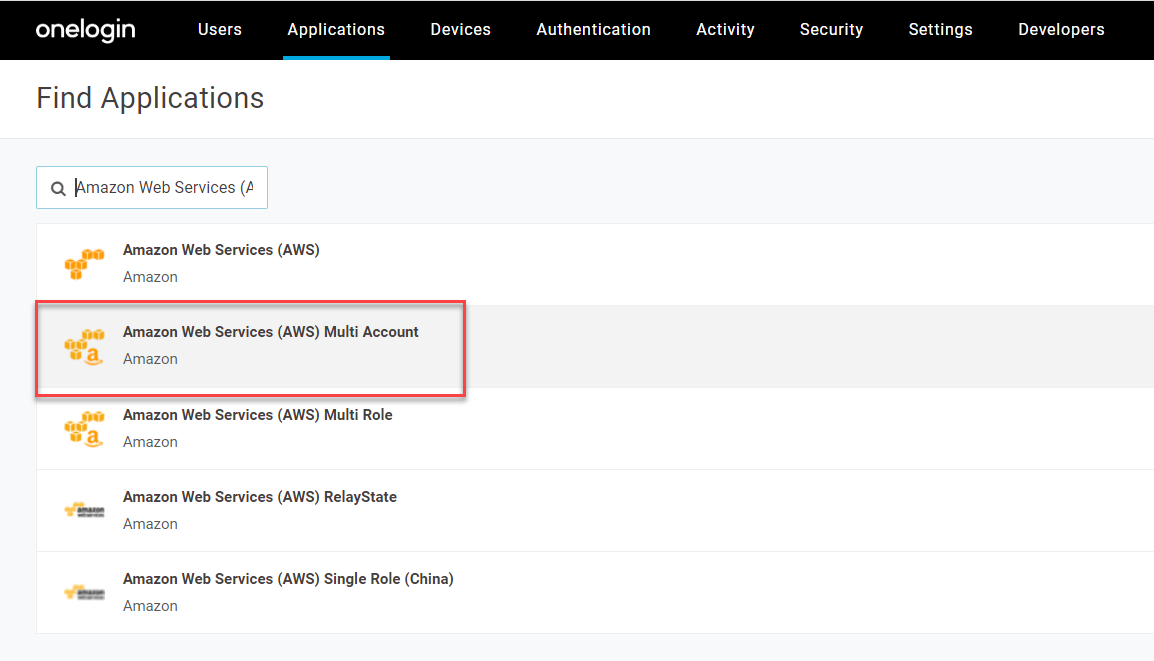
Sign in to your OneLogin admin portal and add the application Amazon Web Services (AWS) Multi Account.
-
Go to Configuration and enter a user-friendly name under External Role Name. The name should indicate the purpose of the role, as you will use the same name for the External Role you later configure for each AWS account.
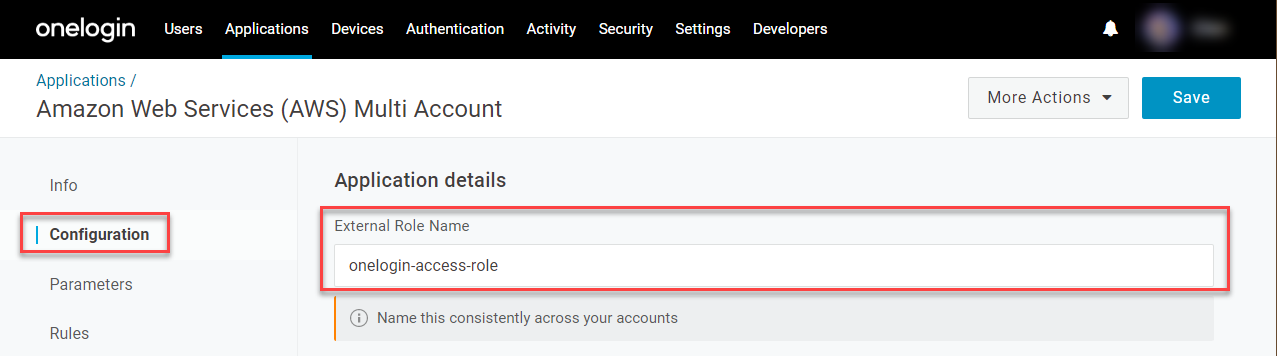
An External Role is an AWS role that enables third-party identity providers like OneLogin to access an AWS account. Together with the External ID, the External Role provides a trusted relationship between OneLogin and your AWS accounts. In a later section, you will set up an External Role for each AWS account that you want your users to access in OneLogin.
-
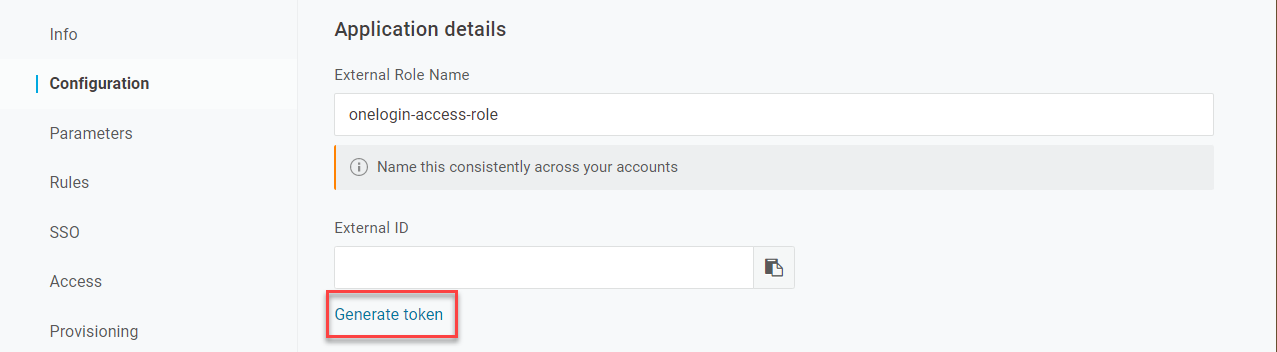
Click Generate token to create an External ID.
-
Go to Provisioning and select Enable provisioning.
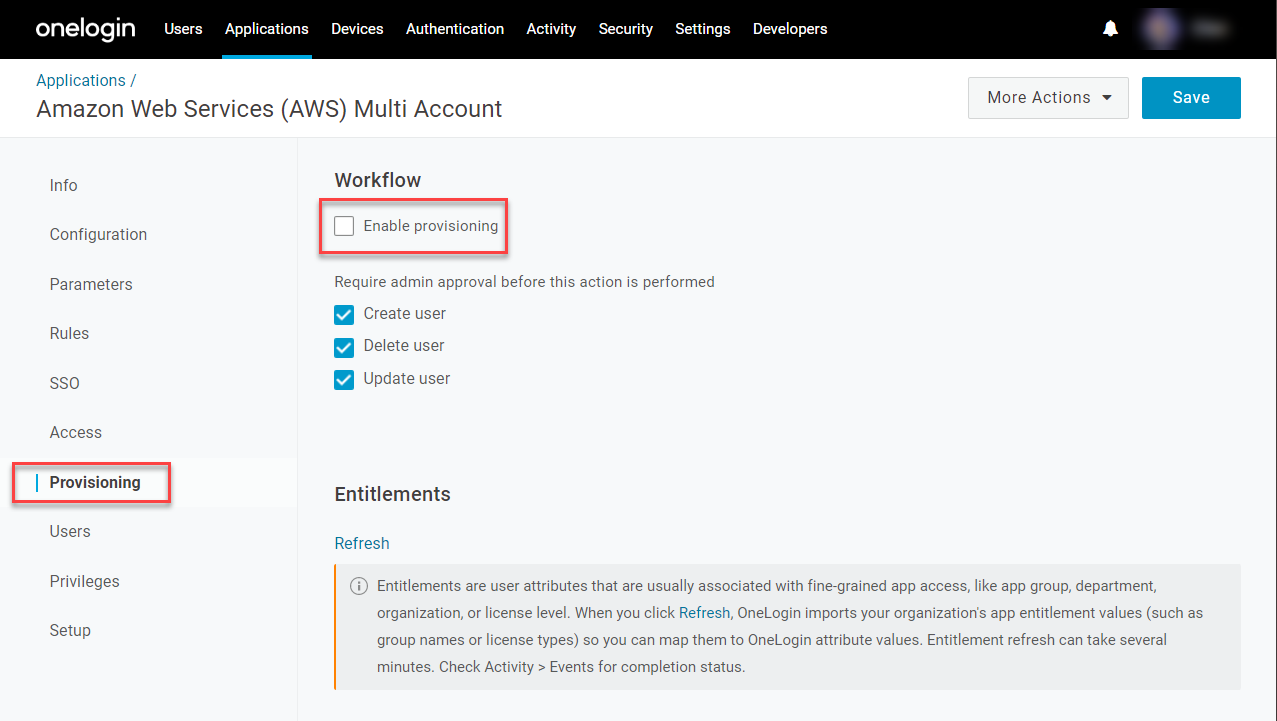
Note: The AWS SAML connection uses the OneLogin provisioning engine to get AWS account and role values, but AWS SAML-based SSO is role-based, not user-based, and therefore does not support actual user provisioning.
-
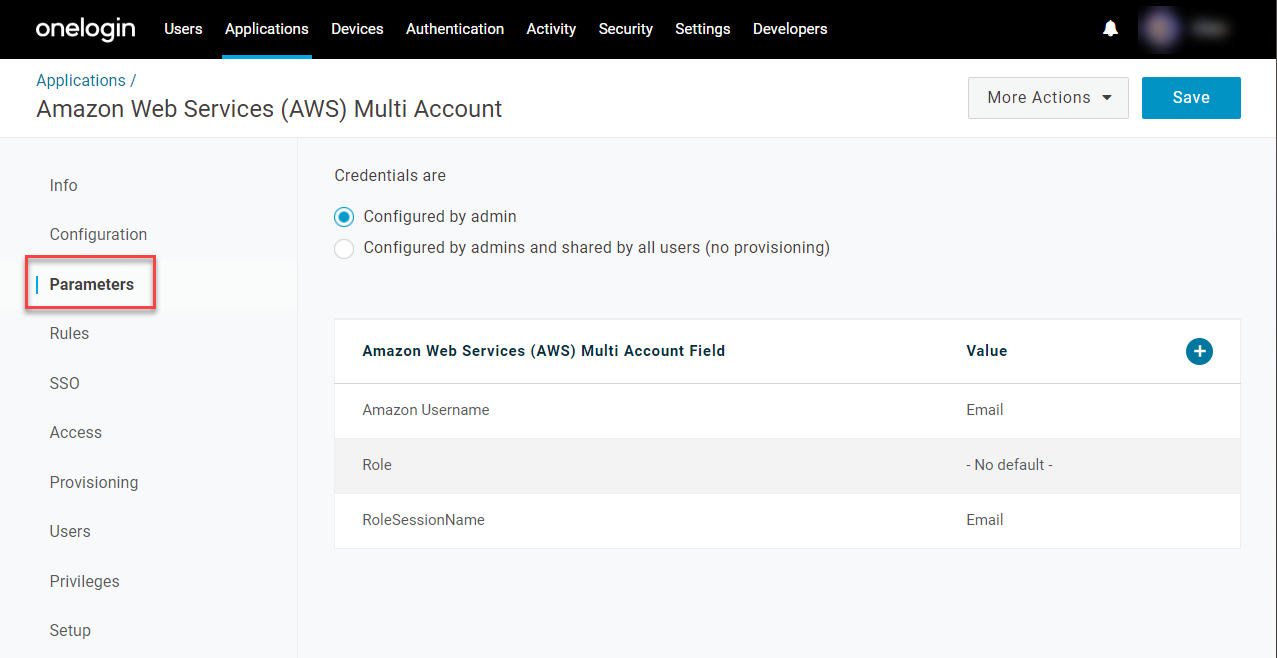
Go to Parameters and assign the following values:
- The Amazon Username must be between 2-32 characters long and cannot contain spaces. By default, it is set to Email, but if your users have email addresses greater than 32 characters, use Username instead.
- The Role should have - No default - selected.
- The RoleSessionName is the user identifier indicated while the session is active. Like the Amazon Username, it defaults to Email, but if your users have email addresses greater than 32 characters, use userPrincipleName instead.
Optional: Session Duration
In AWS, the default session duration is 3600 seconds (60 mins), but you can override this value to limit or extend your users' sessions if desired.
-
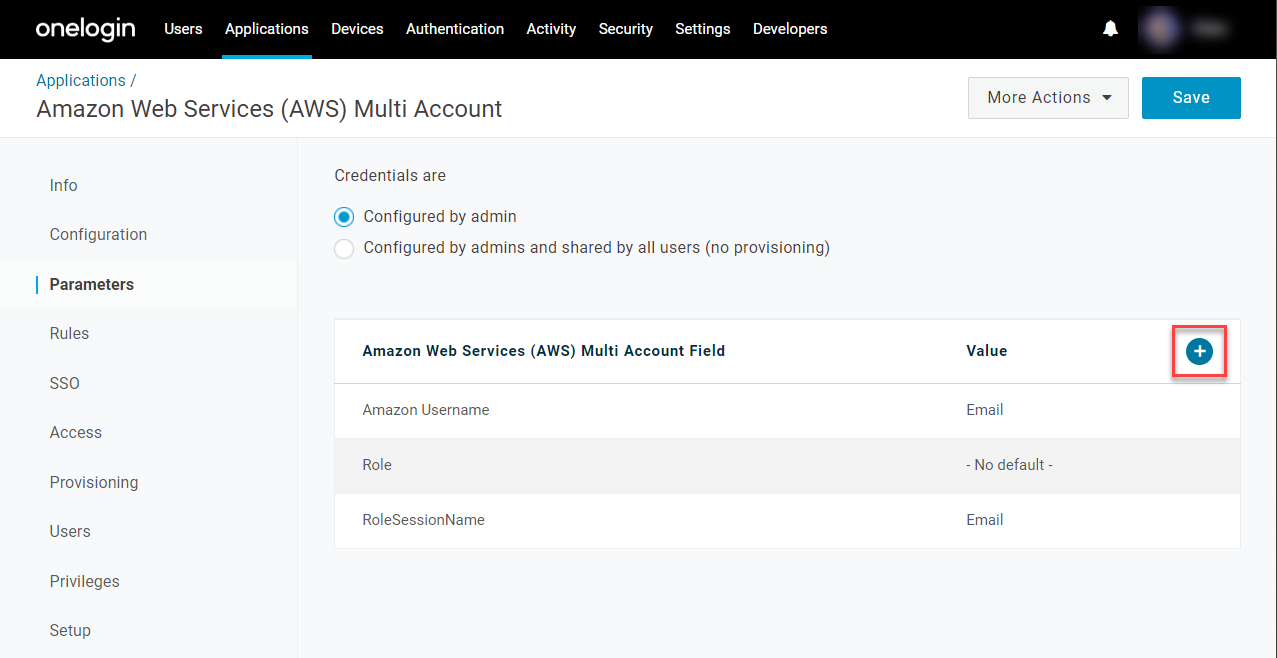
Click + to create a new parameter.
-
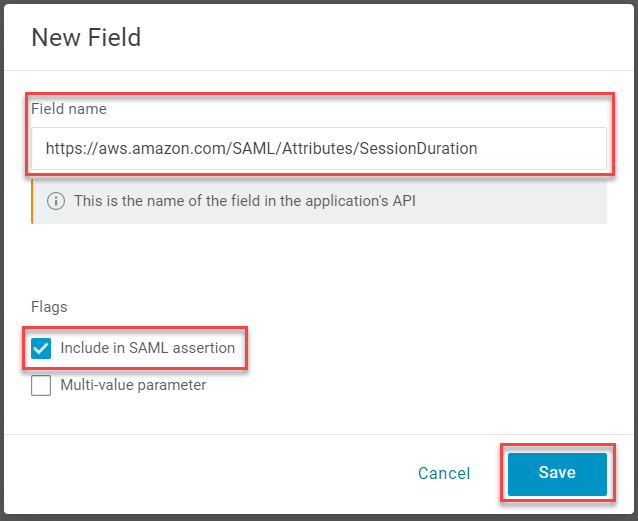
Set the Field name to https://aws.amazon.com/SAML/Attributes/SessionDuration. Select Include in SAML assertion and click Save.
-
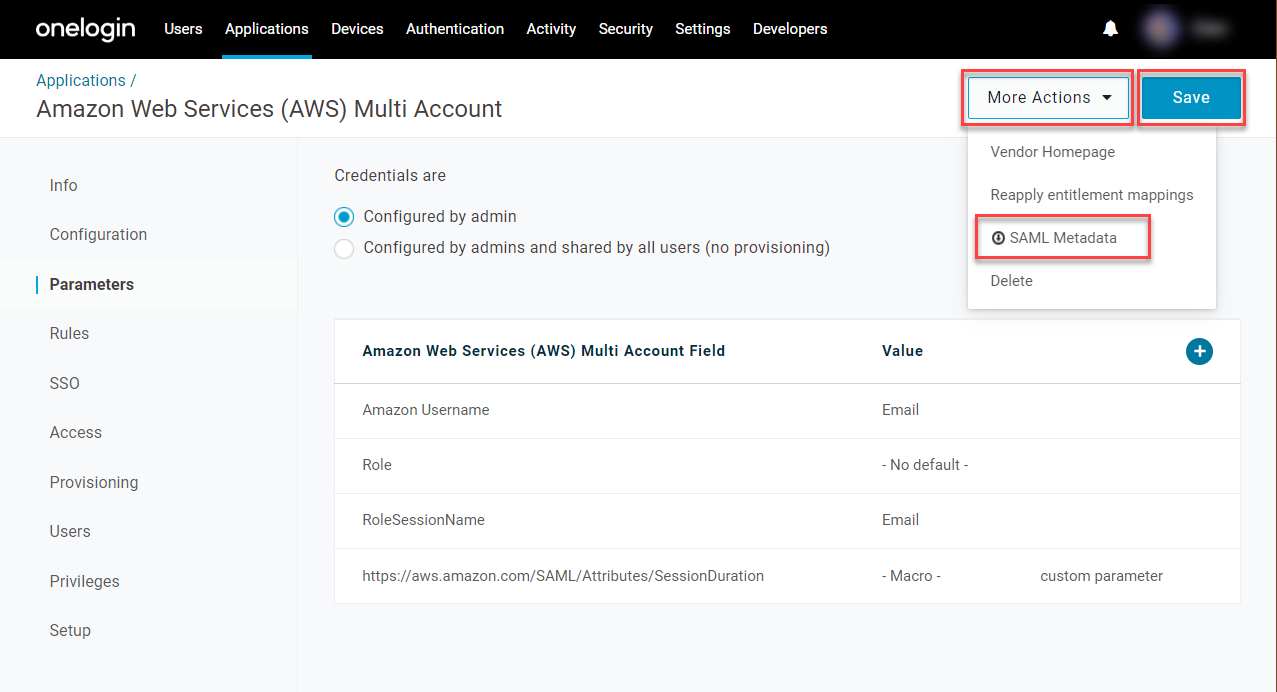
If you want all users to have the same session duration, set the Value to - Macro - and enter your preferred duration in seconds. The number can be anywhere between 900 (15 minutes) and 43200 (12 hours). Click Save.

-
If you want the session duration to vary between different users or groups of users, create a Custom User Field to contain the duration value and select this new field as the parameter's Value. The field can be set individually by editing a user, or broadly mapped to different roles, groups, or user attributes.
- Save your changes and open More Actions to download your SAML Metadata and store it in a safe place. You will need this file when you configure your AWS accounts with OneLogin in the next section.
Configuring OneLogin as an Identity Provider for Each AWS Account
Repeat this section for each AWS account that you want your users to be able to access through OneLogin.
-
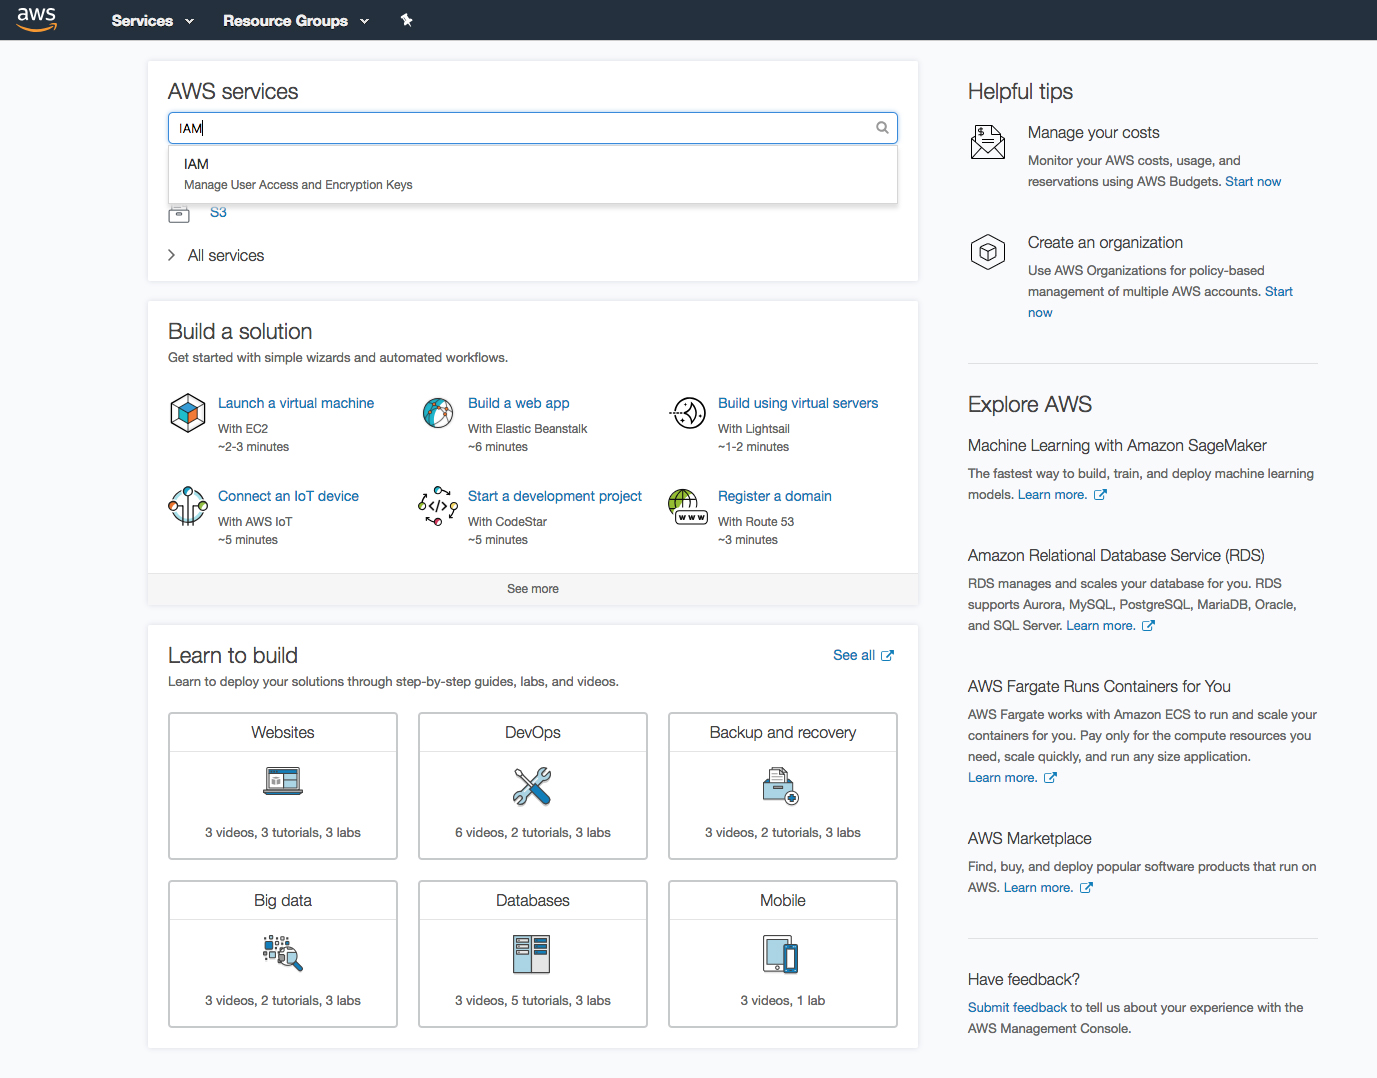
In your Amazon Web Services Management Console, search for and select IAM.
-
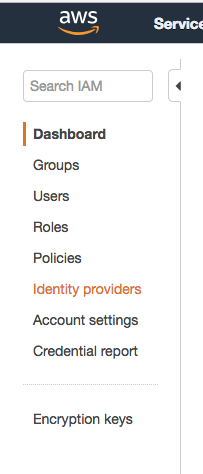
In the Identity & Access Management (IAM) console, select Identity Providers from the left menu.
-
Click Create Provider. For the Provider Type, select Choose a provider type, then choose SAML from the dropdown menu.
-
Enter a name for the Identity Provider. For Metadata Document, click Choose File to upload the SAML metadata XML file that you previously downloaded from OneLogin. Verify your configuration and click Create.
-
Make note of the Provider ARN. You will provide this Amazon Resource Name for each AWS account when you configure your AWS Multi-Account connector in OneLogin in a later step.

Enabling AWS Roles for SAML Federation in OneLogin
Repeat the steps in the following sections for any AWS roles that want your users to be able to access through OneLogin.
Pro Tip! If you haven't already, we recommend that you give your account an alias before proceeding. This will both make it easier for your users to see what account and role to select when they log in to AWS via OneLogin, and make it easier for you to recognize the account/role pairs that appear when you configure the AWS connector in OneLogin in a later section. If your accounts don't have names, the account ID will be used.
- Log in to the AWS Identity & Access Management (IAM) console and click Customize next to the IAM users sign-in link.

- Enter a user-friendly account alias and click Yes, Create.
Editing Existing Roles to Use OneLogin as the SAML Provider
-
In your AWS IAM console, go to Roles and select the role you want to edit.
-
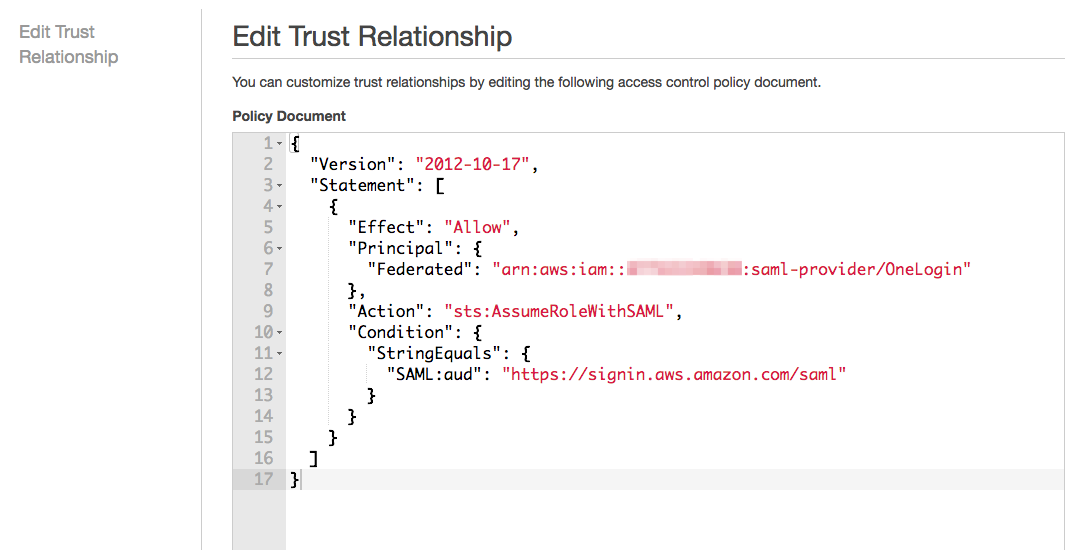
Expand the Trust relationships tab and click Edit trust relationship.
-
Edit the trust policy as needed to include OneLogin as the SAML provider and click Update Trust Policy.
Creating New AWS Roles Using OneLogin as the SAML Provider
-
In your AWS IAM console, go to Roles and click Create Role.
-
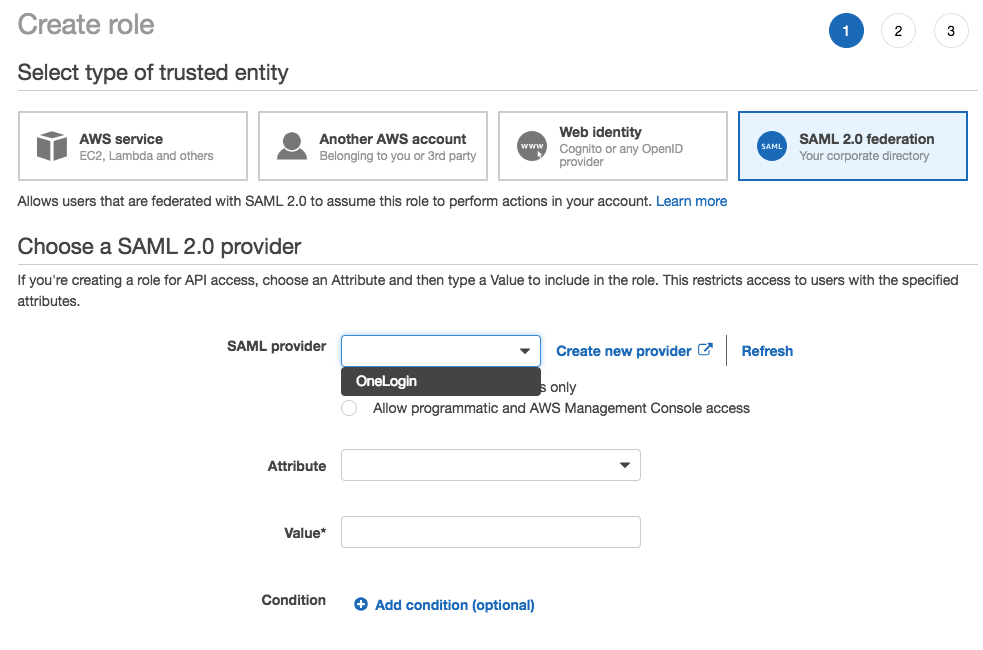
Select SAML 2.0 federation as the type of trusted entity. For SAML provider, choose the identity provider you previously created for OneLogin and select Allow programmatic and AWS Management Console access.
Optional: Attribute Conditions
The SAML:aud attribute is added automatically and set to the URL of the AWS SAML endpoint (https://signin.aws.amazon.com/saml). If you want to add additional attribute-related conditions, click Add Conditions, select the condition, specify a value, and confirm Add Condition.
-
Click Next: Permissions to add permissions policies. AWS offers a variety of preconfigured policies and allows you to directly edit the JSON file.

-
Select the policy you want to apply to the role, and click Next Step.
-
Review your settings and click Create Role.
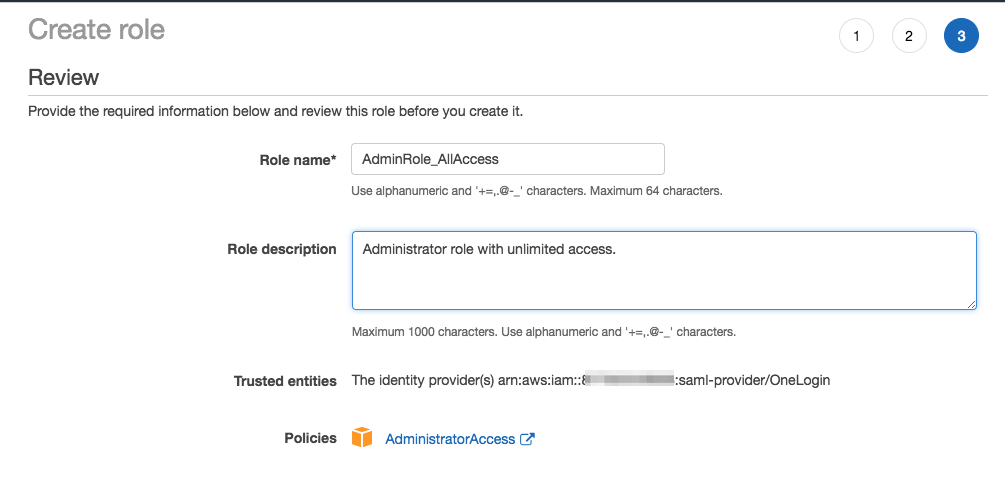
-
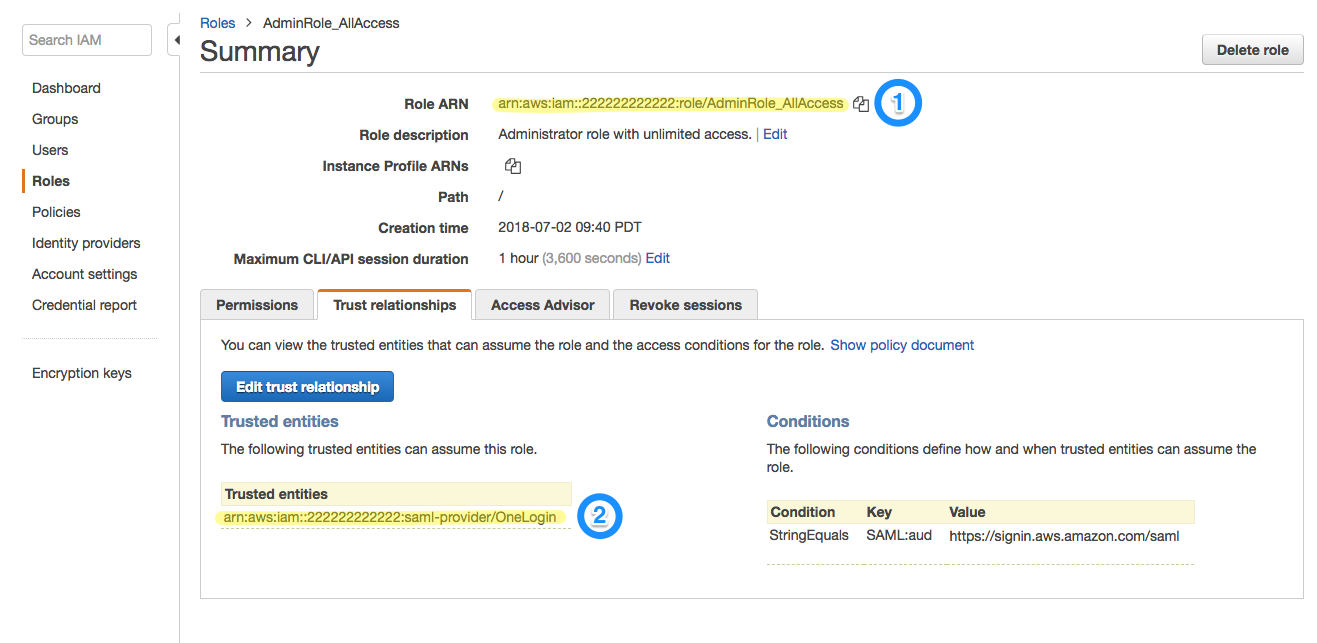
Make a note of the Role ARN and Trusted entities ARN for the identity provider. You will need to provide these values when you assign OneLogin users to AWS roles in the next section.
For further assistance with role creation in the AWS IAM Console, consult Amazon's documentation.
Adding External Roles to Give OneLogin Access to Your AWS Accounts
In addition to the AWS roles that your users access through OneLogin, you must also create an external role for each of your AWS accounts to provide access to OneLogin.
-
Log in to the AWS Identity & Access Management (IAM) console and select Policies from the left menu.
-
Verify that you have an IAM access policy that includes only the permissions ListRoles and ListAccountAliases. If you do not, create a new policy with these permissions. Your policy should be similar to this one:
{
    "Version": "2012-10-17",
    "Statement": [
        {
            "Action": [
                "iam:ListAccountAliases",
                "iam:ListRoles"
            ],
            "Effect": "Allow",
            "Resource": "*"
        }
    ]
}
-
Select Roles from the left menu and click Create Role.
-
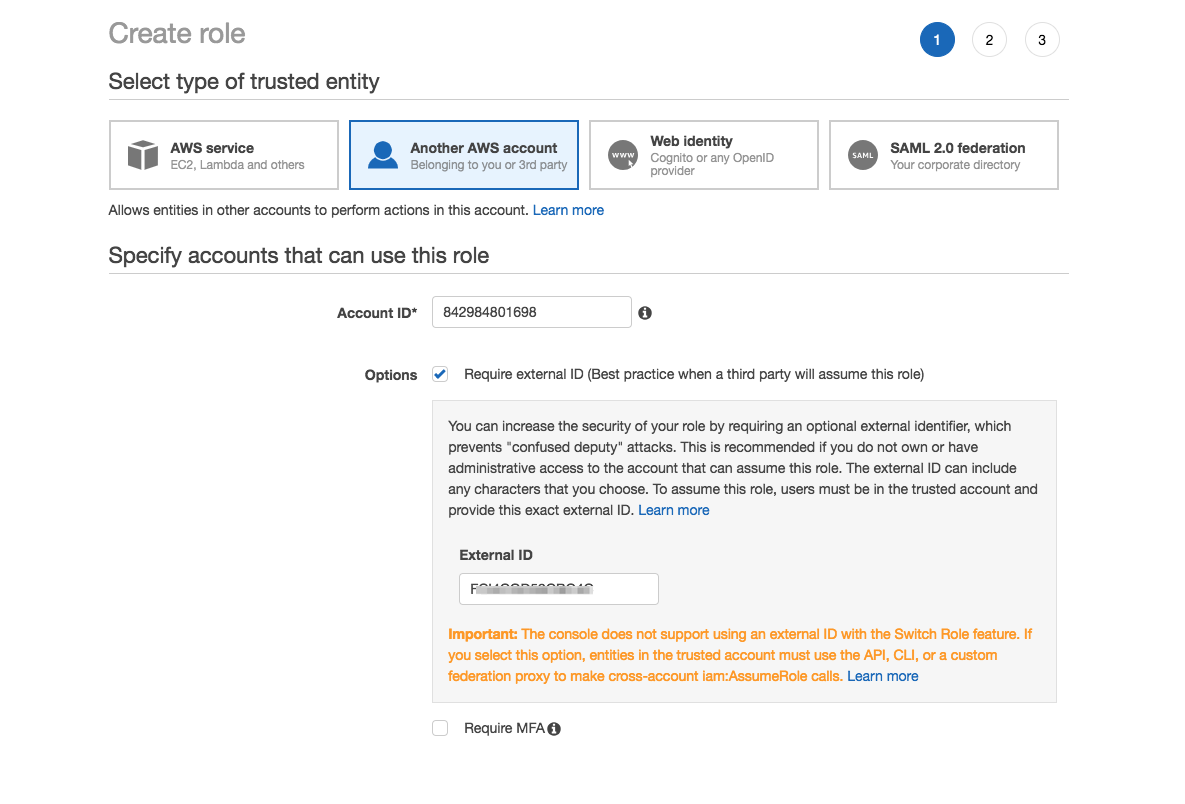
Choose Another AWS account as your trusted entity. In the Account ID field, enter the OneLogin account ID: 842984801698.
If you are using GovCloud, enter 544144431229 instead.
Select Require external ID. In the External ID field, enter the OneLogin External ID that you previously generated in your OneLogin admin console. Click Next: Permissions.
-
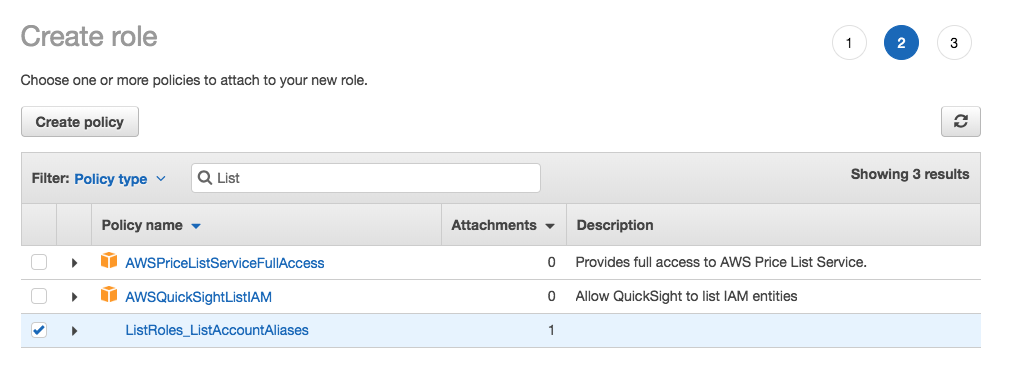
Search for and apply the ListRoles_ListAccountAliases permissions policy. Click Next: Review.
-
Name your role, using the same External Role Name that you provided when you initially configured the AWS connector in OneLogin. Add a description, review the role, and click Create Role.
This role must have the exact same name for each account you configure; if the names differ even slightly, an error will appear in your event log.
Completing Your AWS Multi-Account Configuration in OneLogin
-
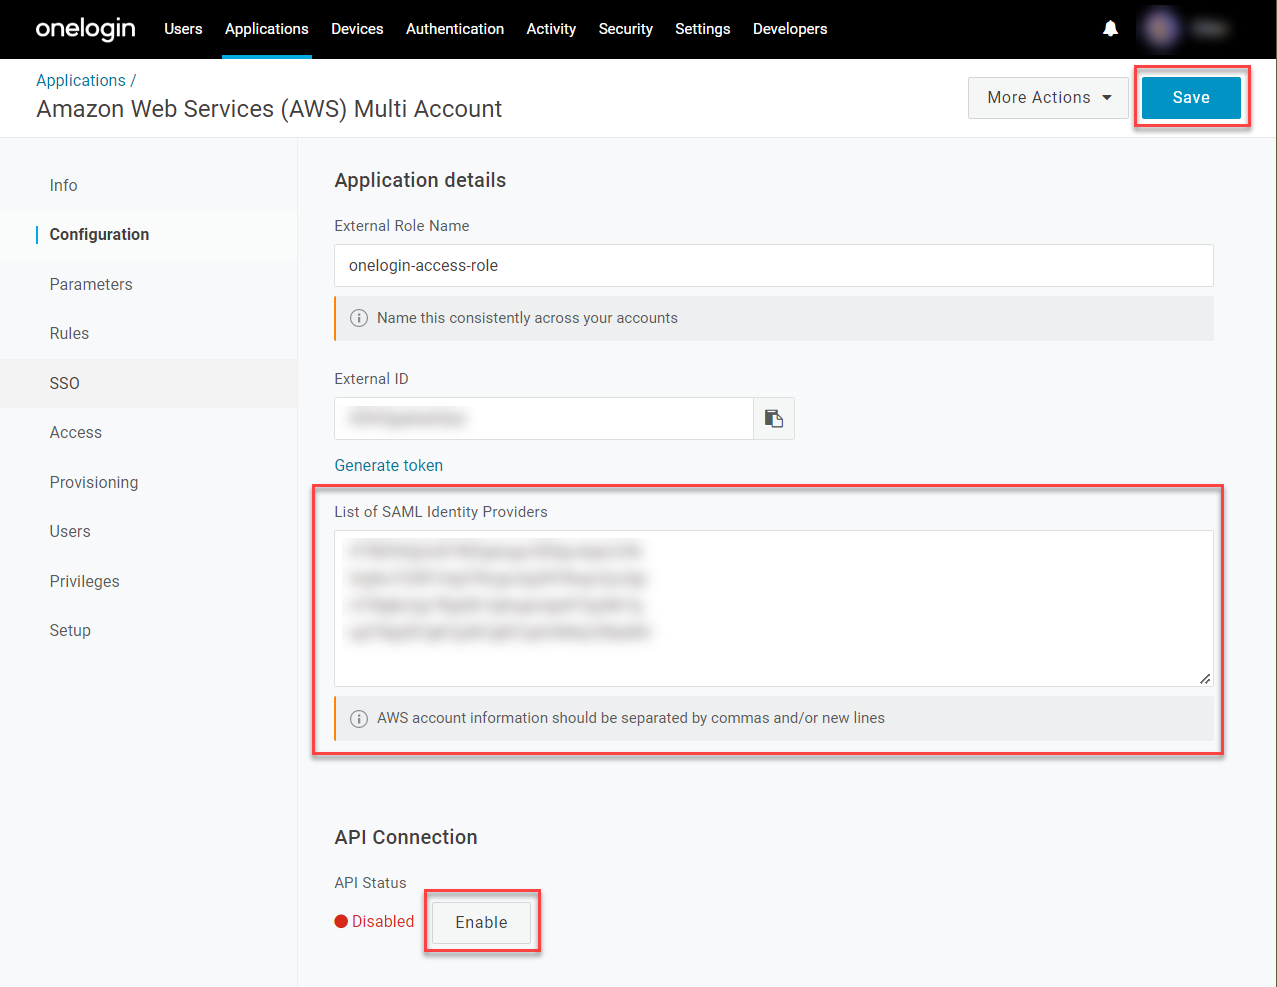
Return to the AWS Multi Account app in your OneLogin admin portal and go to Configuration.
-
Under List of SAML Identity Providers, enter the Identity Provider ARN for each AWS account that you previously enabled for OneLogin SSO, separated by commas or by line breaks. Click Enable under API Connection and Save your changes.
-
Go to Provisioning and click Refresh under Entitlements to allow OneLogin to use the AWS API to fetch your newly enabled AWS accounts and roles.
-
If needed, go to Access to apply any User Roles and Security Policies that you want to use to control access to the AWS Multi Account app.
-
Go to Rules to set the rule mappings that will assign your users to specific AWS roles. Create a new rule for each group of users that you want to grant access to a given account/role pairing in AWS.
 In this example, we've used the condition MemberOf > contains > techops, to apply the rule to all users who are members of the Active Directory "techops" group and give them access to their relevant Tech Ops role in AWS.
If your AWS account/role pairs are not available in the Actions dropdown, ensure that you've refreshed the entitlements in Provisioning. If they appear but only as strings of numbers or account IDs and you're having trouble distinguishing the correct account/role pairs, you can give your accounts aliases to make them easier to identify.
-
Save your changes, then open More Actions and click Reapply provisioning mappings from the drop-down menu.
You must reapply mappings any time you create or update rules, or your users' AWS accounts and roles may not be included in the SAML assertion when they use OneLogin SSO to log into AWS.
-
Going forward, when your users long into AWS through OneLogin, they will now be presented with an AWS page that lets them choose from among the accounts and roles you've given them access to.
Removing Identity Provider ARNs
If you later choose to remove an AWS role and delete its corresponding Identity Provider ARN from the List of SAML Identity Providers, you must also remove any rules that reference the deleted role. Otherwise, the rule will generate an invalid entry when it tries to call on the deleted ARN, causing AWS to reject any SAML SSO and fail to log in. After ensuring you have no invalid rules, refresh your entitlements and reapply your mappings as described above, then test your SSO to ensure users can log in.
|