| This article describes how to configure OneLogin to provision users to NetSuite.
Enable Provisioning
- Go to Applications > Applications, and select NetSuite.
- On the Configuration tab, connect to the NetSuite API.
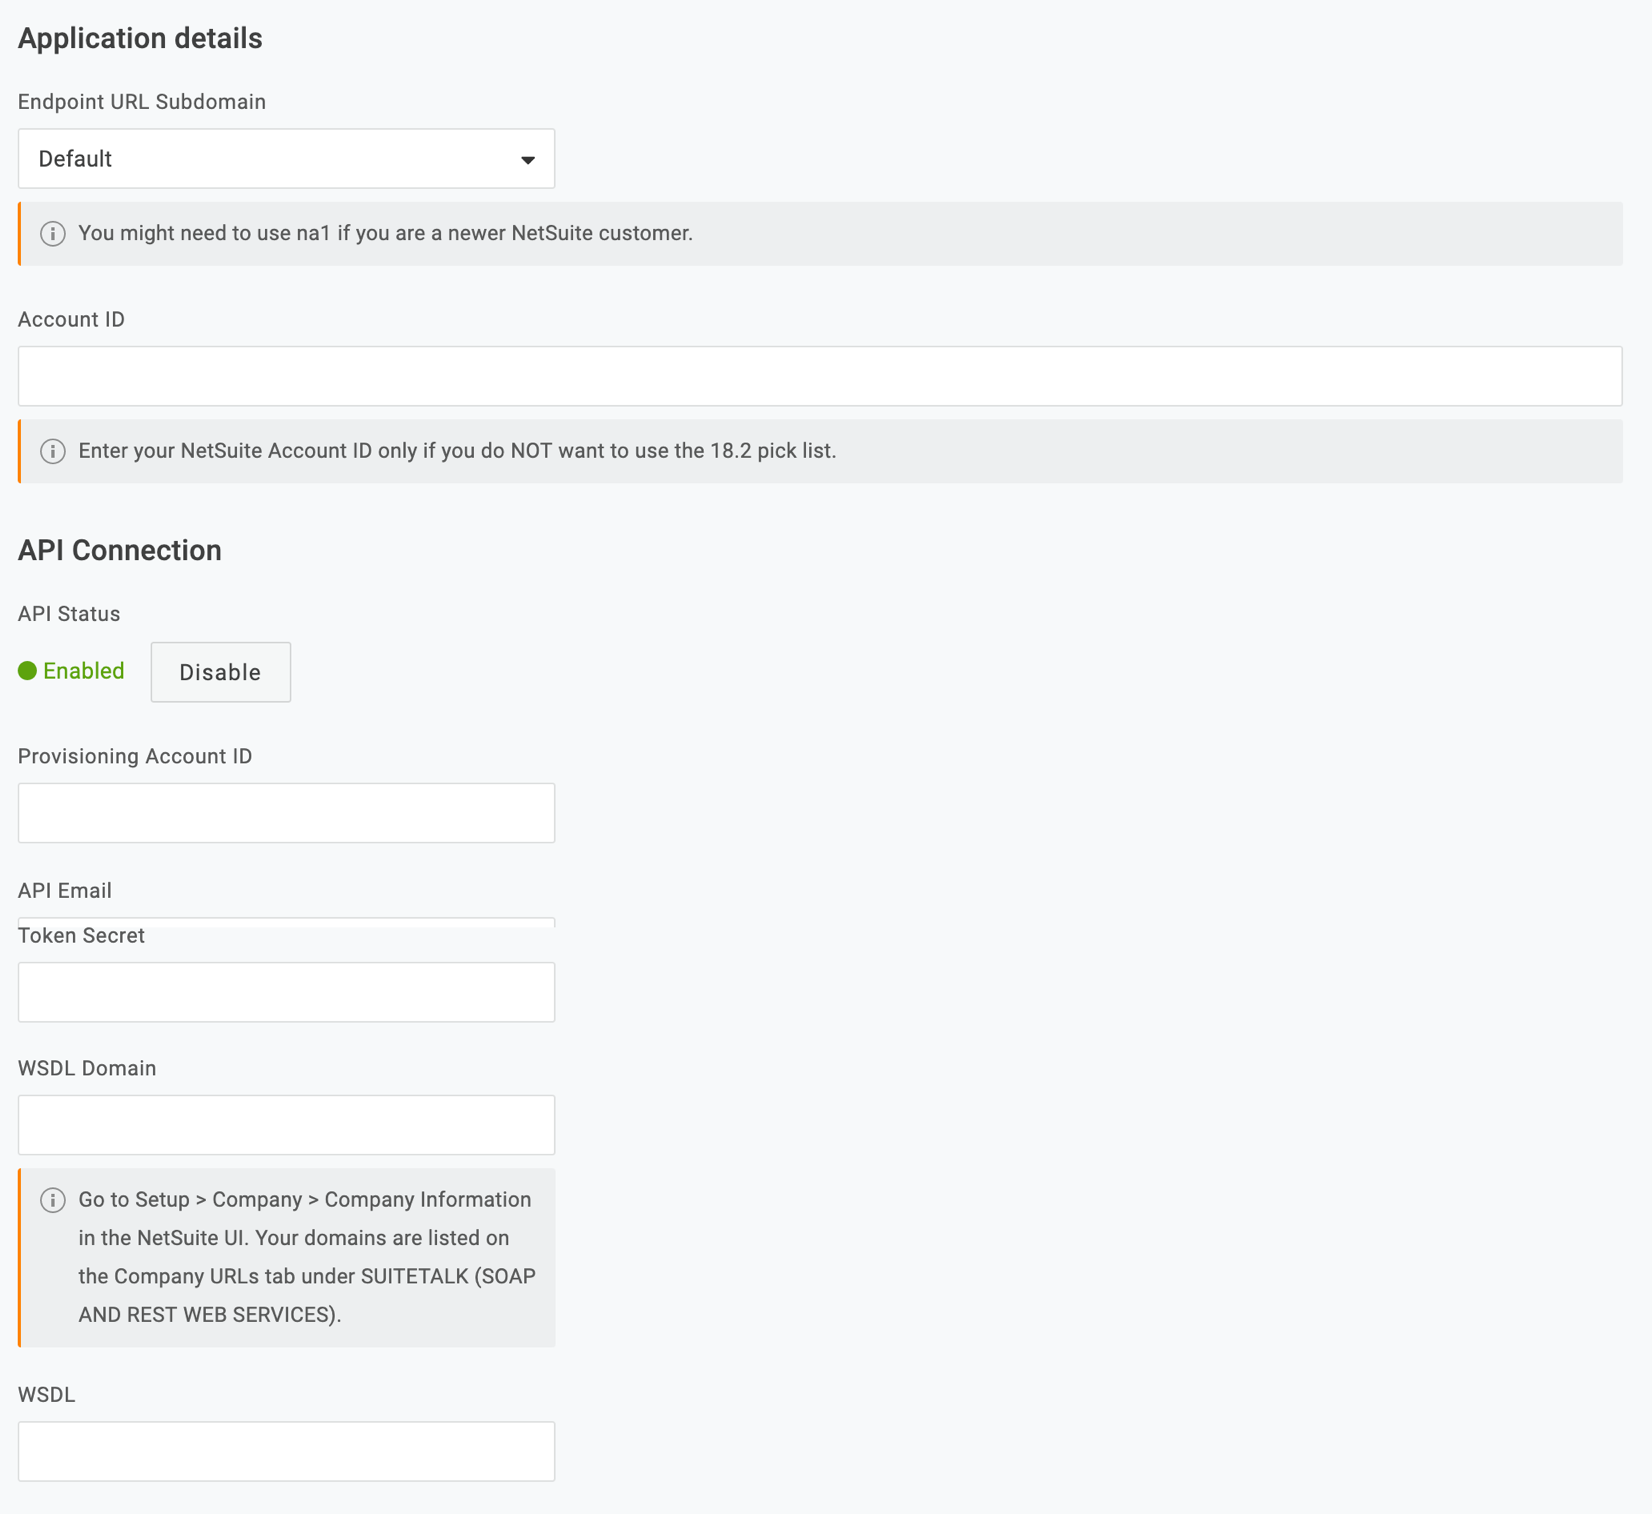
- In the Provisioning Account ID field, enter your NetSuite Account ID.
- Enter your NetSuite administrator credentials in the API Username and API Password fields.
- Click Connect. If the connection is successful, the API Status icon switches to
 . .
In the NetSuite UI, go to Setup > Company > Company Information. Locate & copy your domain on the Company's URL tab under SUITETALK (SOAP AND REST WEB SERVICES).

On the Provisioning tab, enable the provisioning option and import NetSuite entitlement values.
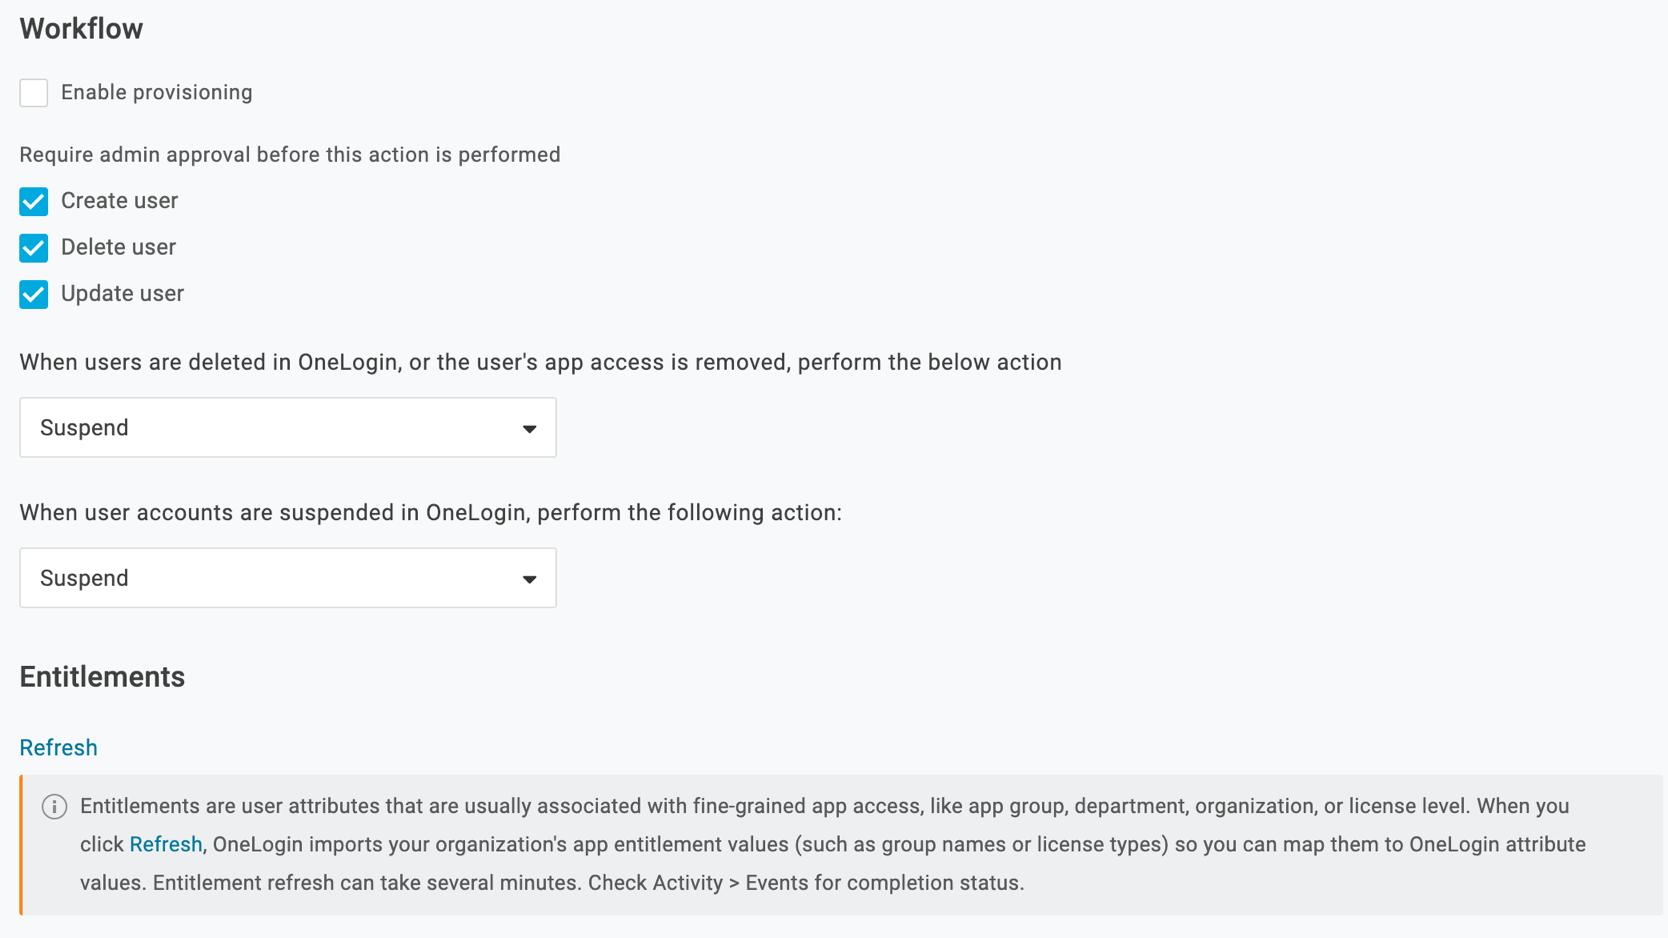
- Select the Enable provisioning for NetSuite option.
- Choose which provisioning actions require administrator approval. For any action you select, a OneLogin administrator must go to Users > Provisioning and manually approve each action for provisioning to complete. Clear these options if you want OneLogin to provision new users and user updates to NetSuite without administrative approval.
- Select what happens to a user in NetSuite when that user is deleted from OneLogin. Choose between Delete, Suspend, or Do Nothing.
- Click Refresh to import NetSuite entitlement values, like Role or Employee Type. Click Save.
Configure Parameters
-
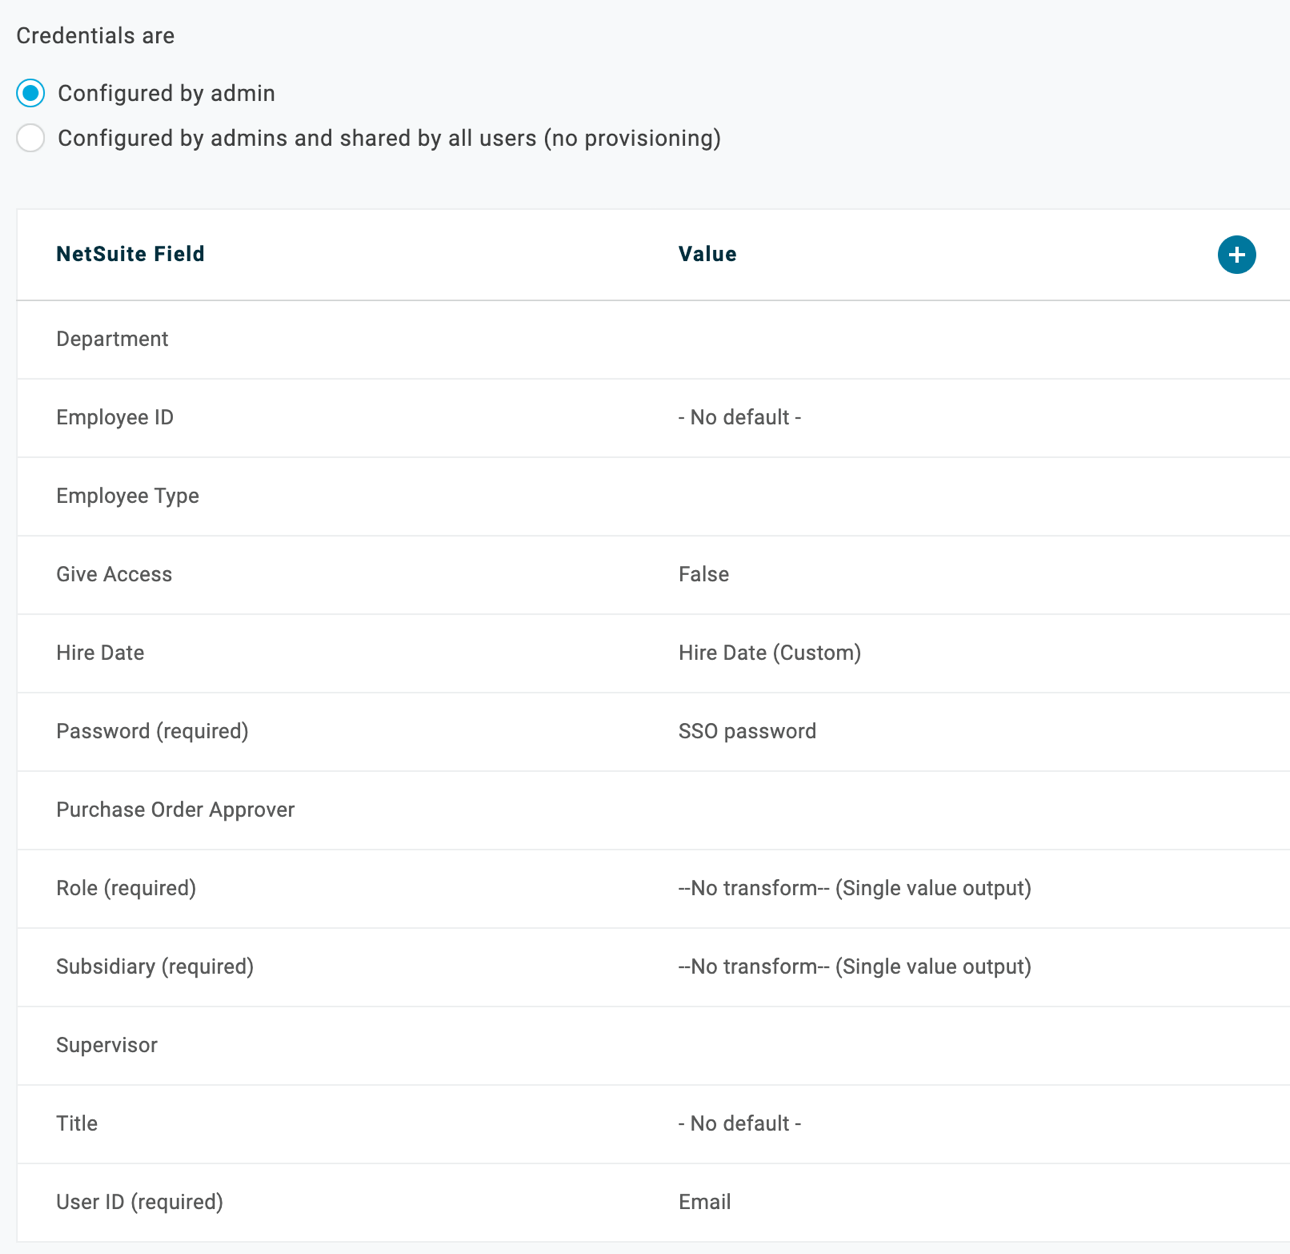
Go to the Parameters tab to map NetSuite attributes to OneLogin attributes.
These mappings tell OneLogin how to populate user attribute values to NetSuite when provisioning users from OneLogin. You can use these parameters to create provisioning rules.
-
For each field that you want to include in user provisioning, click the parameter row to open the Edit Field dialog, where you can change the default OneLogin value and select the Include in User Provisioning option.
Required fields: Password, Role, and Subsidiary are required; if they don't hold OneLogin values for a user, that user will fail to be provisioned to NetSuite. For each of these fields, you must open the Edit Field dialog and select Include in User Provisioning. You must also ensure that these fields hold values in the user's login record.
Custom fields: To provision the Hire Date and Employee ID fields, you must create custom OneLogin fields to hold these values. For more information, see Provisioning Custom User Fields.
Note: Some legacy Netsuite applications are required to define the datacenter URLs. If this matches your use case, add WSDL and WSDL Domain as Parameters, then configure them as follows:
WSDL DOMAIN: https://[ACCOUNT-ID].app.netsuite.com
WSDL: https://[ACCOUNT-ID].suitetalk.api.netsuite.com/wsdl/v2018_2_0/netsuite.wsdl
Click Save when you are done editing field - value mappings.
Configure Provisioning Rules
- Select the Rules tab to create and configure a NetSuite Rule Mapping.
- Click New Rule to bring up the New Mapping pane.

- Name your new Mapping.
- Set the Action for your mapping and the Conditions that will trigger it. In this example, when Conditions = DistinguishedName > equals > Josh Ames, Perform these actions = Set Roles >Administrator, it’s saying that ‘If provisioning encounters a User named Josh Ames, assign him into the NetSuite Role of ‘Administrator’.
- Click Show Affected Users to makes sure that the mapping will affect the desired users.
- Click Save.
- Go to the More Actions menu and select Reapply provisioning mappings. Do this every time you create or update a mapping to ensure that the most recent mappings are being applied to your users.
Provision Custom User Fields
The parameters Hire Date and Employee ID allow you to map OneLogin custom user fields holding hire date and employee ID values to the NetSuite Hire Date and Employee ID fields, enabling those values to be included when you provision users to NetSuite.
Important! In order to use these parameters, your account must support Custom User Fields.
To set up provisioning to include hire date:
- Log into your OneLogin account as an administrator.
- Go to Users > Users.
- In the More Actions menu, select Custom User Fields and click New User Field.
-
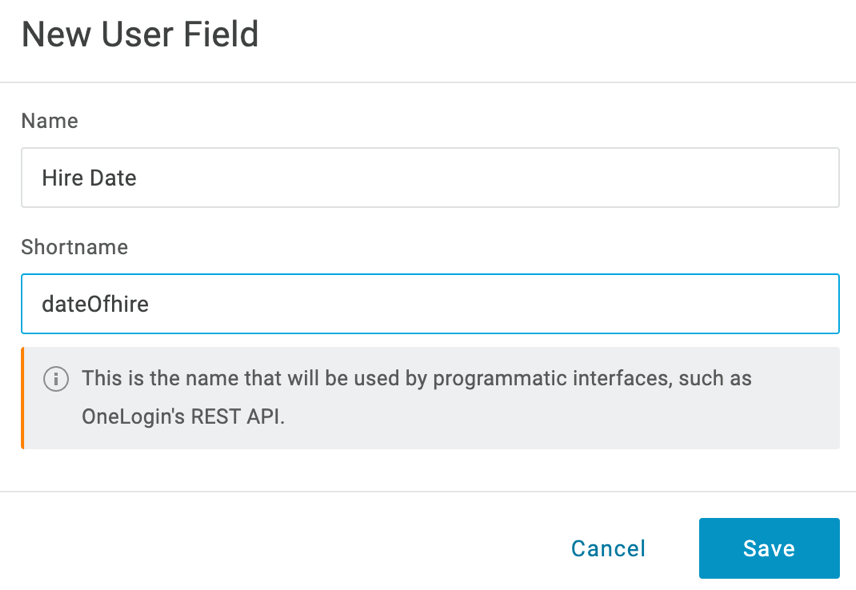
Name your custom field, and then provide a Shortname.
For this example, Hire Date and dateOfhire were used. Click Save.
- Go to Users > Users and select the user or users you wish to confirm Hire Date for.
- Under your custom Hire Date field, enter the timestamp format of: YYYY-MM-DDTHH:MM:SS+Z.

You may use any numbers, as long as they are in this format, as they will be overwritten by the timestamp from AD. If left empty, the timestamp will default to today's date in the GMT timezone.
- Click Save.
- Go to Apps > Apps > NetSuite, and select the Parameters tab.
-
Click the Value associated with the Hire Date Field, and choose your Hire Date custom attribute.
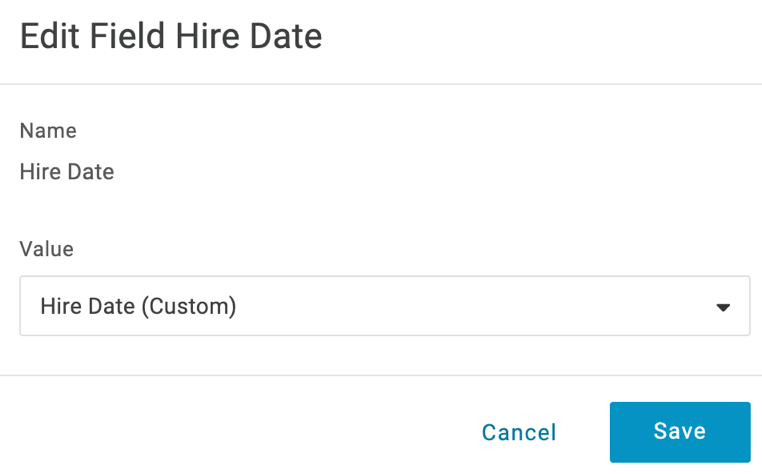
- Click Save.
Users are provisioned into NetSuite with a Hire Date.
To set up provisioning to include Employee ID:
- Log into your OneLogin account as an administrator.
- Go to Users > Users.
- In the More Actions menu, select Custom User Fields and click New User Field.
-
Name your custom field, and then provide a Shortname.
For this example, Employee Id and emplId were used. Click Save.

- Go to Apps > Apps > NetSuite, and select the Parameters tab.
- Click the Employee ID row to open the Edit Field Employee ID dialog, and select the custom field (in our example, Employee ID) as your OneLogin Value.
-
Enter the Employee IDs for the users you want to provision to NetSuite.
If you store Employee IDs in Active Directory, you can map the AD attribute to the custom field that you created for Employee IDs.
Alternatively, you can enter Employee IDs directly in the OneLogin user record for each employee you want to provision to NetSuite:
- Go to Users > Users and select a user.
- Enter the user's employee ID in the custom field (in this example, Employee ID).
Users will be provisioned into NetSuite with an Employee ID.
Test Provisioning
To confirm that provisioning from OneLogin to NetSuite is working, add a user to OneLogin, give that user access to the NetSuite app in OneLogin, and go to Users > Provisioning to approve the provisioning event, if necessary. When the user is marked as Provisioned, go to NetSuite and confirm that the new user has been added.
|