This topic describes how to import users from Workday to OneLogin using Workday Custom Reports. By doing so, Workday is treated as your user directory of record. We recommend that you read How to Configure Workday Directory Connectors to understand what your options are.
Note: If you just want to set up SSO for Workday, see Configuring SAML for Workday.
Prerequisites: Familiarity with the attributes in your Workday user list, specifically the editable Default Fields and XML Overrides.
How to Set Up Import from Workday to OneLogin
- Log into Workday as an administrator.
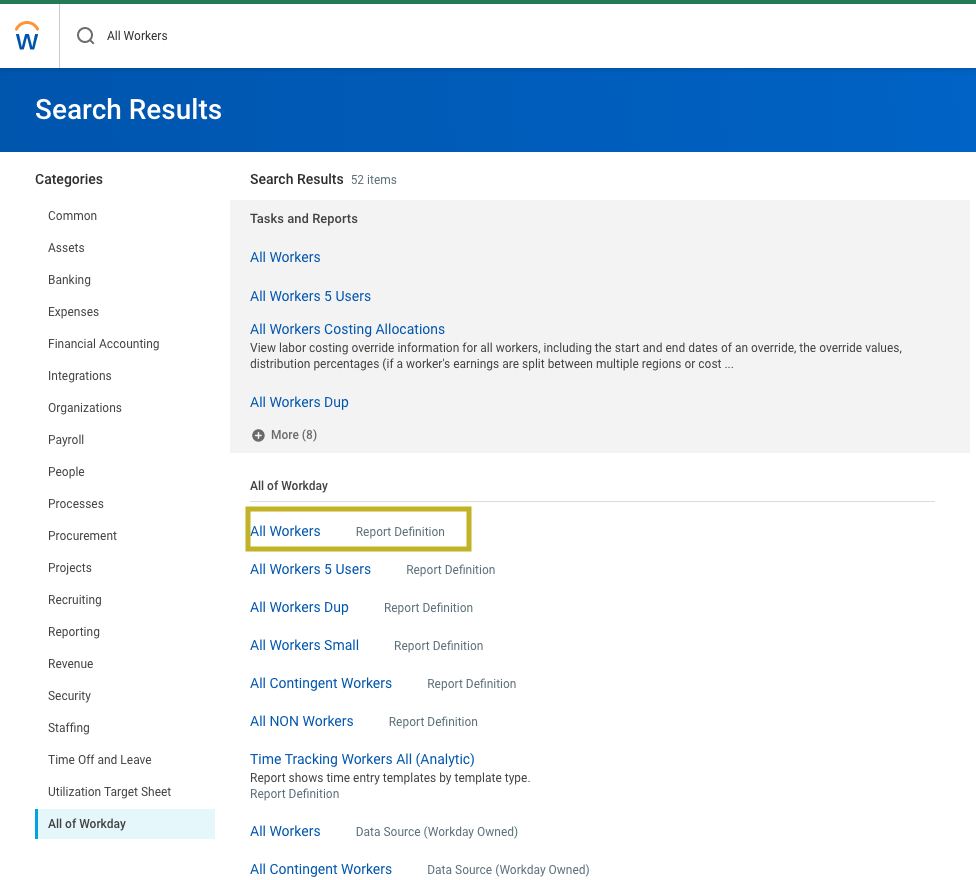
- Search for “All Workers”. If a report titled All Workers appears, select it. If it doesn't appear, please see Creating a Custom Workday Report.
Note: check with your Workday administrator to ensure that the reports generated (at minimum) contain First Name, Last Name, Employee ID and Username, as those will be passed to OneLogin.
- On the redirected page, ensure that Enable as a Web service is set to Yes.
- At the top, click on Actions > Web Service > View URLs
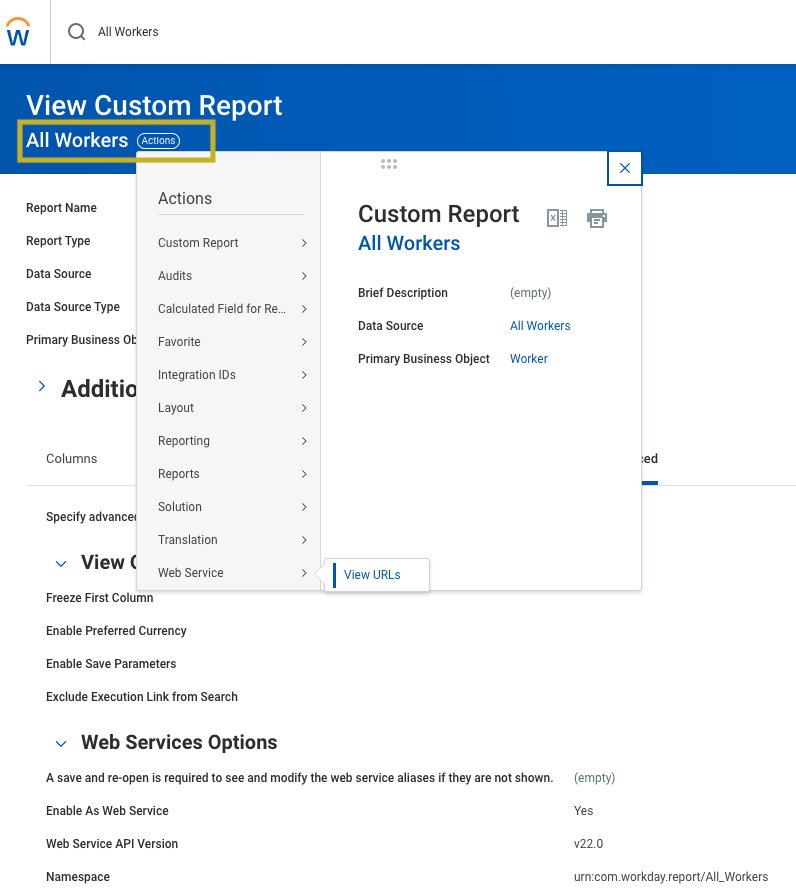
- If asked for a start effective date, select the current date, then click OK.
- In the next window, right click on JSON and click Copy URL. The URL looks like this:
https://.workday.com/ccx/service/customreport2///?format=json - Right click on XSD and click Copy URL. The URL looks like this:
https://.workday.com/ccx/service/customreport2///All_Workers?xsd
Configure OneLogin
- Log into OneLogin.
- Go to Users > Directories, click New Directory, and select Workday Custom Reports.
- Give the directory a name, then choose OneLogin under Authenticate users in
- Click Save to open the Workday Reports configuration page.
- Ensure that both checkboxes under Importing Users are enabled.
- Under API Settings, enter your administrative username and password.
- Enter the JSON URL. This URL looks like the XSD URL, but xsd at the end is replaced with format=json.
https://.workday.com/ccx/service/customreport2///?format=json - Enter the XSD URL you copied from Workday, which is in this format:
https://.workday.com/ccx/service/customreport2///?xsd - Click Save to generate the directory.
- On the Directory Attributes page, map the custom Workday attribute fields to OneLogin fields.
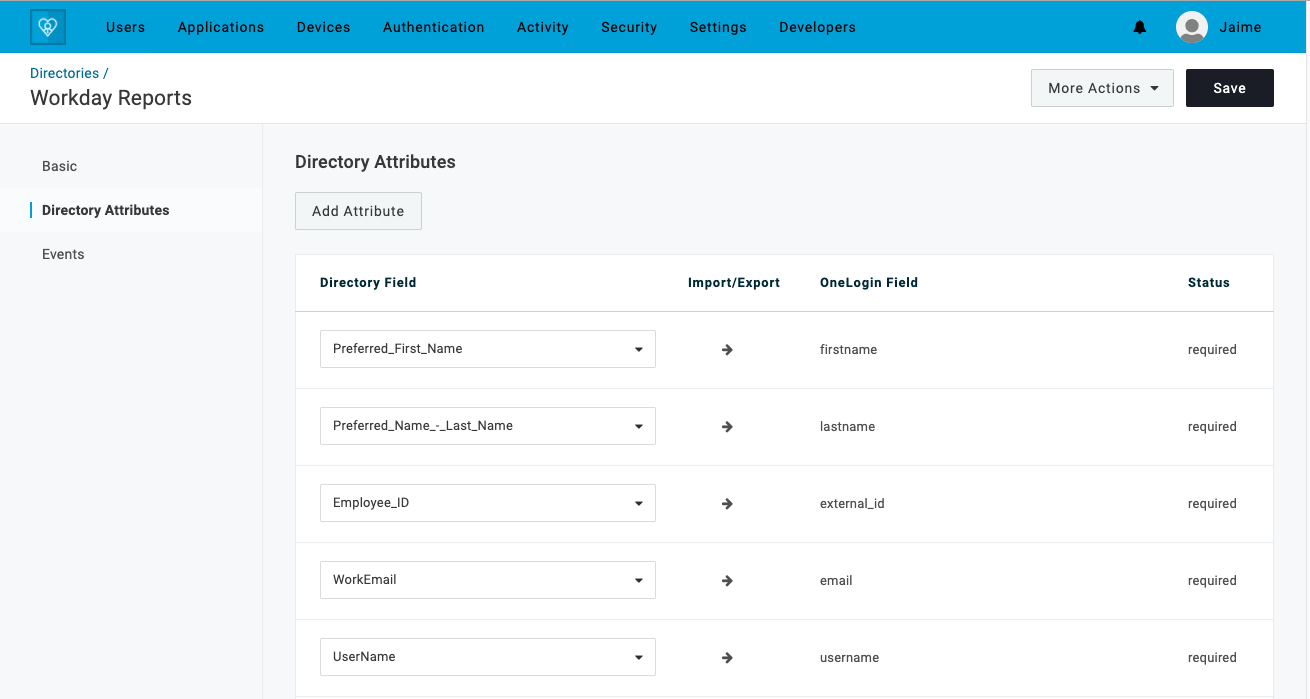
After mapping the user fields according to your account configuration, click Save. Workday is now exporting users with their defined attributes into OneLogin.
Create a Custom Workday Report
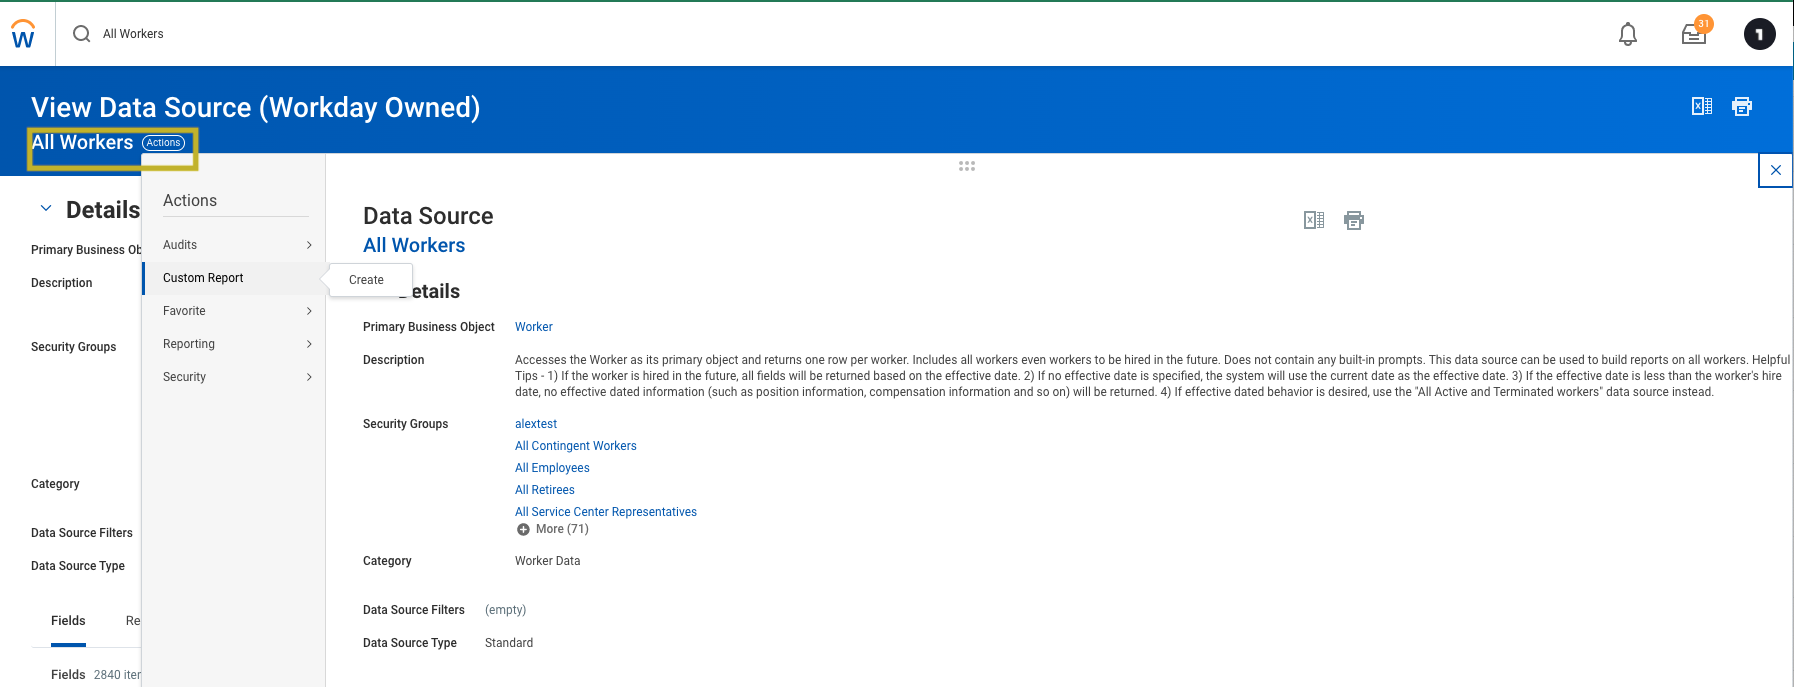
- Connect to your Workday tenant as an Administrator.
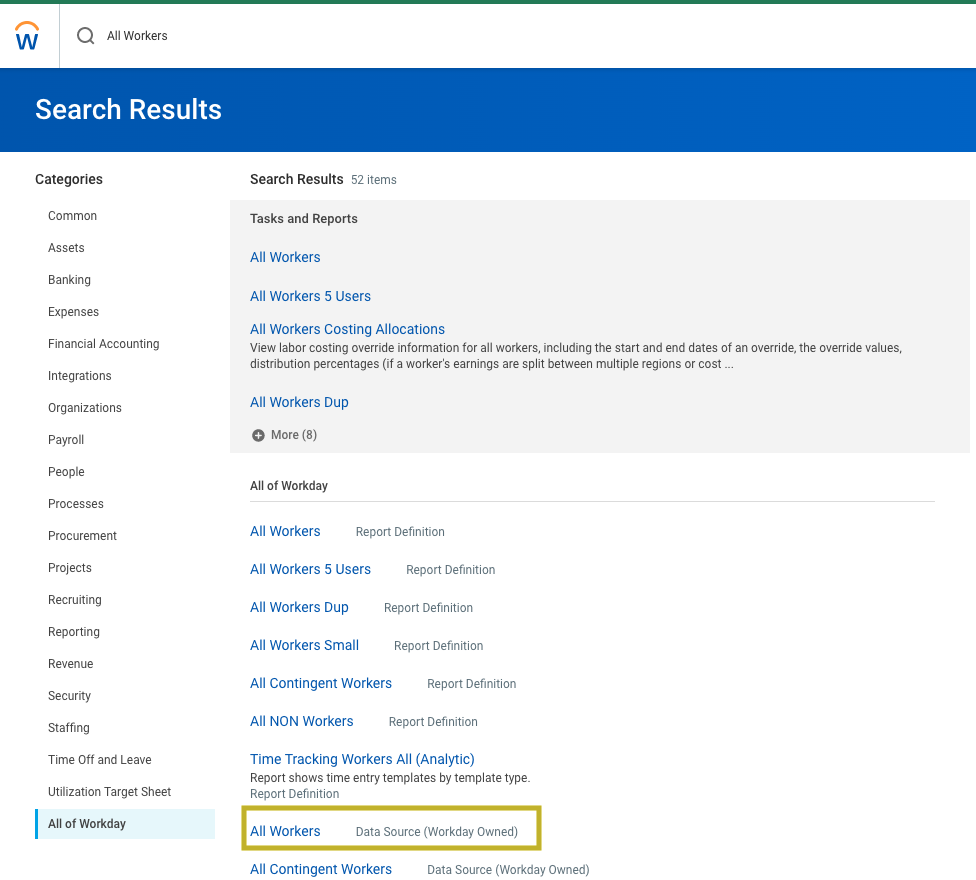
- Search for All Workers, then click All Workers Data Source (Workday Owned)
- Choose Actions > Custom Report > Create.
- Set Report Type to Advanced and check Enable as a Web Service, then click OK.
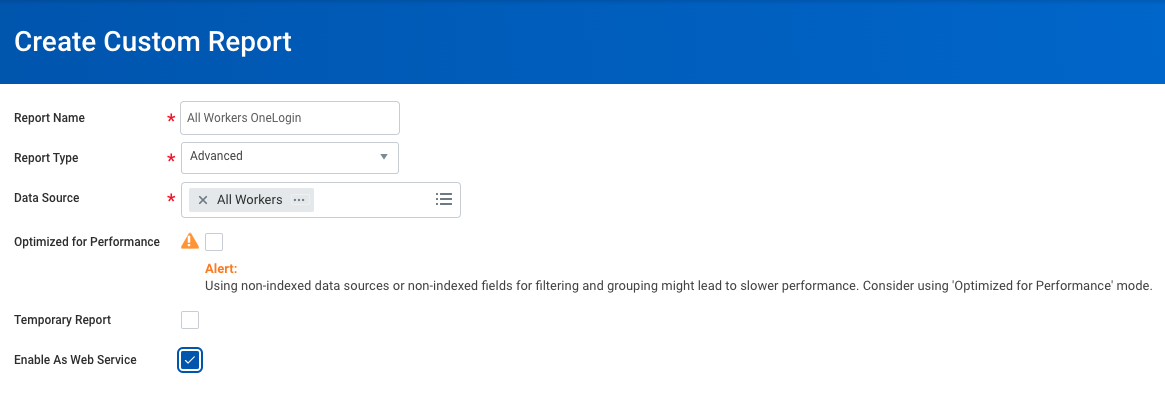
- Refer to the image below for an example of how to set up your columns in Workday. Once yours match the example, click OK.

Set User Status
Users that are created by Workday and imported into OneLogin are set to null by default. If all your organization's users are created by Workday, the simplest solution for setting and changing user statuses is to map a custom user field that fires when a user is created and automatically sets the user status to Active.