This article describes how to upgrade to Office 365 V2 using best practices.
Entitlement migration to Office 365 V2 connector is a manual process. Admins must recreate the configuration for the older Office 365 instance in the new Office 365 V2 instance.
Before you migrate to Office 365 V2, plan a maintenance window for approximately 1 - 2 hours or perform the migration during a period of low traffic to minimize user disruptions.
Note: The use of Groups, provisioning, and Immutable ID differ between versions. Review the documents below before you upgrade to Office 365 V2.
Office 365 Groups and Provisioning
Immutable ID
Configure
To upgrade to Office 365 V2, manually migrate your Office 365 V1 configurations and settings to Office 365 V2.
Note: O365 global admin credentials are required to complete this process.
-
Federate and authenticate your domain in Office 365 V2. For more information, see Enabling OneLogin Provisioning (Please note that the V2 connector differs from V1 with Entitlements and Immutable ID)
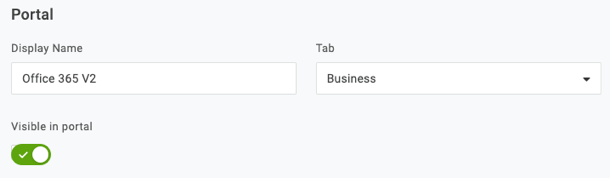
Note: Hide the new Office 365 app to prevent users from launching it from the portal. To hide the new app, go to Applications > Office 365 V2 > Info and deselect Visible in Portal option.
-
Customers using Classic Groups must migrate them to Office 365 Groups. The following Microsoft article details how to migrate older groups.
Upgrade distribution lists to Office 365
-
Refresh Entitlements on the Provisioning tab for your Office 365 V2 instance.

-
Recreate your Rules configuration and reassign settings on the Parameters tab, from Office 365 V1 to the new Office 365 V2 instance.
-
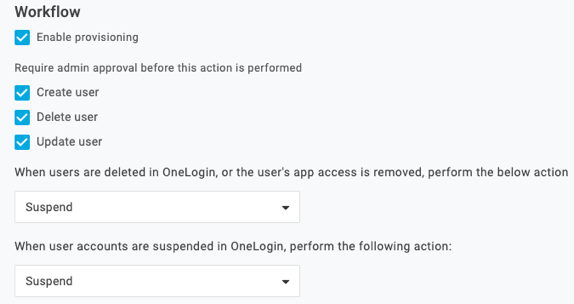
On the Provisioning tab, enable provisioning in Office 365 V2 by selecting the Enable provisioning for Office 365 V2 option. Select Create, Delete, and Update user options, ensuring that Admin approval is required for these actions.
-
Recreate Roles for the Office 365 V2 app on the Access tab. This action adds users to Office 365 V2 and places them in Pending status.
Verify
We recommend you test the V2 connector to verify it's functioning correctly. Testing is important as it minimizes risk by ensuring the connector is configured correctly, prior to activating your V2 instance.
-
On the Users tab in Office 365 V2, select a user for a test. Click on the user to verify that the correct License and Group entitlements are assigned.
-
If the entitlements are correct, approve the pending task to Create the user. If the user already exists, the user reverts to pending status. Approve the pending Update task and verify that the job is successful.
-
Once you complete these steps, verify the user's license and groups with the Office 365 Admin portal. The user can sign in to Office 365. The user signs in to Office 365 V1, while Office 365 V2 is used for provisioning.
Note: Make sure you turn off provisioning for the O365 V1 instance.
Repeat the steps above for multiple users to ensure they can access Office 365 V2.
Activate
Now that you configured and tested the V2 connector, activate it.
-
Change the federation from Office 365 V1 to V2. On the SSO tab, toggle Enable automatic SAML configuration to defederate the Office 365 V1 connector.
Note: It can take 15 mins for the changes to propagate. To verify that the domain is defederated, visit portal.office.com and enter an email (eg. user@company.com). If the domain is defederated, a password prompt appears; if it's not defederated, you're redirected to your OneLogin portal.
-
Once the domain is defederated, federate Office 365 V2. On the SSO tab, toggle Enable automatic SAML configuration to federate the Office 365 V2 connector.
Note: if you received an error stating An error occurred while processing the write request, your system used a non-standard mailnickname value in Office 365 V1 and you need to manually activate the mailNickname variable in the Office 365 V2 app. After you do so, set the value to be - Macro- and {email_name_part}and re-run provisioning for the users.
-
It can take 15 mins for the changes to propagate. To verify that the domain is federated, visit portal.office.com and enter an email (eg. user@company.com). If the domain is federated, you're redirected to your OneLogin portal.
-
Once SSO is verified, navigate back to the Configuration tab of the V2 connector and toggle the application to visible. At this point, go to your preexisting V1 connector and toggle this to hidden. Once you determine the V2 configuration is stable, remove the V1 connector from OneLogin entirely. Before doing this, verify that provisioning is not enabled in the V1 connector.
|