This topic describes how to set up OneLogin as the user provisioning service that syncs users and their attributes between your directory service and Office 365. In this scenario, OneLogin's provisioning engine provides the functionality typically provided by Azure AD Connect in an ADFS-based federation architecture.
For more information about how OneLogin works with Office 365, see Introduction To Office 365 Integration With OneLogin. Note: if your organization uses any workstations running Windows 10 or later, you need to activate your licenses with Office 365. Please see Configure Hybrid Azure Active Directory Join.
Watch Video Training
This article includes the following topics:
Before you begin
Office 365 Groups
The Office 365 V2 connector only supports new Office 365 Groups, also called Unified Groups. The V2 connector doesn't support Classic Groups. There is only one group, Office 365 Groups, with two attributes: mailEnabled or securityEnabled. Distribution Lists are no longer supported.
This change is beneficial as Office 365 Groups provide OneLogin with access to all Office 365 applications within the Office 365 platform. Previously, with Classic Groups, OneLogin could only access Exchange and Azure AD.
Note. Customers using Classic Groups must migrate them to Office 365 Groups. The following Microsoft article details how to migrate older groups.
Upgrade distribution lists to Office 365
Benefits of Office 365 Groups
Enabling OneLogin provisioning to Office 365
Note. You may already have performed steps 1-8 when you configured SSO for Office 365. You do not need to repeat them.
- Close any Office 365 applications that are open in your browser.
- Go to Apps > Company Apps > Office 365.
- Select the Configuration tab.
-
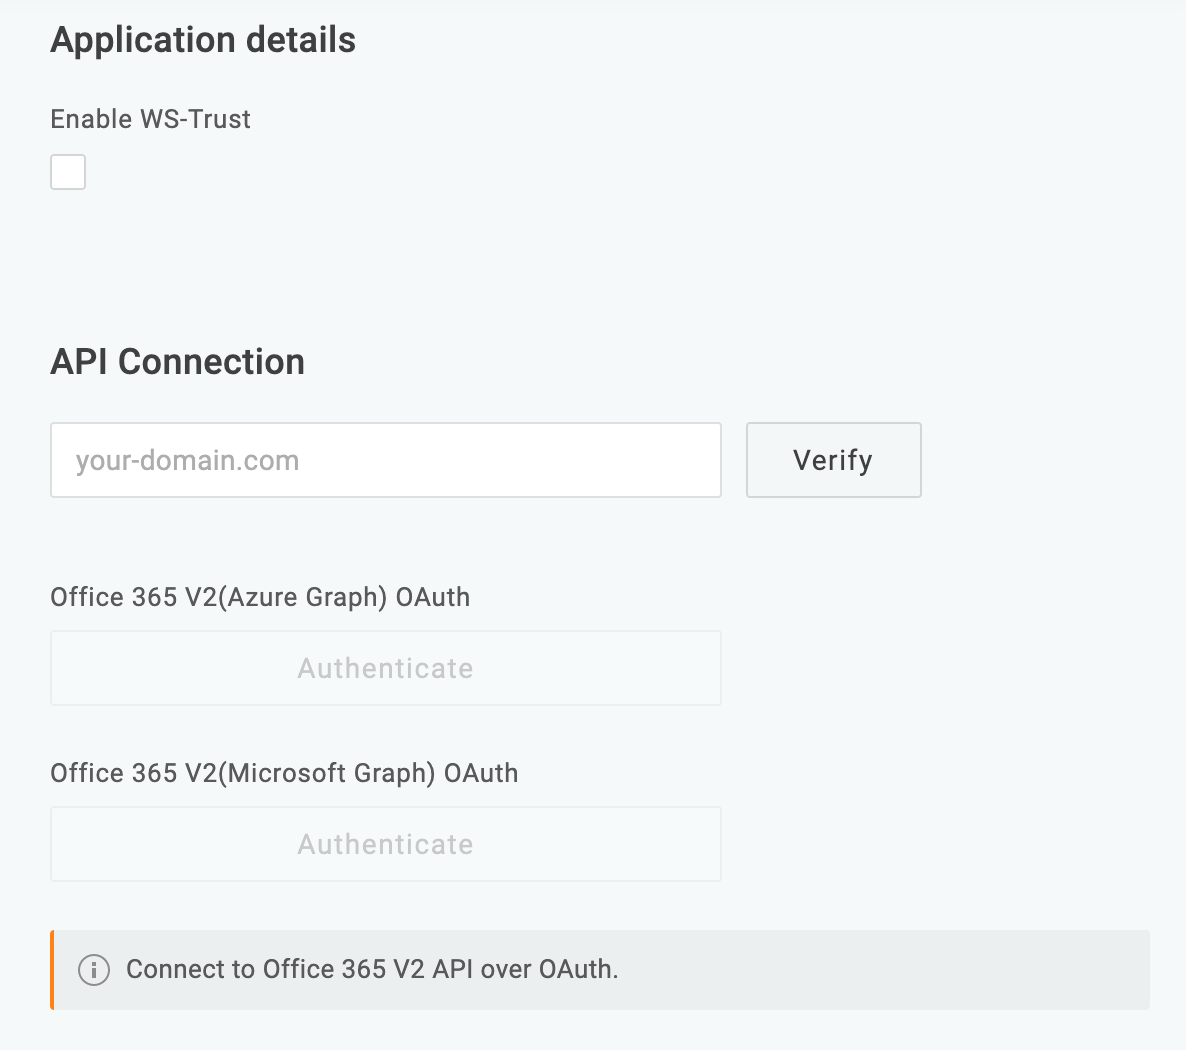
On the Configuration tab, enter your Office 365 domain.
This will enable OneLogin to access the Windows Azure Active Directory for Office 365.
-
Enter the domain (yourdomain.com) that you want to federate with Office 365 and click Verify. Once your domain is verified, the Authenticate buttons are enabled.
All users must share the same Office 365 and OneLogin email addresses, using this domain.
- Click the Authenticate buttons for Office 365 V2(Azure Graph) OAuth and Office 365 V2(Microsoft Graph) OAuth, to attain the access token for each API. If you haven't previously authorized, you will receive a consent request that enables OneLogin to access the Windows Azure Active Directory for Office 365.
-
A dialog prompts you to complete the authentication process by authorizing access for OneLogin. Click on your Office account name and you will be directed to Office 365, choose your account, or sign in if prompted.
- Once you authenticate, the Authenticate button becomes Clear Token which allows you to clear the bearer token and reauthenticate if needed.
-
On the Provisioning tab, enable provisioning.
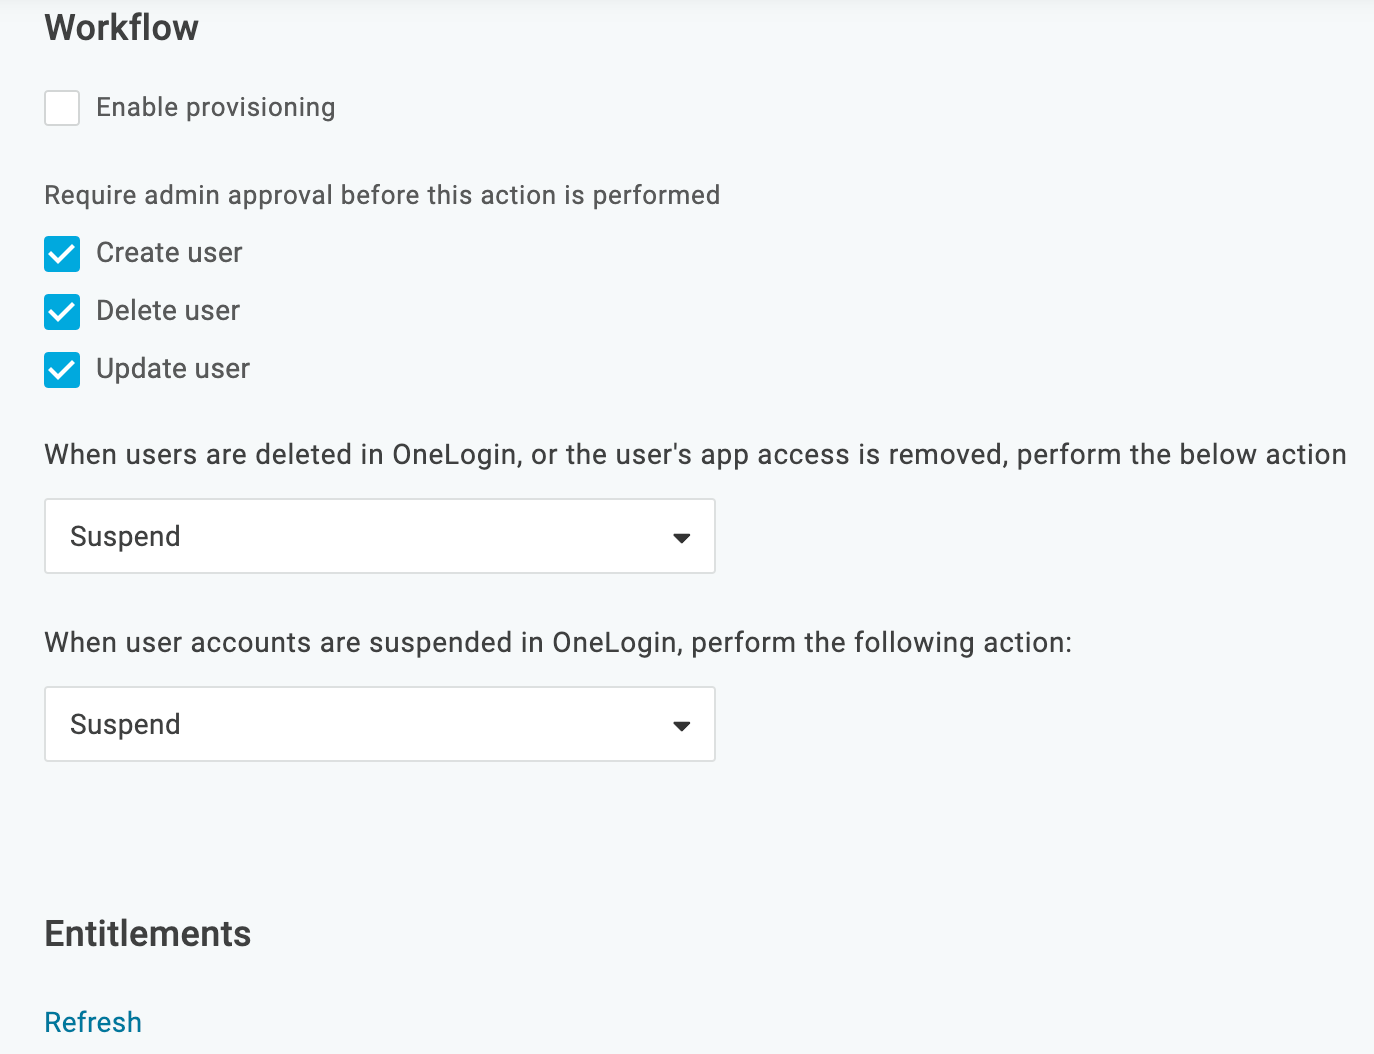
- Select Enable provisioning for Office 365.
-
Select the provisioning actions that require admin approval.
If you select any of the available actions, an admin must go to Users > Provisioning and manually approve the action every time it occurs.
-
Select how users that are deleted in OneLogin are handled in Office 365.
Choose between Delete, Suspend, or Do Nothing.
-
Under Entitlements, click Refresh.
Refreshing entitlements populates Group and License values on the Parameters tab and updates the values available when you configure Rules.
For more information about provisioning Groups and Licenses, see "Entitlement provisioning."
-
On the Parameters tab, configure the user attributes that you want to provision to Office 365.
For a complete list of supported attributes and instructions for configuring them for provisioning, see Provisioning User Attributes to Office 365.
You are now ready to set up your users for provisioning to Office 365. You can set up users to be provisioned to Office 365:
- Automatically, by mapping roles
- Manually, by adding Office 365 to users directly
- Including license or group membership entitlements
Note: The ImmutableID parameter is provisioned bi-directionally. If a OneLogin user is provisioned into Office 365, and that user exists with an assigned Immutable ID, OneLogin will copy that value back into the ImmutableID parameter. If the value in Office 365 differs from the value in OneLogin, we copy the value from Office 365 into OneLogin ImmutableID parameter. For this reason, we recommend you create a custom parameter to safely store ImmutableIDs.
The correct ImmutableID is required for SSO to function. SSO will fail if the wrong ImmutableID is stored in OneLogin.
Provisioning users automatically
The most efficient way to provision to Office 365 is through mappings via Roles and Groups. It will allow a large user base to be quickly paired up with licenses without having to manually update each user individually.
If you are using an external directory, create a Group (security group if using Active Directory) that will contain all of the Office 365 users. For simplicity's sake, lets call this group Office 365.
To begin the process for automatic provisioning, go to the OneLogin dashboard portal and do the following:
- Go to Users > Groups.
- Click New Group.
- Give this group a name. We named ours Office 365.
If you have a group within an associated directory, this group name should match the name within that group.
- Click Save.
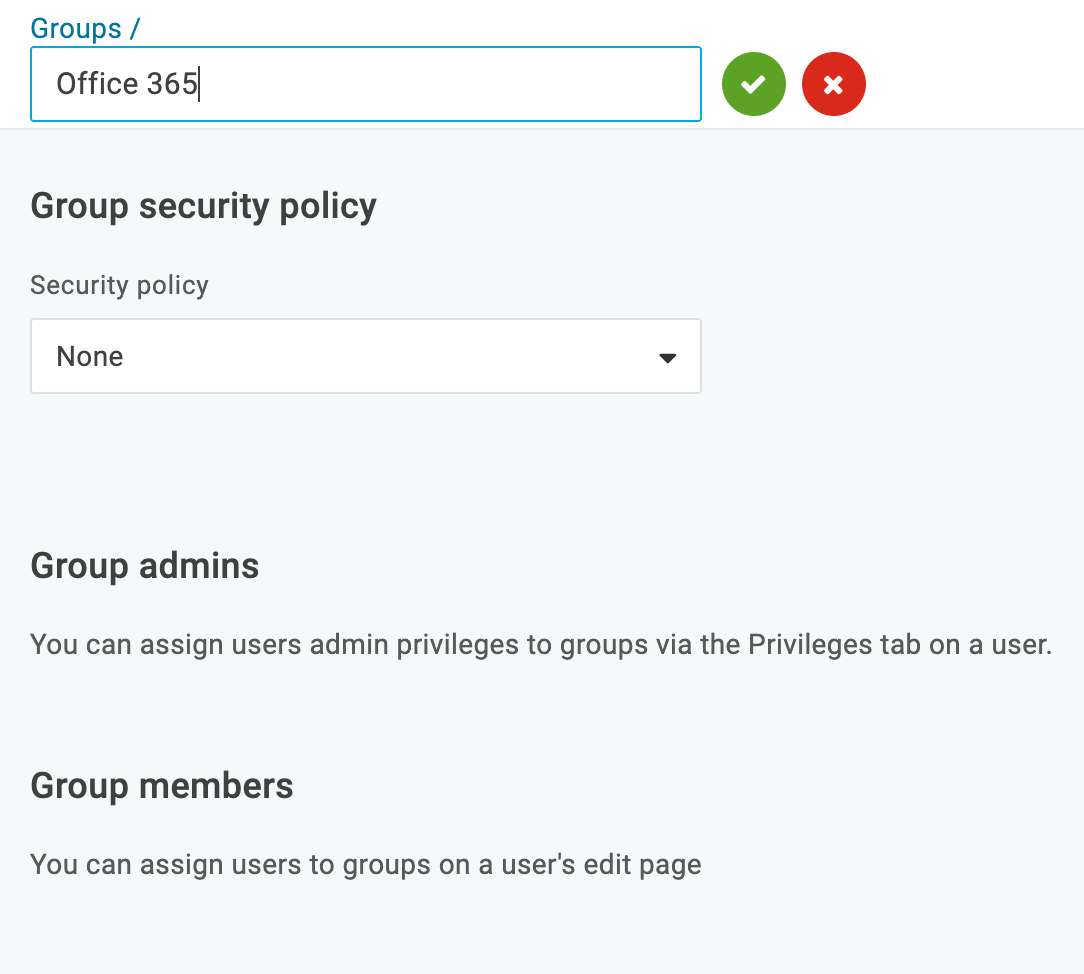
If you have a security policy you wish to affiliate with this group, you may apply it now.
- Go to Users > Roles.
- Click New Role to create a new role.
- Give your role a name and associate it with Office 365 by selecting Office 365 from the list.
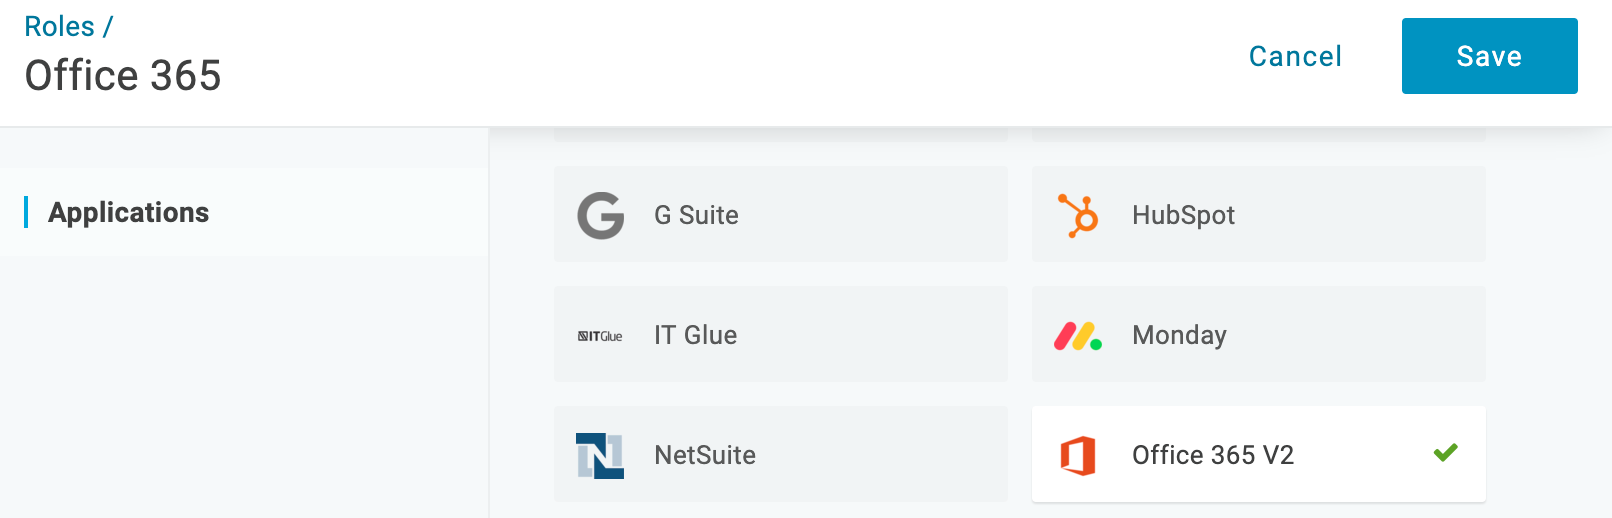
- Click Save.
- Go to Users > Mappings.
- Click New Mapping.
- Give your mapping a name (we've chosen Office 365 Mapping for simplicity) and then create a mapping that associates users in the Office 365 group with the Office 365 role.
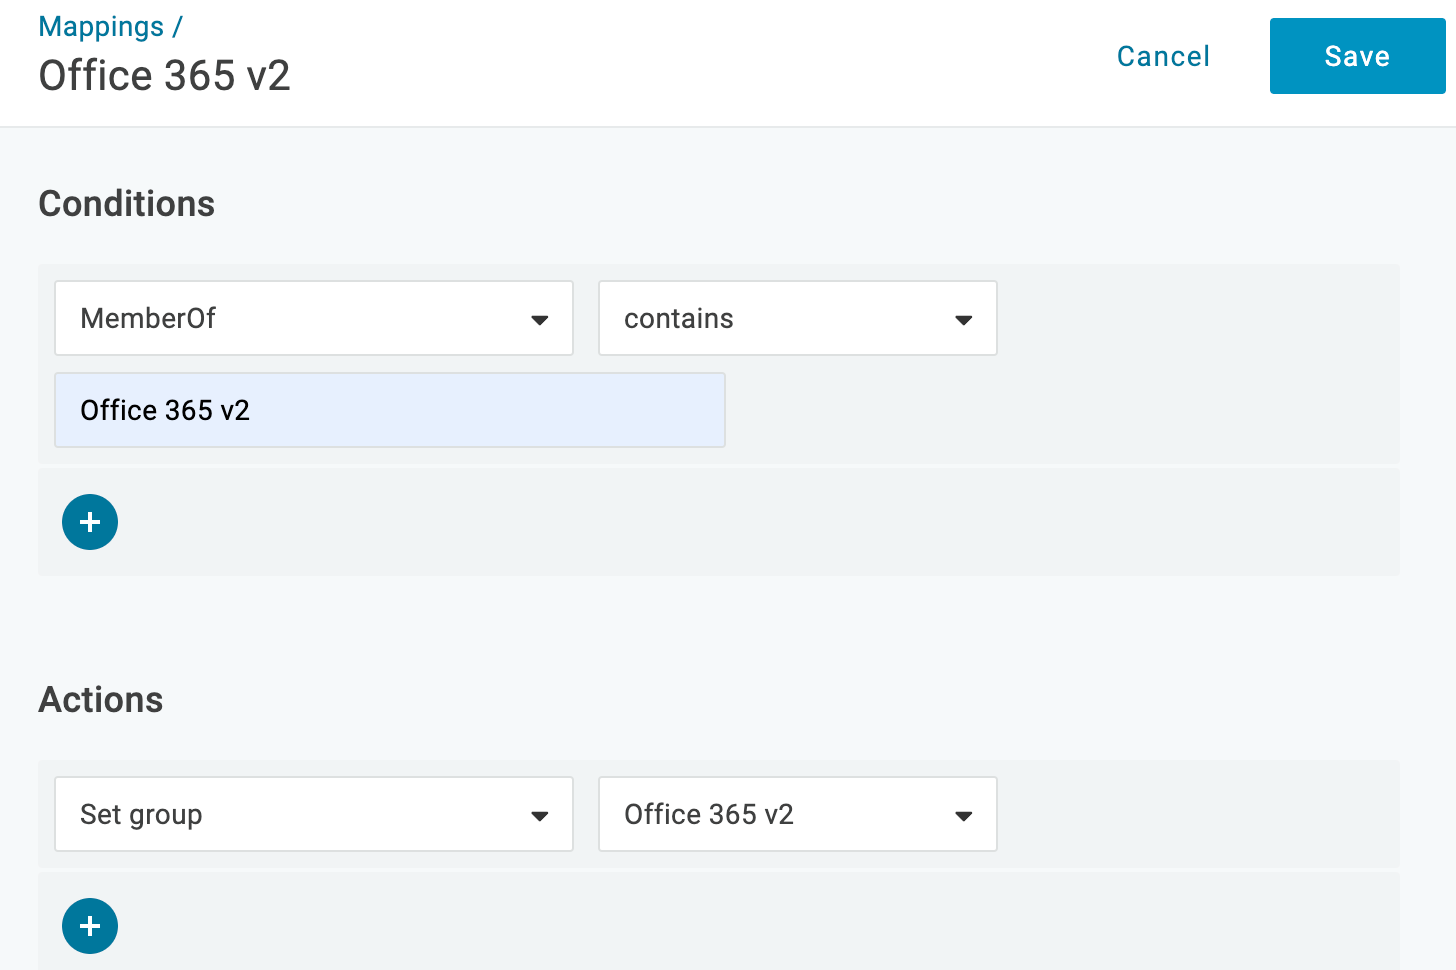
Note how when the Condition = Memberof > Contains > Office 365, Perform these actions = Set role > Office 365, it's saying that 'Anytime a user is a member of the group Office 365, set their role to 'Office 365'. Mappings are flexible, so tailor them to your personal user situations.
- Click Save.
- On the Mappings page, click Reapply All Mappings to confirm and refresh the mapped entitlements.
This should always be done after creating a new entitlement or updating an existing one just to ensure the mappings are correctly confirmed.
At this point, everyone within the Role of Office 365 should be successfully provisioned with a license and all applications within Office 365.
Provisioning users manually
Manually provisioning a user with Office 365 is a quick process that involves going into the user's page and providing them with just the application. This can also be done when the user is created within OneLogin and not imported from a directory.
In the dashboard portal, do the following:
- Go to Users and select a user.
- Select the Applications tab.
- In the Roles section, select Office 365.
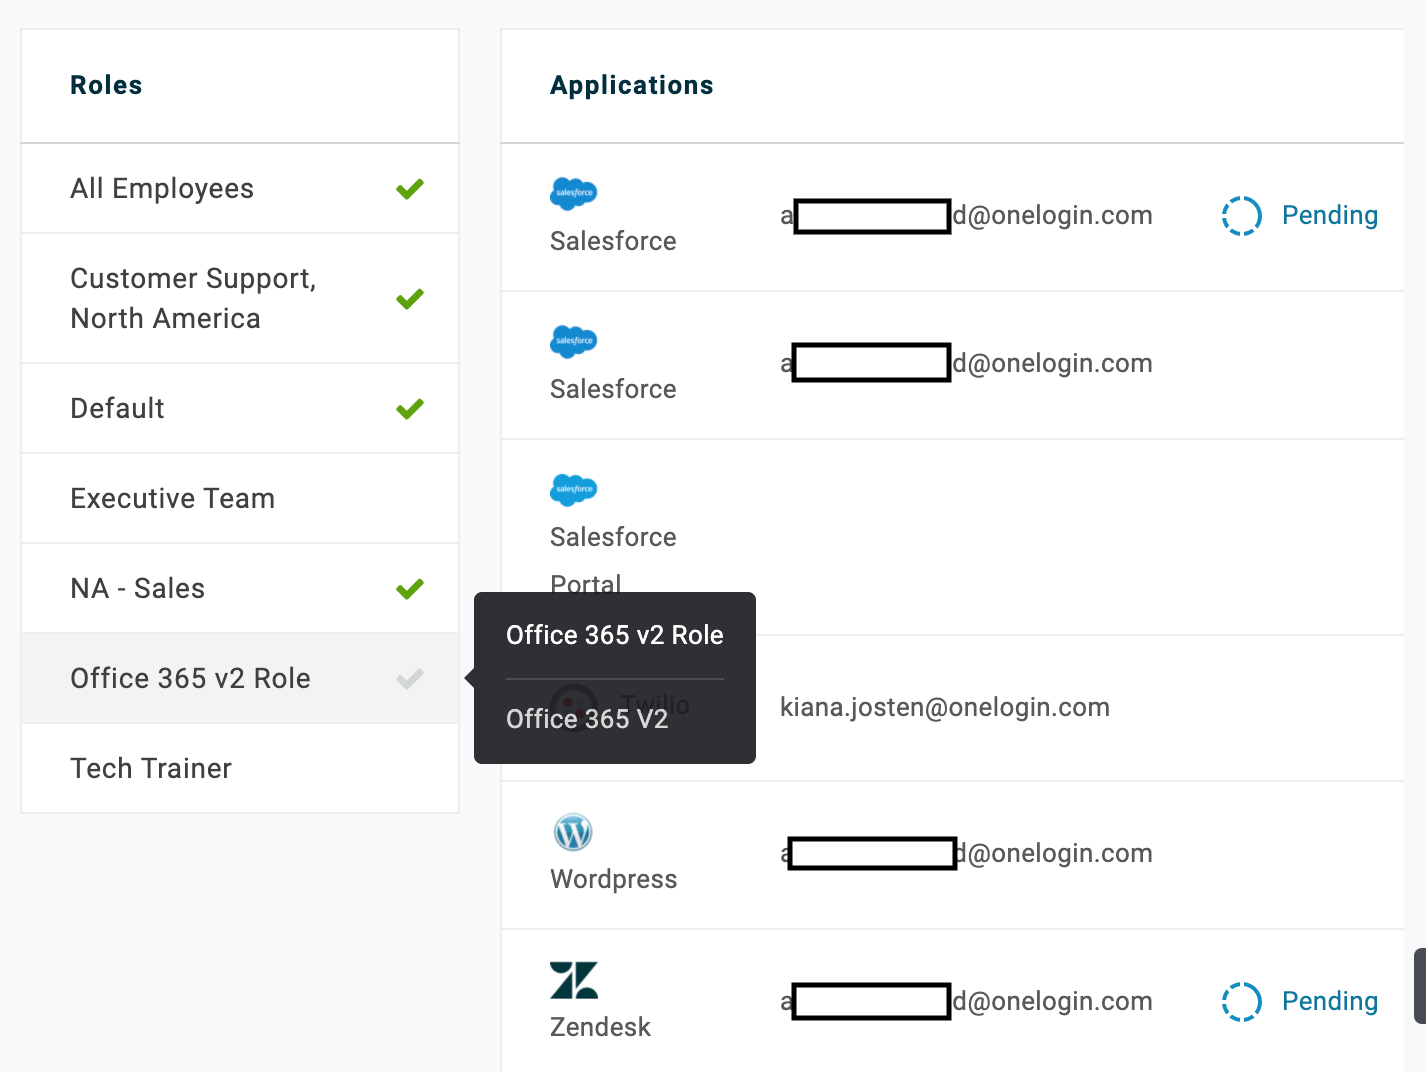
This will immediately provision the user with an Office 365 license which, depending on the administrative settings found in Apps > All Apps > Office 365 > Provisioning, may need to be manually approved from 'Pending' to 'Provisioned' in Users > Provisioning.
Using rules to provision Office 365 licenses to users
- Go to Company Apps > Office 365.
- Select the Parameters tab.
- Click the Licenses field to bring up the field editor.
- Click Include in User Provisioning.
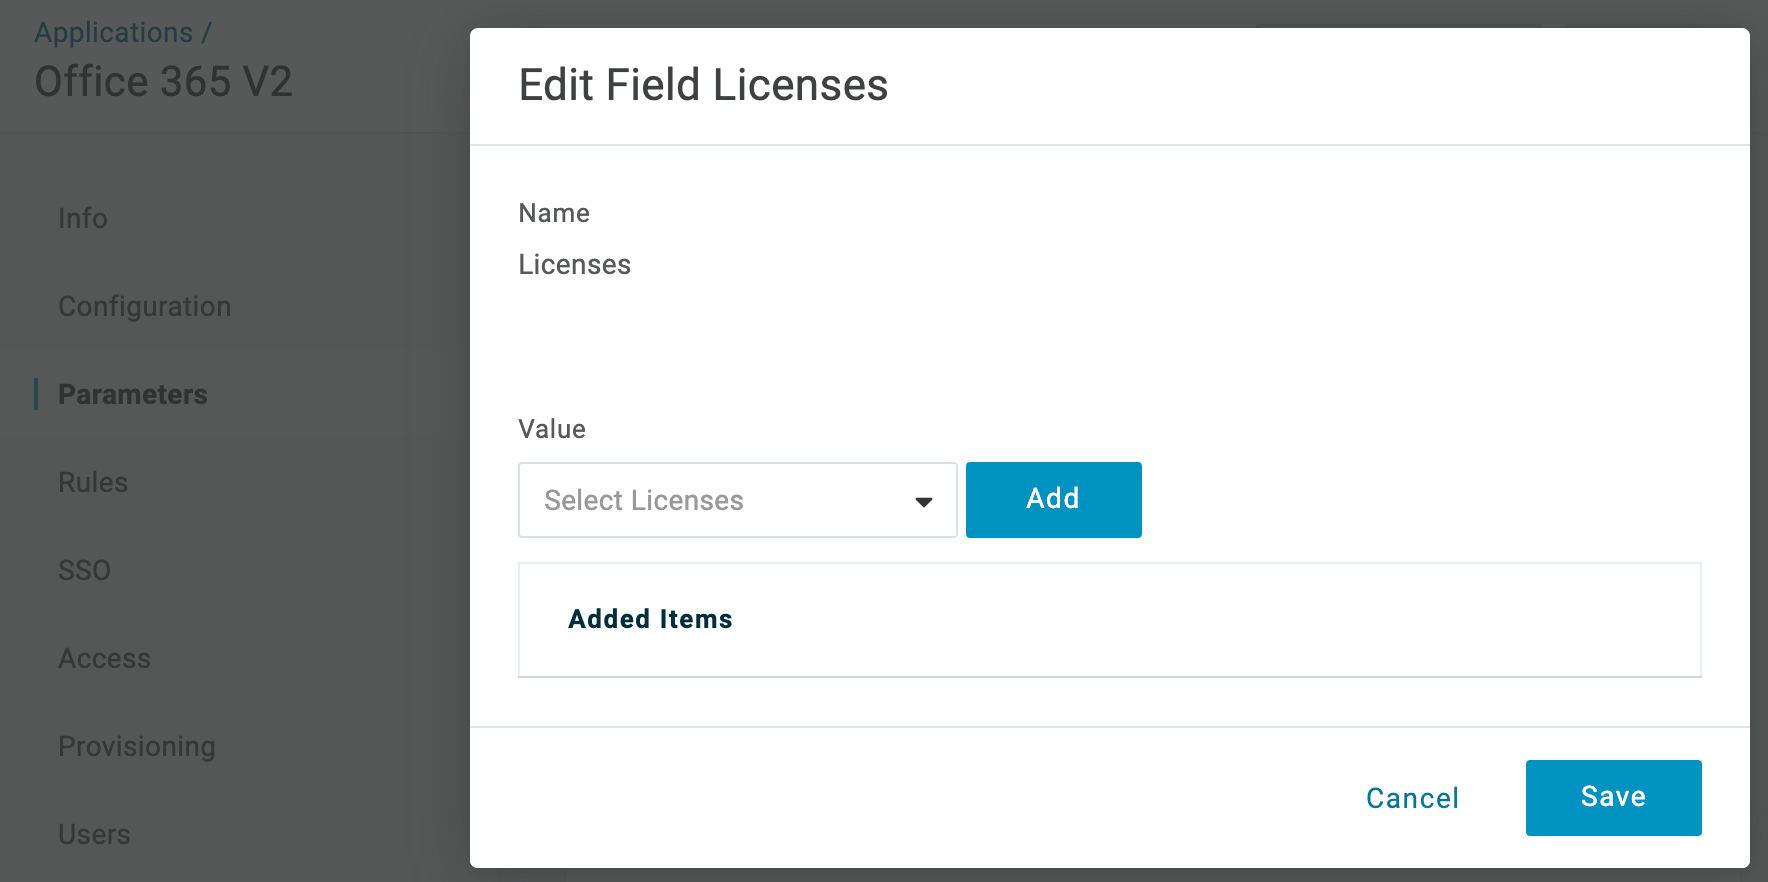
This is useful in cases where a group of users will all need access to Office 365 per their groups, but will only need to use certain applications within Office 365. In the example above, we've selected the full suite of potential Office 365 Licenses to provision out to users.
- Click Save.
- Select the Rules tab.
- Click New Rule to bring up the New Mapping editor.
- Name your mapping and then create a mapping that associates users or a group of users with the desired licenses.
The example above maps a user with the name of 'Josh Ames' to licenses for Yammer and the Office suite, regardless of the established role and Office 365 mapping.
The Condition = DistinguishedName > equals > Josh Ames, Perform these actions = Set Licenses > Yammer / Office Web Apps / Office Professional means "If the provisioning encounters a User named Josh Ames, assign the selected licenses to the user." Mappings are flexible, so tailor them to your organization's needs.
- Click Save.
-
Test your rule by checking whether the correct users are affected by it.
From the Rules tab, select the new rule. On the Edit Mapping dialog, type the first few letters of the user's first or last name in the Check Rule with Users (optional) field, and the field displays the names of available users. You can add as many users as you want before you click Check.
Each user will be listed as Will be mapped or Will not be mapped.
-
Go to the More Actions menu and click Reapply Provisioning Mappings to apply the new rule.
Important! You must reapply mappings any time you create or update rules!
Troubleshooting
As stated above, some users may not be able to log into your Azure cloud-based SQL server after you provision your users into Office 365 v2.
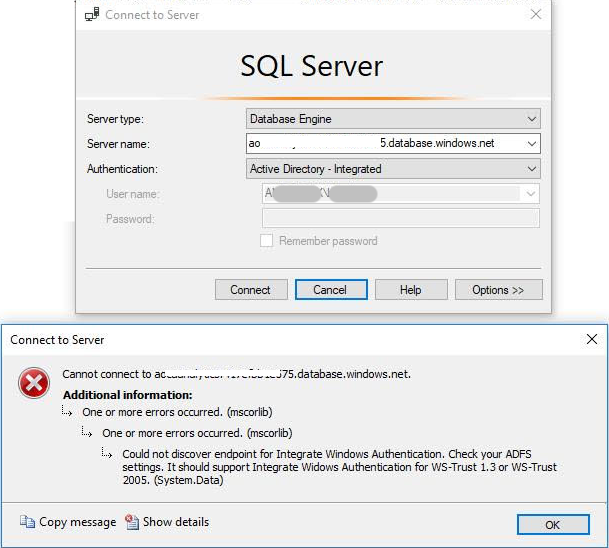
If this occurs:
- Navigate to your Office 365 administration console, then ensure that the Modern Authentication tab specifies that allows other protocols that require WS-trust
- Ensure that your OneLogin administration has enabled WS-trust for Office 365 domain federation.
- Check your SQL Studio authentication method and change it from Active-Directory Integrated to Azure Active Directory - Universal with MFA
- Have user login with the email address and/or UPN that matches OneLogin. Do not use their username.
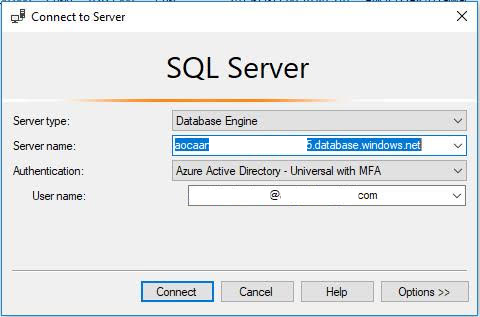
Once the user clicks Connect, they will be prompted to complete their MFA and an event will be logged by OneLogin. |