|
This article describes how to provision users from OneLogin to Lucidchart using the Lucidchart SCIM API.
Prerequisites
Configure SAML SSO for Lucidchart
Enabling Provisioning
-
Go to Apps > Company Apps and select the Lucidchart app to which you want to provision users.
-
Go to the Configuration tab.

-
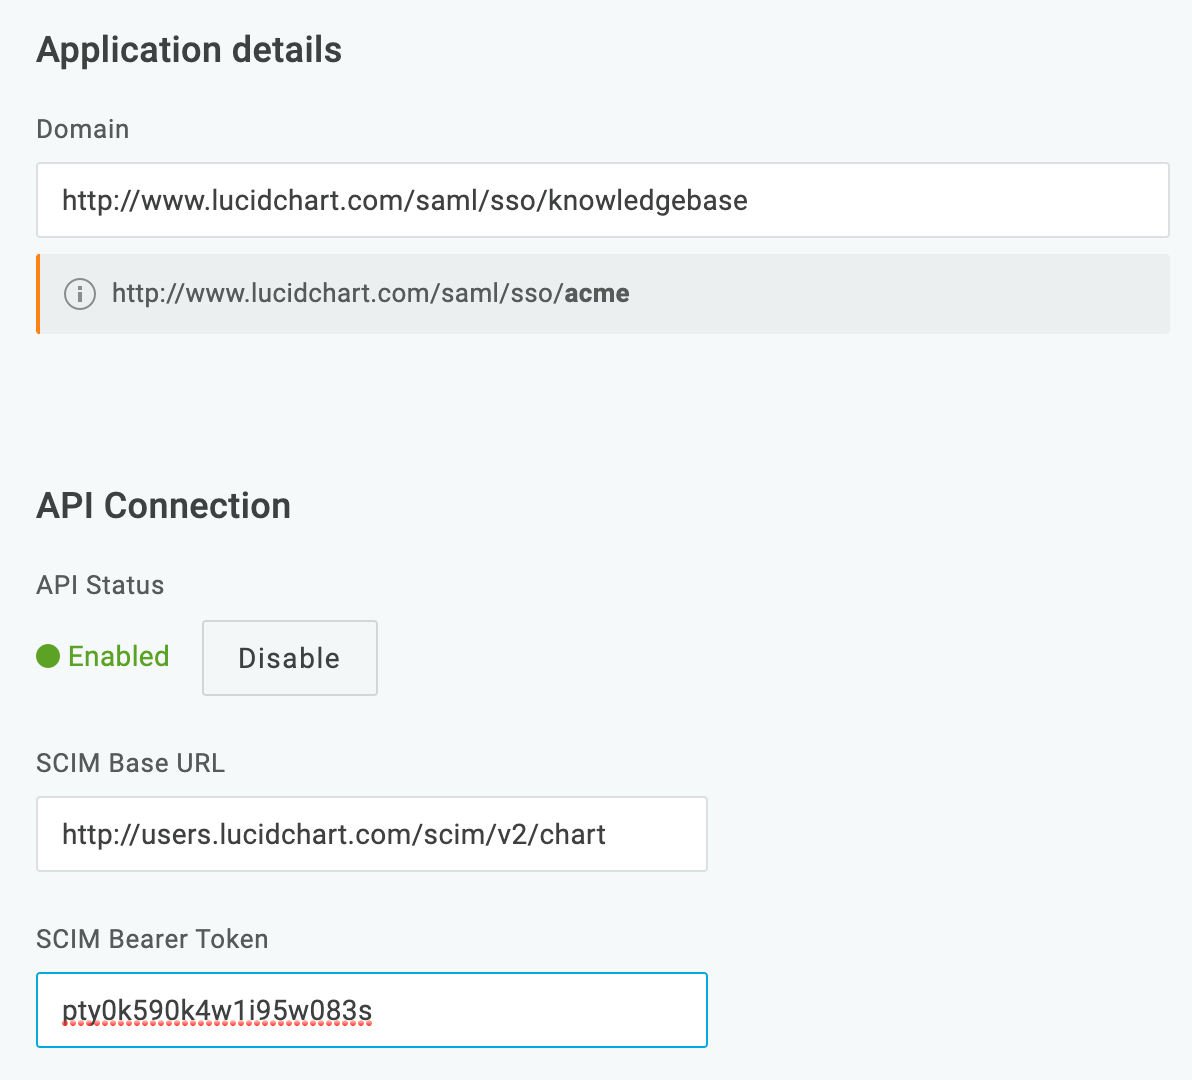
Enter the Lucidchart API SCIM Base URL value: https://users.lucidchart.com/scim/v2/chart.
-
Enter your Lucidchart SCIM Bearer Token value. To get your token value:
-
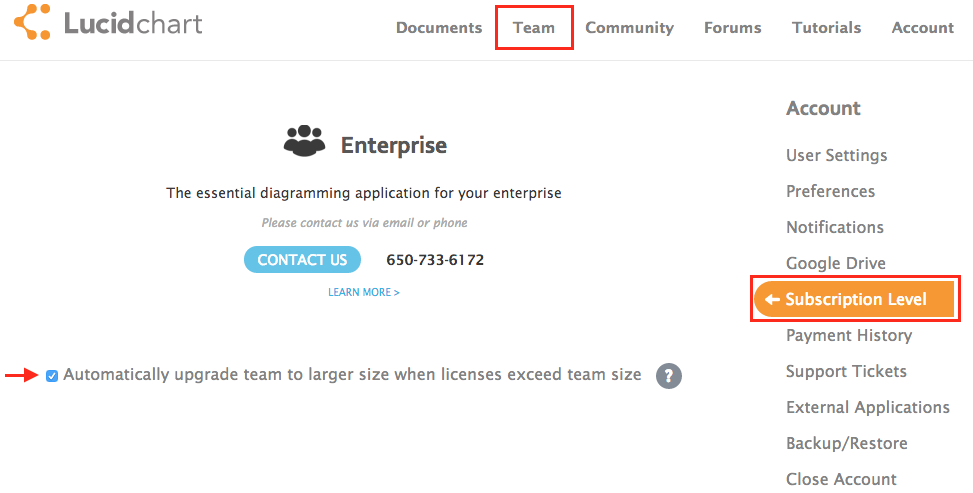
Log in to your Lucidchart account as a Lucidchart administrator. From the drop-down menu displaying your username, select Account Settings.
-
Select Automatically upgrade team to larger size when licenses exceed team size. This setting is required for SCIM provisioning/deprovisioning to work.
-
Click Team at the top of the page and then select App Integration > SCIM.

-
Click Generate token to create a unique code that is shared between Lucidchart and OneLogin.
-
Copy the bearer token and paste it into the SCIM Bearer Token field on the Configuration tab in OneLogin.
-
Click Enable to connect to the Lucidchart API over OAuth 2.0.
-
Go to the Provisioning tab.
-
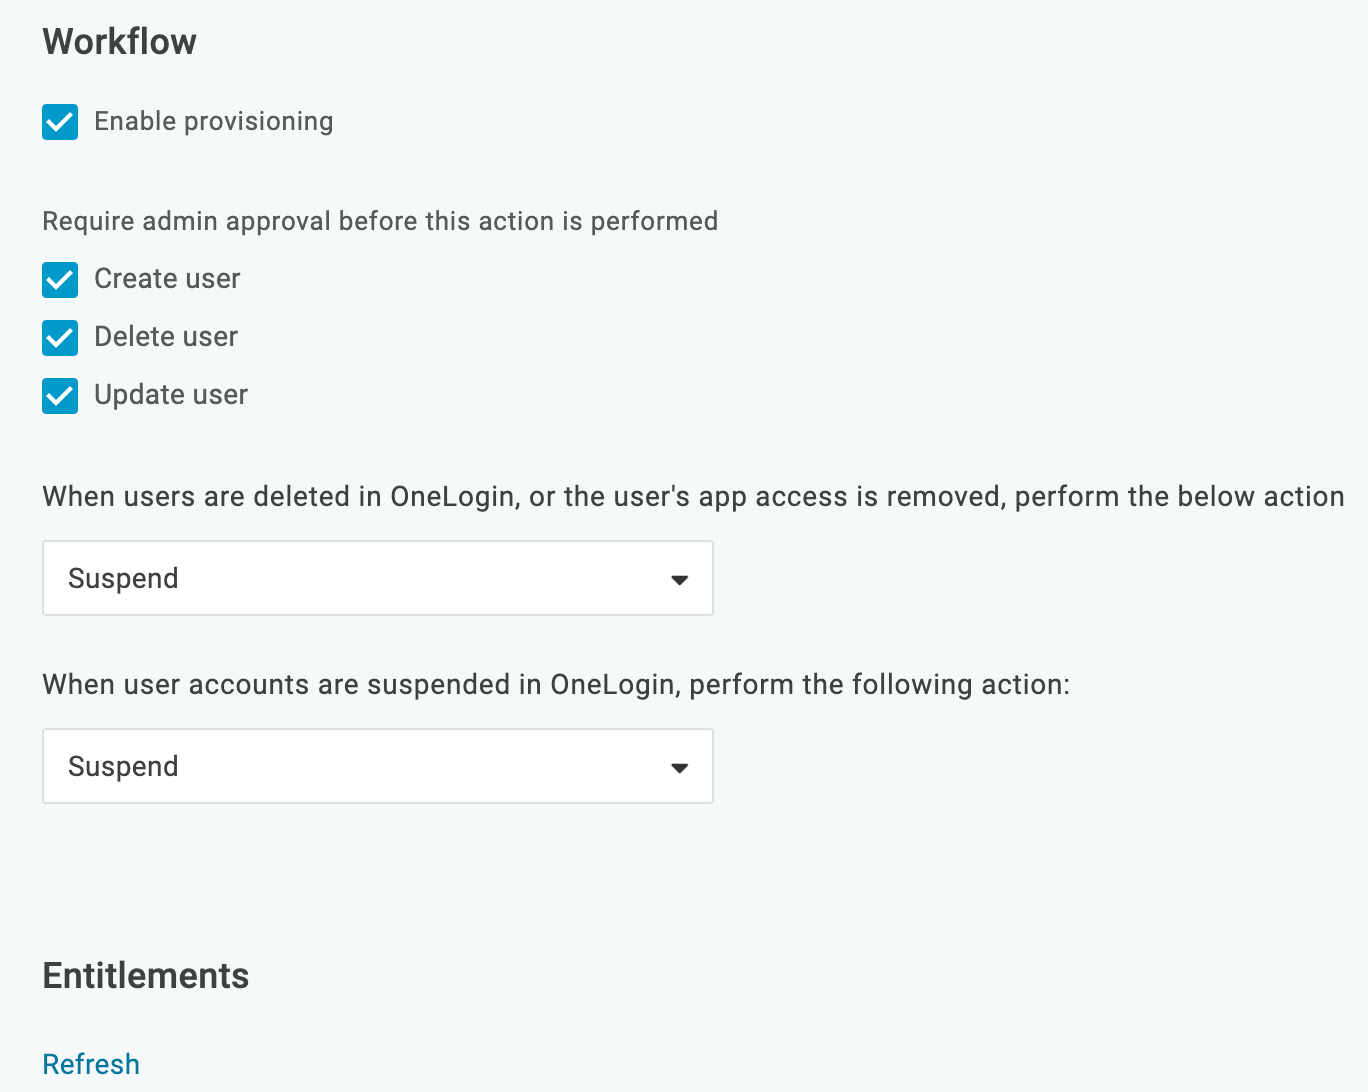
Select Enable provisioning for Lucidchart. Once you enable this option and give users access to the app, the provisioning process will begin.
Note: You must select this option now to enable options required to complete subsequent steps. To ensure that you do not inadvertently provision users to Lucidchart before you are ready, enable the action controls described in the next step.

Choose the provisioning actions for which you want to require administrator approval. For example, based on the settings in the screenshot above, any time a user is created, deleted, or updated, a OneLogin administrator will need to go to Users > Provisioning to manually approve or ignore each of these actions.
Enabling these action options is useful especially before you intend to start provisioning because with the Enable provisioning for Lucidchart option selected, you may just trigger provisioning during the course of setup and testing. With this safeguard enabled, a OneLogin administrator can just choose to ignore any inadvertent provisionings.
Once you are done configuring and testing provisioning, you can update the settings to leave one or more action options clear if you want OneLogin to make the provisioning change in Lucidchart without requiring administrative approval.
-
Select what happens to a user in Lucidchart when that user is deleted from OneLogin. Select Delete, Suspend, or Do Nothing.
-
Click Save.
Mapping Lucidchart Attributes to OneLogin Attributes
In this task, you'll map Lucidchart user attributes to OneLogin user attributes. These mappings tell OneLogin how to populate user attribute values to Lucidchart when provisioning users from OneLogin. If you have a OneLogin attribute value that you want to send over to populate a Lucidchart field, you'll define it in this task.
-
Go to Apps > Company Apps and select the Lucidchart app to which you want to provision users.
-
Go to the Parameters tab.
-
Select Configured by admin.
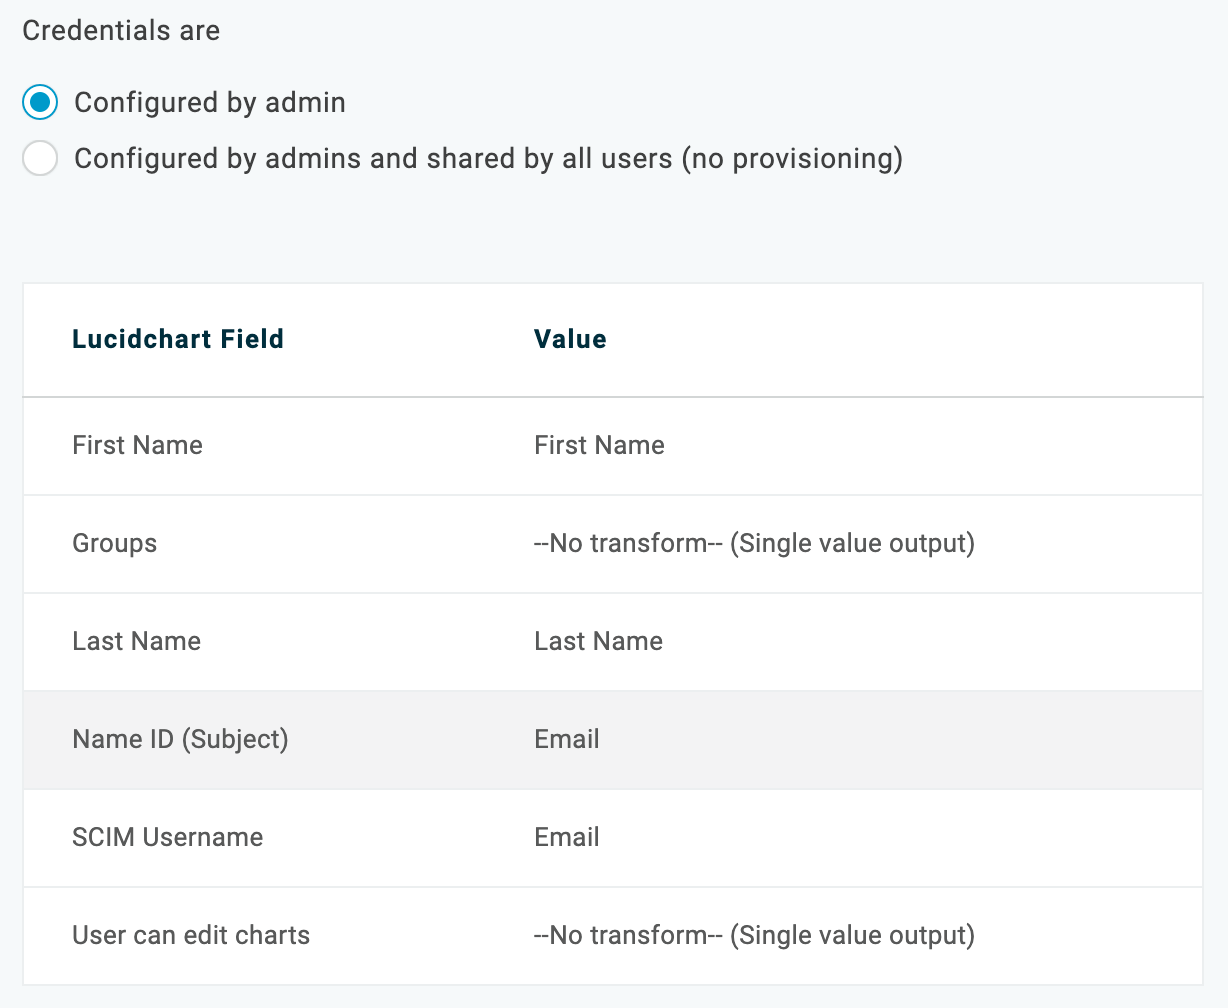
The default mappings are as follows:
| Lucidchart Field |
Default OneLogin Value |
SAML or Provisioning? |
Notes |
|
First Name
|
First Name
|
SAML
|
|
|
Last Name
|
Last Name
|
SAML
|
|
|
NameID (Subject)
|
Email
|
SAML
|
Leave Value set to Email. Most Lucidchart implementations use email as the NameID.
See Configuring SAML SSO for Lucidchart.
|
|
SCIM Username
|
Email
|
Provisioning
|
Leave Value set to Email. While you can use a macro or another value here, Lucidchart does an excellent job of parsing email values into usernames so we recommend that you set Value to Email.
|
|
User can edit charts
|
- No default -
|
Provisioning
|
Use this parameter to provision users with chart editing permissions.
Click the User can edit charts row and select the appropriate value for users:
Be sure to scroll down and select Include in User Provisioning. Click Save.
If you want to provision these permissions to subsets of users instead of all users, see Using Roles to Provision Users with Chart Editing Permission.
|
-
Click Save.
Using Rules to Provision Users with the Chart Editing Permissions
You can define rules to provision subsets of your OneLogin users with chart editing permissions. For example, you can define a subset of users by filtering on a specific OneLogin user attribute value and then define an action that provisions the subset of users with a specific chart editing permission.
-
Go to Apps > Company Apps. Search for and select your Lucidchart app.
-
Go to the Rules tab.

-
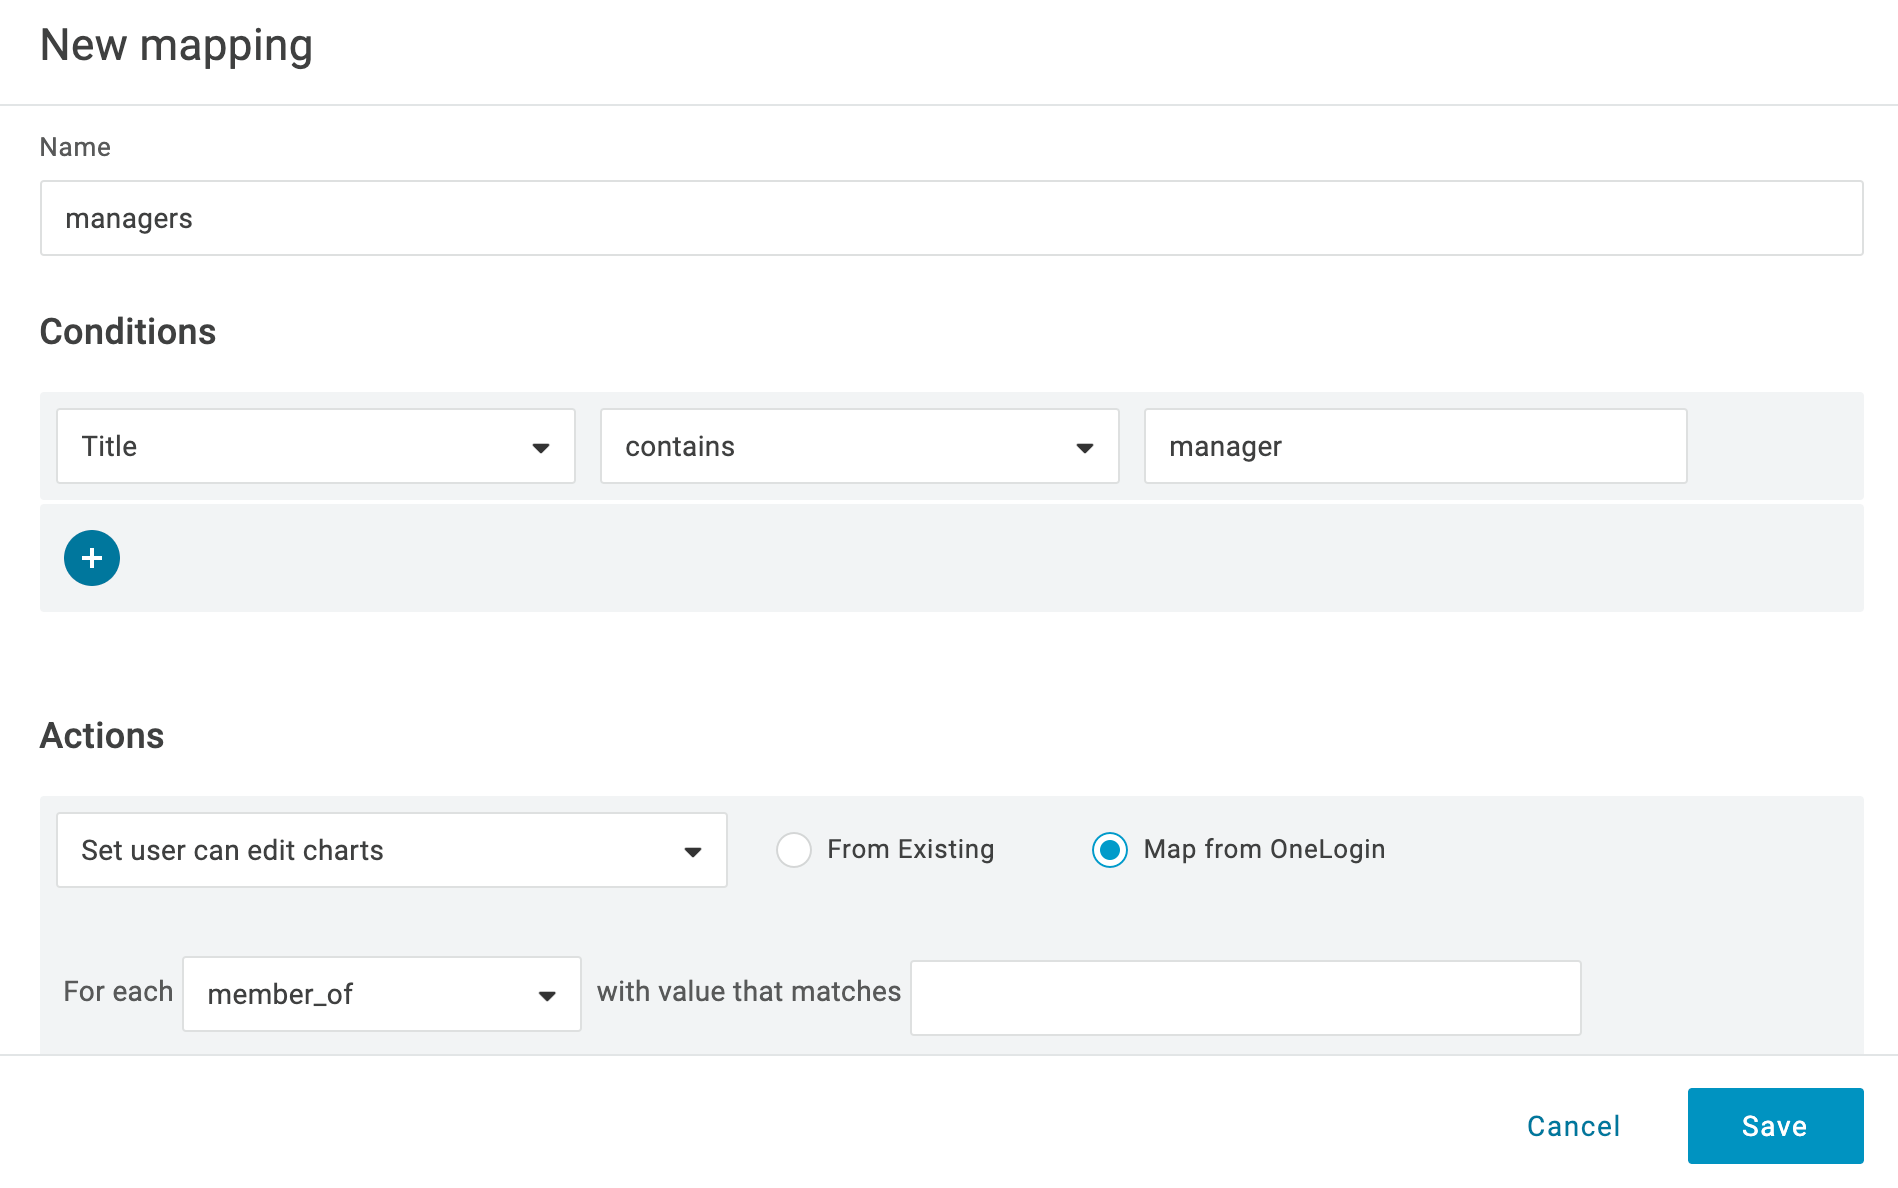
Click New rule to open the New Mapping dialog, where you can set the conditions and actions that determine which users will be provisioned from OneLogin with a specific chart editing permission.
-
Give your rule a name.
-
In the Conditions area, click + to add a condition. Use the fields to define a condition that defines a subset of users to be acted upon by the rule. Conditions are based on OneLogin user attribute values.
-
In the Actions area, click + to add an action. Use the fields to define the action that will be performed on users by the rule. Available actions include:
-
To see a list of users affected by the provisioning rule you've configured, click Show Affected Users. Review the list and refine your rule until only intended users are listed.
-
Once you are satisfied with your rule, click Save.
-
To add another provisioning rule, click New rule.
The order in which rules are applied matters and can impact provisioning results. Drag and drop the rule rows to put them in the order that produces correct results. To test results, see Testing Provisioning.
-
Click Save.
-
Go to the More Actions menu and click Reapply Provisioning Mappings to apply the new rule.
Important! You must reapply mappings any time you create or update rules!
Testing Provisioning
Test your provisioning setup to confirm that provisioning from OneLogin to Lucidchart is working.
-
Go to Apps > Company Apps. Search for and select your Lucidchart app.
-
Go to the Provisioning tab. Ensure that the following options are selected for reasons described in Enabling Provisioning.
-
Click Save.
-
Go to Users > Roles.
-
Create a test role and add your Lucidchart app to it.
-
Click Save.
-
Access the test role you just created.
-
Go to the Users tab.
-
Under Add Users to Role Manually, add your test user(s).
-
Click Save. This will trigger provisioning of the test user to your Lucidchart app.
-
Per the settings in step 2, you must approve the provisioning action before it can proceed. To do this, go to Users > Provisioning. Use search and filters to locate your provisioning task. It should be in Pending status.
-
Click the row. Click Ignore or Approve, depending on your test case.
-
If the provisioning row shows up as Failed on the Provisioning page, click the row to view a reason for the failure. Click Retry to try again.
-
When the user has been successfully provisioned according to OneLogin, go to Lucidchart and confirm that the new user has been added.
-
Continue to test for user updates and user deletions.
|