This article describes how to configure OneLogin to provision users to Salesforce. For video-based training, click the links below.

Prerequisites:
You should already have your API Security Token. If you don't, follow these steps to find it or get a new one:
-
Log in to Salesforce as an admin.
-
At the top of any Salesforce page, click on your own profile picture in the top-right.
-
Click Setup.
-
If you clicked Setup, select My Personal Information.
-
Click on Reset My Security Token.
-
Click Reset Security Token. The new security token is sent via email to the address on your Salesforce user record.
Enable Provisioning
-
Log in to OneLogin as an admin and go to Applications > Applications and search for Salesforce in the search company apps box (or the name of your Salesforce app).
-
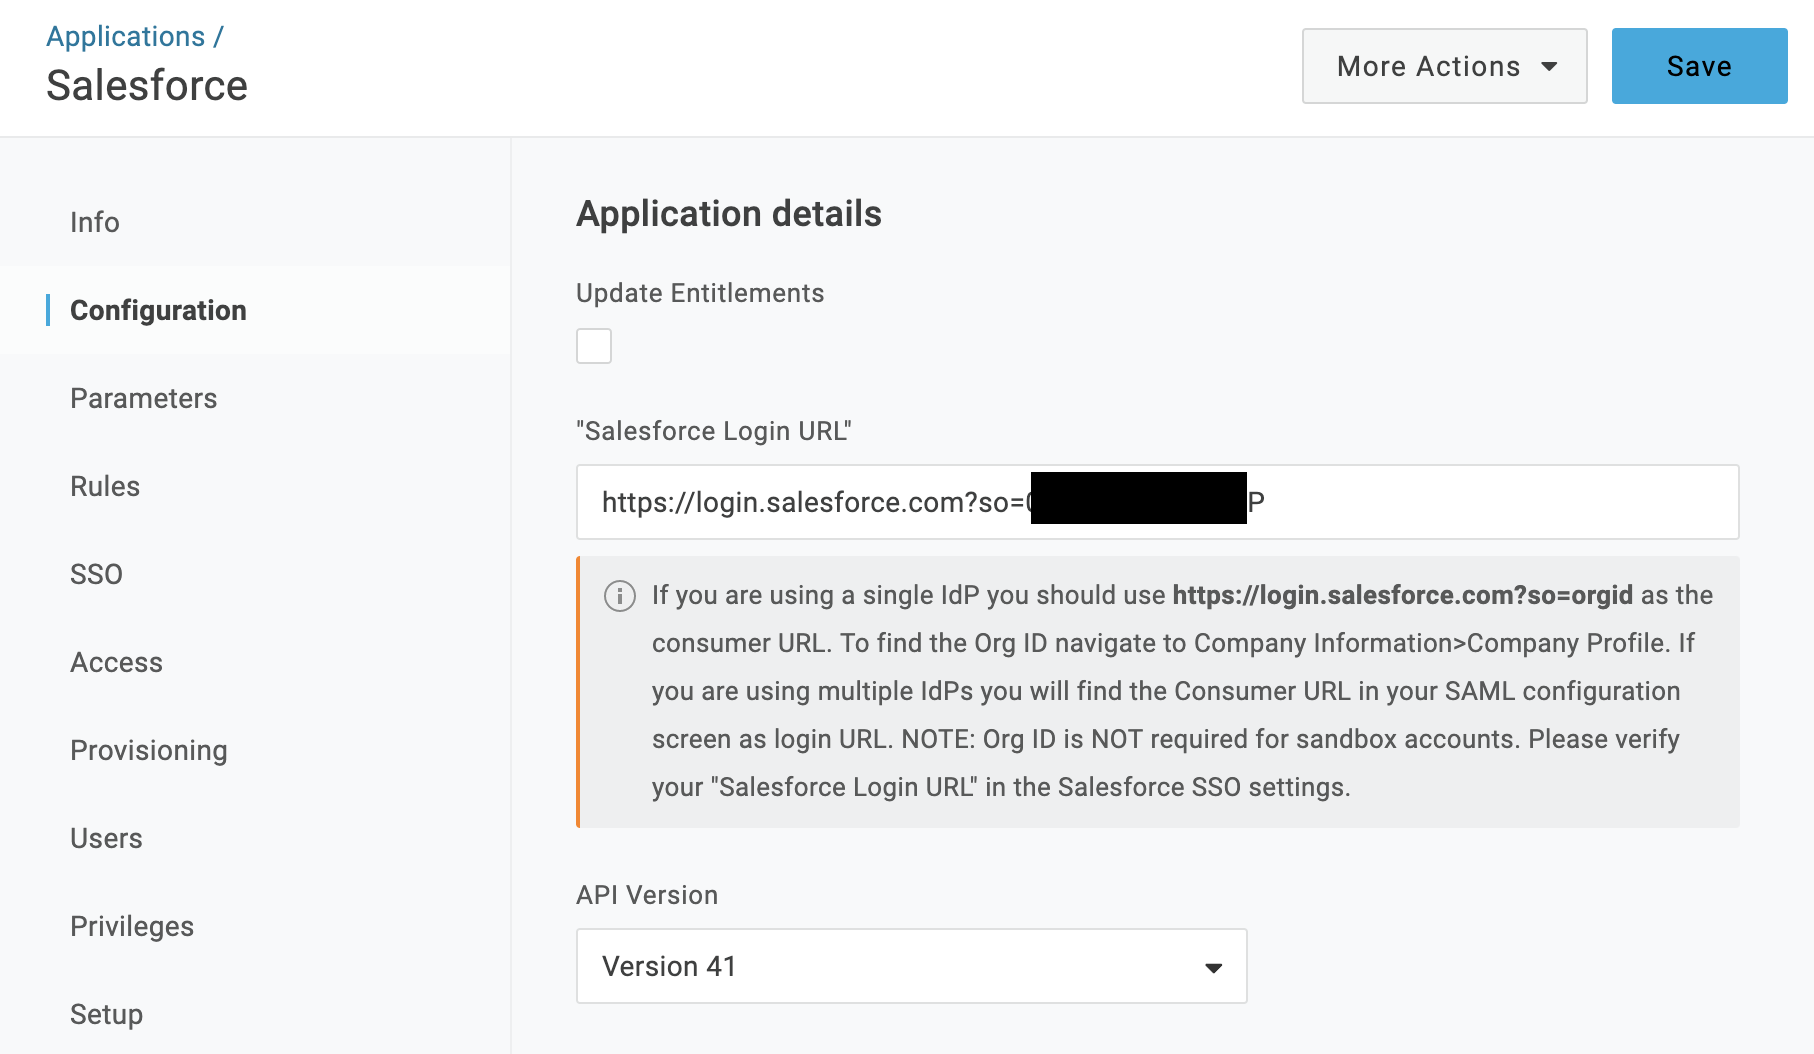
Click Configuration and connect to the Salesforce API.
-
Select Salesforce API Version 24, 33 or 49. We highly recommend using version 49, which fixes several issues in earlier API versions. By default, Salesforce provides your account with access to all of its API versions, but go to Salesforce to verify access to API version 49 before selecting it here. Follow this link to help determine your API version.
-
Click Save. OneLogin drops you in the Info tab after you save.
-
Return to the Configuration tab to connect to the API. For API version 33 or better, you see an Authenticate button in the API Connection section. Click it to open a dialog, that allows you to click a link to the Salesforce login page. Enter your Salesforce admin credentials to give OneLogin access to the Salesforce API over OAuth. When the connection is complete, the Authenticate button is replaced by the Clear Token button. Click this to clear your API connection.
-
If you selected API version 24, you continue to see the Connect button in the API Connection section. Enter your admin credentials in the API username and API Password fields and click Connect. The API Password takes the form mypasswordXXXXXXXX, where mypassword is the password for your organization’s Salesforce account, and XXXXXXXX is your Salesforce API Security Token (see Prerequisites). When the connection is complete, the API Status is Enabled.
-
(Optional) On the Configuration tab, click Update Entitlements to enable OneLogin to provision entitlements (such as Salesforce Roles, Permission Sets, and Licenses) to users in Salesforce. You can set rules for entitlement provisioning on the Parameters and Rules tabs.
-
On the Provisioning tab, enable provisioning and set your admin approval policy.
-
Select Enable provisioning.
-
Select the provisioning actions that require admin approval. If you select any of the available actions, an admin must go to Users > Provisioning and manually approve the action every time it occurs.
-
Select how users deleted in OneLogin are handled in Salesforce. Choose between Delete, Suspend, or Do Nothing.
-
Under Entitlements, click Refresh. Refreshing entitlements populates Permission Sets on the Parameters tab and updates the values available when you configure Rules. Click Save.
Parameters
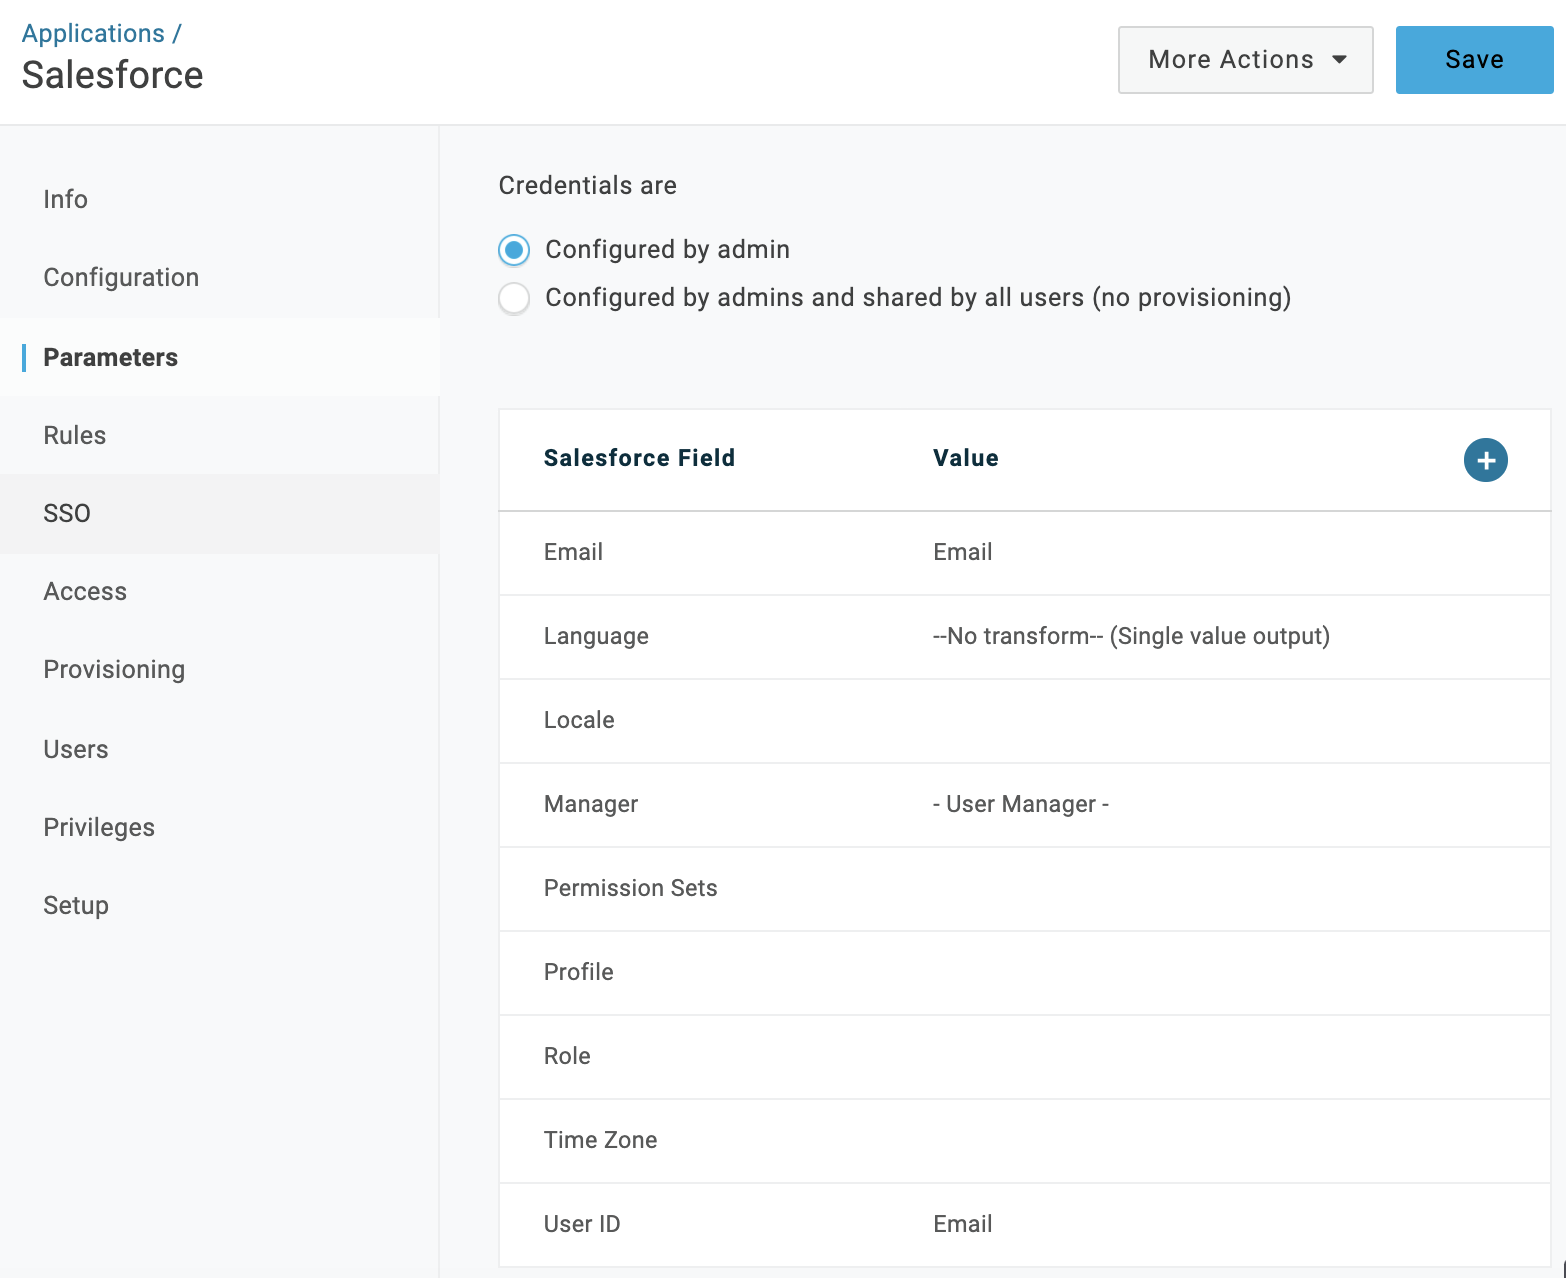
On the Parameters tab, map Salesforce user attributes to OneLogin attributes. You can use these parameters to create provisioning rules (in the next step) that map OneLogin user attributes to Salesforce user attributes. You may already have completed this step, or parts of it, when you configured SSO for Salesforce.
Click any of the parameter rows to open an editor that lets you select alternate values. Note, that -No value- means that OneLogin does not pass a value to the app in the SAML assertion or through the API: the user attribute is supplied by the app. You can import your Salesforce values for the following parameters and create provisioning rules:
- Locale
- Permission Sets
- Profile
- Role
- Time Zone
To add additional parameters, click the +button.
Populate the field according to the Salesforce APIs and any flags you would like to set. For more information about provisioning these attributes, see Provisioning Entitlements.
On the Rules tab, configure your provisioning rules, then click New Rule to launch the New Mapping.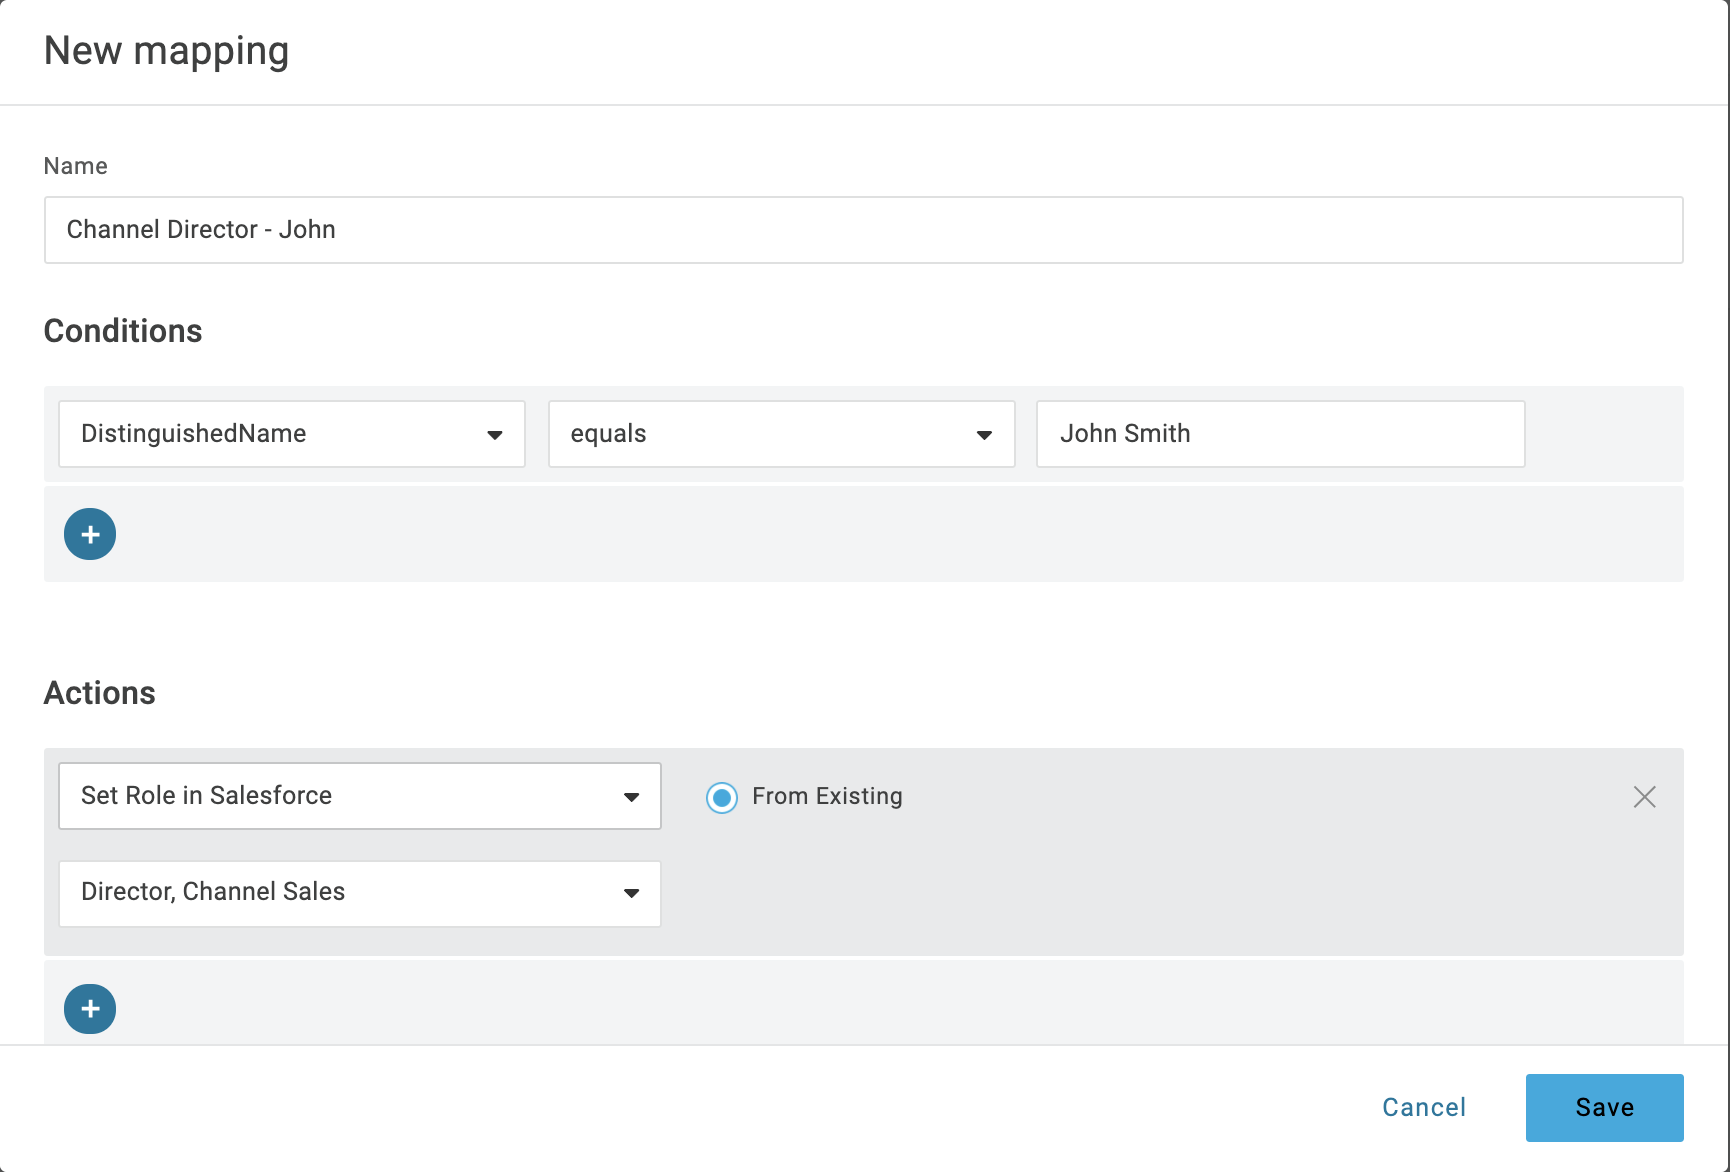
In this example, Conditions = DistinguishedName > contains > Josh Ames and Actions = Set Role > Director, Channel Sales means "If provisioning encounters a User named Josh Ames, assign him the Salesforce role of Director, Channel Sales."
-
Click Save.
-
Click Show Affected Users to make sure that the mapping applies to the correct users.
-
Click Save.
-
Go to the More Actions menu and click Reapply Provisioning Mappings to apply the new rule. You must reapply mappings any time you create or update rules.
Provisioning Entitlements
By default OneLogin lets you provision the following Salesforce attributes:
- Locale
- Permission Sets
- Profile
- Role
- Time Zone
Additional entitlements may be added using the + button.
Note: You can assign licenses by provisioning Profiles to users, but Salesforce doesn't allow updating licenses via API. The license must be assigned to a Profile in Salesforce and then users must be provisioned with this Profile from OneLogin. The licenses of existing/provisioned users will not be changed since there is no license attribute in the Salesforce app.
-
Confirm that you're connected to the Salesforce API, enabled provisioning, refreshed entitlements, and saved your Salesforce app before you provision the attributes. You must perform these tasks to populate the attribute parameters with the current Salesforce values. See Enabling Provisioning.
-
Go to Applications > Company Apps > Salesforce (or the name of your Salesforce app).
-
Go to the Parameters tab.
-
Click the Profile field to bring up the field editor.
-
Select the profile that you want to assign by default to any provisioned users who do not fit the conditions of the provisioning rules you will set up in the next step.
-
Click Save.
-
Go to the Rules tab.
-
Click New Rule to bring up the New Mapping editor.
-
Name your mapping and then create a mapping that associates users or a group of users with the desired profiles.
-
Click Save.
-
Click Show affected users to see which users will be affected by your configuration before you commit to any mappings.
-
Go to the More Actions menu and click Reapply Provisioning Mappings to apply the new rule. Reapply mappings any time you create or update rules.
Test Provisioning
To confirm that provisioning from OneLogin to Salesforce is working, add a user to OneLogin and go to Users > Provisioning to approve the provisioning event, if necessary. When the user is marked as Provisioned, go to Salesforce and confirm that the new user has been added. |