|
This article describes how to configure OneLogin to provision users with Atlassian Cloud.
Prerequisites
Enable Atlassian Cloud provisioning in OneLogin
- Log in to OneLogin as a Super user or Account Owner and access your .
- Go to Applications > Applications and select Atlassian Cloud.
- On the Configuration tab, connect to the Atlassian Cloud API:
- Enter your API GUID.
- Enter your Atlassian Cloud SCIM Bearer Token.
- Click Save.
If the connection is successful, the API Status icon switches to  . .
- On the Provisioning tab, select Enable provisioning.
- Select the provisioning actions that require admin approval. If you select any of the available actions, an admin must go to Users > Provisioning and manually approve the action every time it occurs.
Enabling these options is useful, especially before you start provisioning. Once you enable provisioning here, you could trigger provisioning during the course of setup and testing. With this safeguard enabled, a OneLogin administrator can ignore any inadvertent provisioning. Once you complete configuration, testing, and provision, you can update the settings to leave action options clear if you want OneLogin to make provisioning updates in Atlassian Cloud without requiring administrative approval.
- Select how users deleted in OneLogin are handled in Atlassian Cloud: choose between Delete, Suspend, and Do Nothing
- On the Parameters tab, confirm the mapping of Atlassian Cloud attributes to OneLogin attributes.
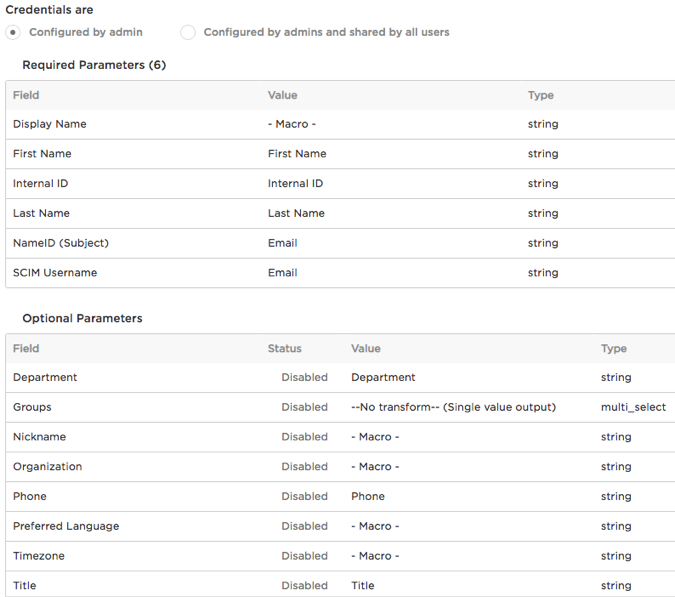
- SAML Attributes: The First Name, Last Name, Internal ID, and NameID parameters are used for SAML and should not be updated when enabling provisioning. In most cases, they should be left to their default values.
- SCIM Attributes: Display Name is used for provisioning and must be configured before provisioning users. Edit the parameter and set the value type to - Macro - and the value to
{firstname} {lastname}
- SCIM Username is used for provisioning. Keep the default OneLogin value of Email.
- There are additional Optional Parameters which can also be configured for user provisioning but they are not required.
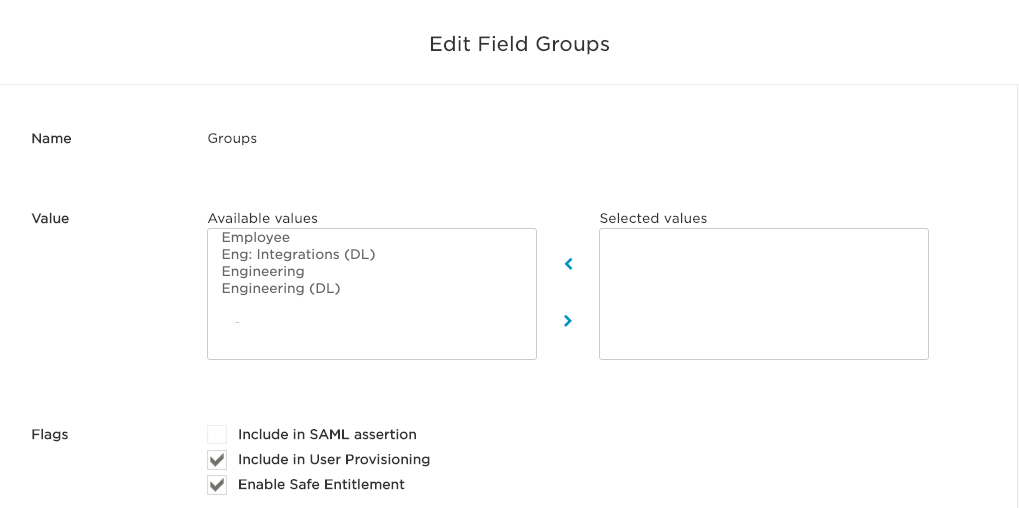
- Groups: Atlassian Access groups provide user access to Atlassian products. Only Access groups can be imported into OneLogin. Traditional Atlassian groups will not be imported into OneLogin.
- You must create Access groups via SCIM. Documentation on creating groups via SCIM can be found here
Note: Once User Provisioning is enabled in Atlassian Access, OneLogin is the source of truth for your Access Groups. Groups can't be created or edited via the Atlassian Access UI. All further Group creation and editing is controlled in OneLogin. Groups not associated with Access aren't affected by this.
- To confirm that provisioning from OneLogin to Atlassian Cloud is working, assign Atlassian Cloud to a OneLogin user and go to Users > Provisioning to approve the provisioning event, if necessary.
- When the user is marked as Provisioned, go to Atlassian Cloud and confirm that the new user has been added.
- Note: For more information about how to create groups with SCIM, see Provision Groups via SCIM
|