This topic describes how to configure OneLogin to provide SSO for ClickTime using SAML.
-
Log into OneLogin as an admin and go to Apps > Add Apps.
-
Search for and select the ClickTime connector.
The initial Configuration tab appears.
-
Ensure that the SAML2.0 connector is selected in the Connectors section.
-
Click Save to add the app to your Company Apps and display additional configuration tabs.
The Info tab appears.
-
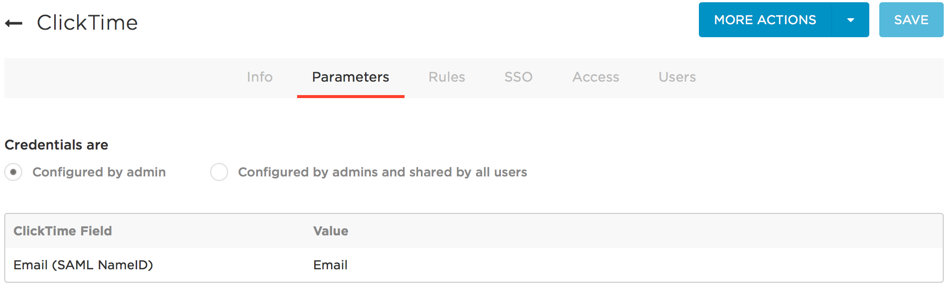
Go to the Parameters tab and map ClickTime attributes to OneLogin attributes.
In most cases, you should keep the Configured by admin default. For more information, see Setting Credential Configuration Options. For most implementations, you can accept all of the default attribute mappings. To change the OneLogin values, click the parameter row to open the Edit Field dialog, and select the value from the drop-down.
Ensure that the ClickTime field Email (SAML NameID) is set to Email.
Click Save if you made any changes on the Parameters tab.
-
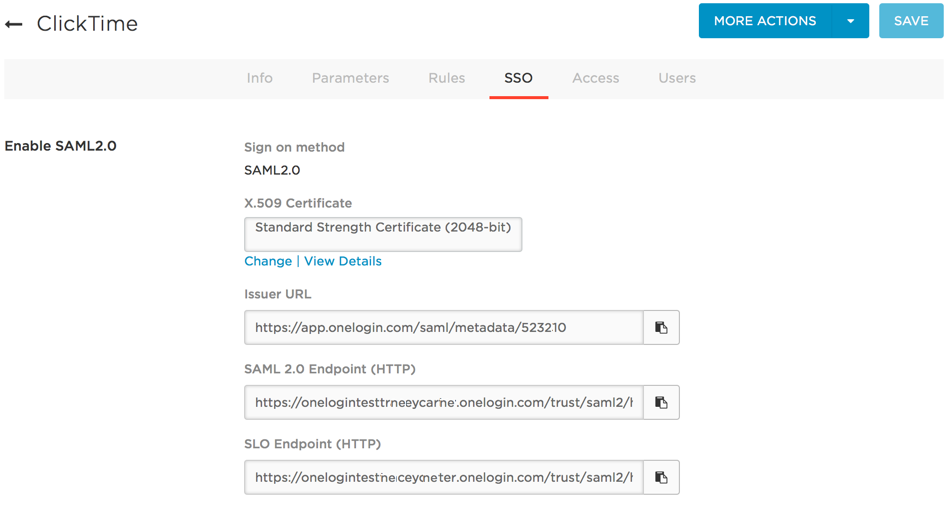
Go to the SSO tab to view the values that you'll copy into your ClickTime account to set up SAML SSO.
-
In a new browser tab, configure your ClickTime Single Sign-On settings.
-
Log in to your ClickTime account as admin.
-
In the navigation bar, select Preferences and then scroll down to the Single Sign-On Preferences section.
-
Select OneLogin as the Single Sign-On provider.
-
With both the OneLogin SSO tab and the ClickTime Single Sign-On Preferences page open, copy the SAML values from OneLogin to the analogous Clicktime settings.
Copy this OneLogin SSO field value: To this ClickTime SSO field: SAML 2.0 Endpoint (HTTP)
Identity Provider Endpoint
X.509 Certificate
To get the X.509 Certificate, click View Details to open the certificate page. Copy the entire X.509 Certificate, including "
----BEGIN CERTIFICATE----" and "----END CERTIFICATE----."X.509 Certificate
Paste the entire X.509 certificate value into the X.509 Certificate field.
When you are finished, your ClickTime Single Sign-On settings should look like this:

-
-
On the OneLogin Access tab, assign the OneLogin roles that should have access to ClickTime and provide any app security policy that you want to apply to ClickTime.
You can also go to Users > All Users to add the app to individual user accounts.
-
Click Save.
-
Test the SAML connection.
-
Ensure that you have user accounts in both OneLogin and ClickTime that use the same email as the username.
You can create a test user, or you can use your own account if you choose.
-
Make sure you are logged out of ClickTime.
-
Log in to OneLogin as an admin and give the test user access to the ClickTime app in OneLogin. (See step 8 above)
-
Log in to OneLogin as the test user.
-
Click the ClickTime icon on your OneLogin dashboard.
If you are able to access ClickTime, then SAML works.
-