This topic describes how to configure OneLogin to provide SSO for Trello using SAML. (If you want to set up SSO using form-based authentication, see Configuring SSO for a Form-Based Application.)
-
Log in to OneLogin and go to Apps > Add Apps.
-
Search for Trello and select it.
Apps that are enabled for SAML are identified with the label SAML2.0.
-
When the Configuration tab appears, update the app display name or icons if you like, and click Save to add the app to your Company Apps.
Additional tabs appear, and you land on the Info tab.
-
Go to the Configuration tab and enter your Trello Enterprise Organization Name in the Application Details section.
-
Click Save.
-
On the Parameters tab, confirm your credential settings and user attribute mappings.
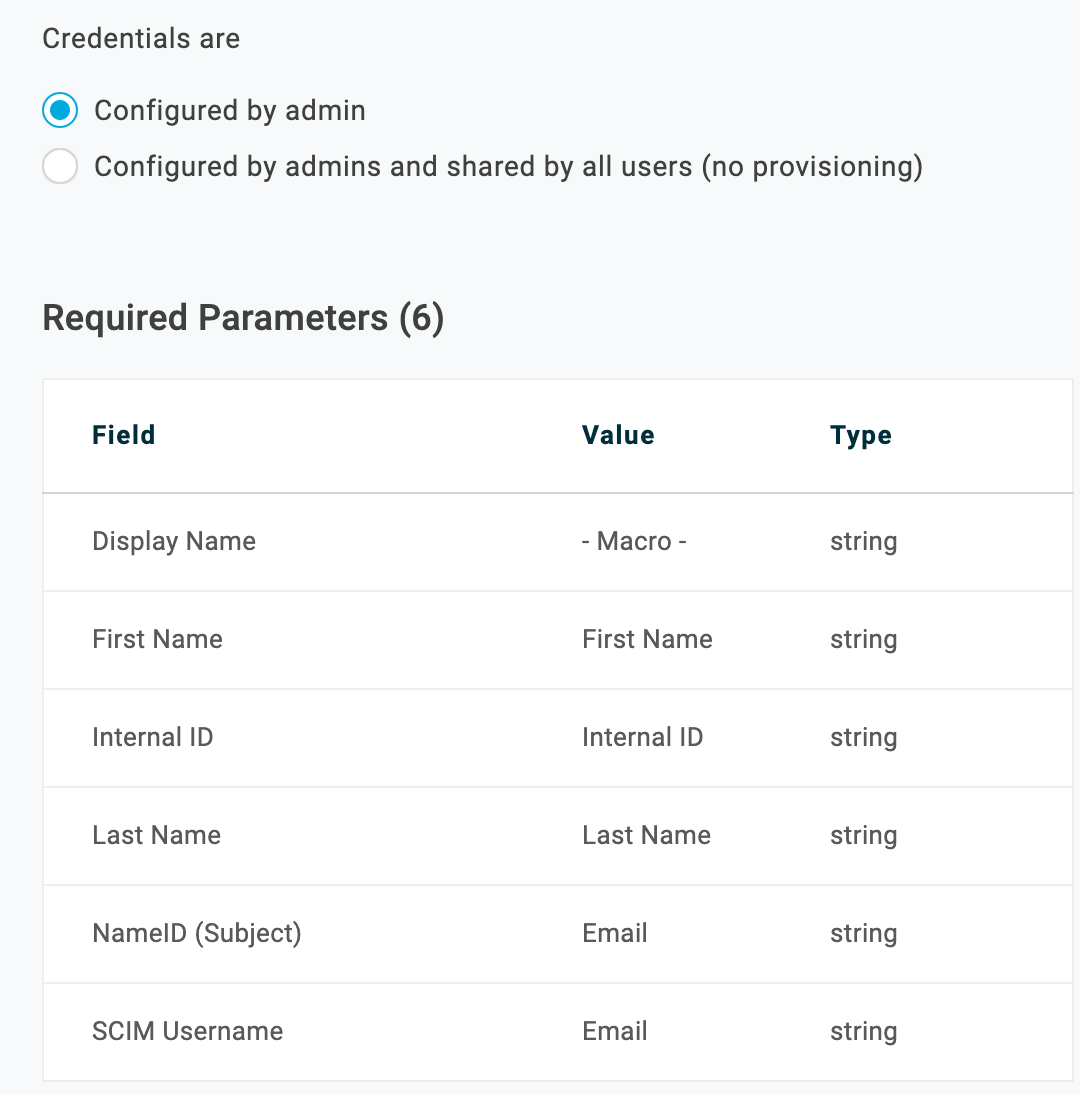
In most cases, you can keep the Configured by admin default credential option. For more information, see Setting Credential Configuration Options.
In most cases, you can also accept the default attribute mappings.
NameID (Subject) is included in the SAML assertion passed by OneLogin to <App Name>. You should keep the default OneLogin value of Email.
The SCIM Username is used for provisioning. See Provisioning for Trello.
If for any reason you need to change the OneLogin value that is mapped to an app attribute, click the parameter row to open the Edit Field <Fieldname> dialog.
-
Go to the SSO tab to copy the SAML metadata that you must provide to Trello to complete the integration.
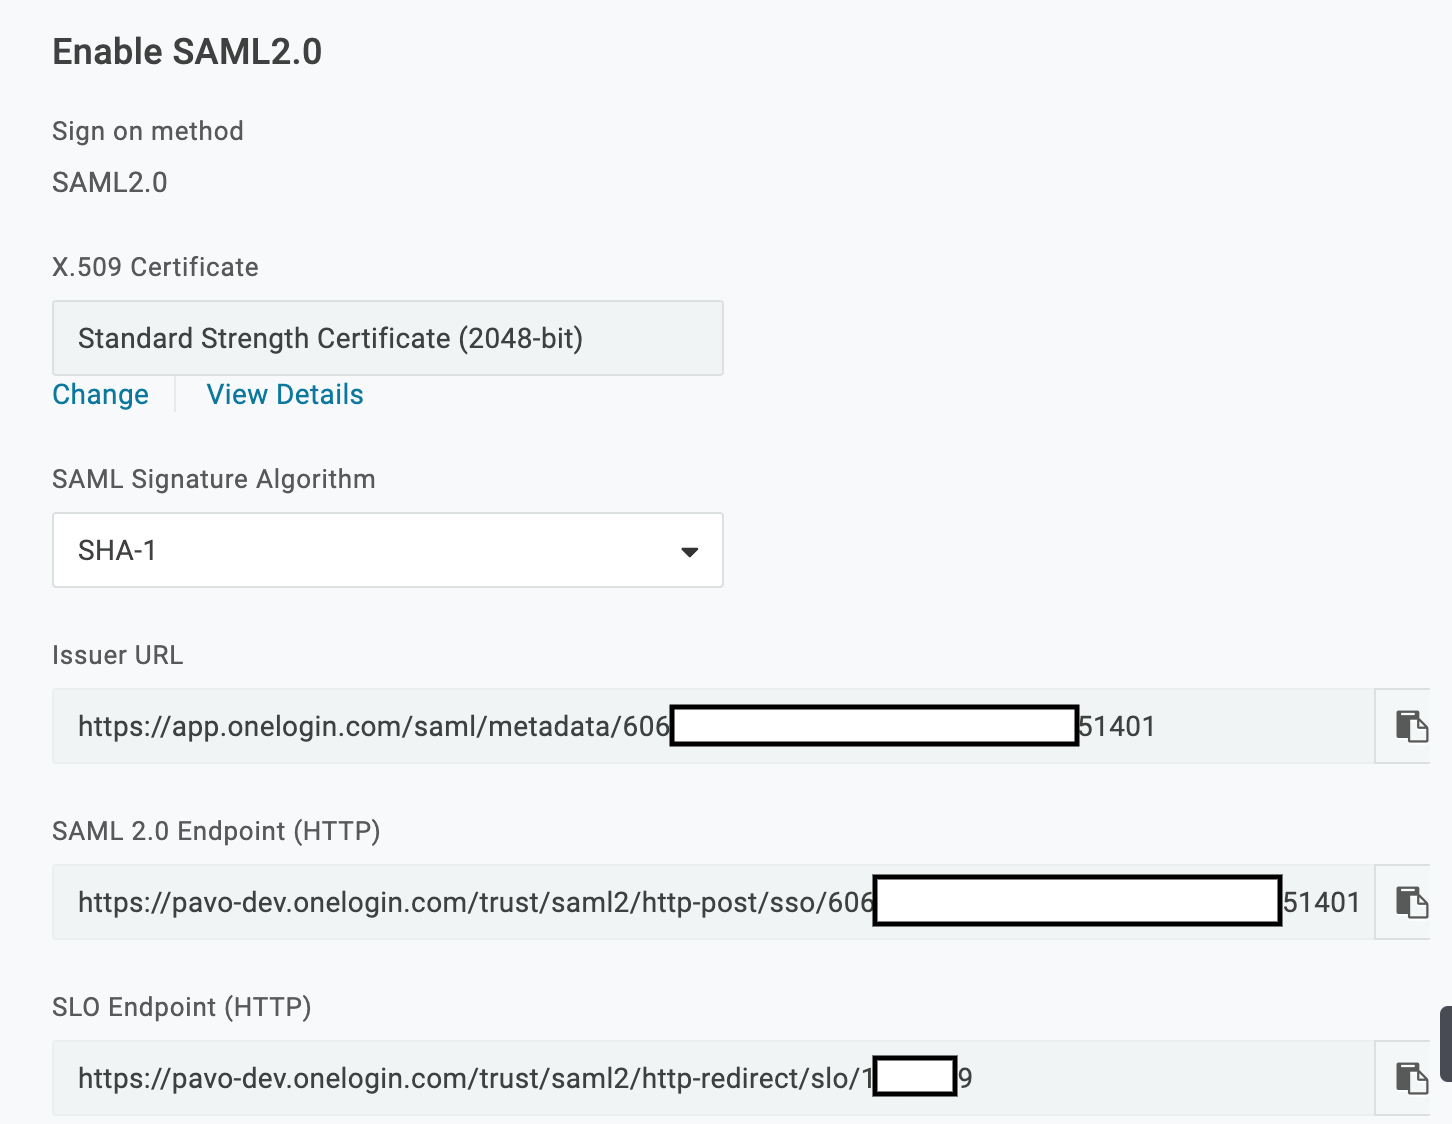
Copy the following values:
-
SAML Issuer URL: the OneLogin URL that provides data about OneLogin as a SAML-providing IdP.
-
SAML 2.0 Endpoint (HTTP): the OneLogin URL that the app redirects to for SSO if a session isn't already established.
-
X.509 Certificate: the Public certificate that establishes trust between OneLogin and the app provider.
To copy the X.509 certificate, click View Details and click the Copy to Clipboard icon for the X.509 Certificate. If you want a different certificate, click Change on the SSO tab, select the new certificate, and follow the above instructions. You must include the entire certificate, including -----BEGIN CERTIFICATE----- and -----END CERTIFICATE------ when you provide it to the app provider.
See also Creating and Applying Certificates.
-
The SHA fingerprint of the X.509 certificate.
To copy the SHA fingerprint, click View Details and click the Copy to Clipboard icon for SHA Fingerprint.
See also Creating and Applying Certificates.
Go to More Actions >  SAML Metadata to get the metadata XML file that you will provide to Trello. SAML Metadata to get the metadata XML file that you will provide to Trello.
-
In OneLogin, go to the Access tab to assign the OneLogin roles that should have access to Trello and provide any app security policy that you want to apply to the app.
You can also go to Users > All Users to add the app to individual user accounts, and return to this app configuration page to complete SSO configuration.
-
Click Save.
- Contact your Trello Account Representative to request they enable SAML in your account. You will need to provide your SAML 2.0 Endpoint URL and your X.509 cert from Step 7 above.
-
Test the SAML connection.
-
Ensure that you have matching user accounts in the app and OneLogin (the OneLogin email address or username is identical to the app user name).
You can create a test user, or you can use your own account if you choose.
-
Make sure you are logged out of the app.
-
Log in to OneLogin as an admin and give the test user access to the app in OneLogin. (See step 9 above)
-
Log in to OneLogin as the test user.
-
Click the app icon on the OneLogin dashboard.
If you are able to access the app, then SAML works.
|