This topic describes how to configure OneLogin to provide single sign-on (SSO) for Join.me using SAML. (To set up SSO for Join.me with form-based authentication, see Adding a Form-Based Application.)
-
Log in to OneLogin and go to Apps > Add Apps.
-
Search for Join.me In the Find Applications list and select the Join.me connector that is enabled for SAML 2.0.
-
On the Configuration tab, you can optionally change the Display Name and add an icon.
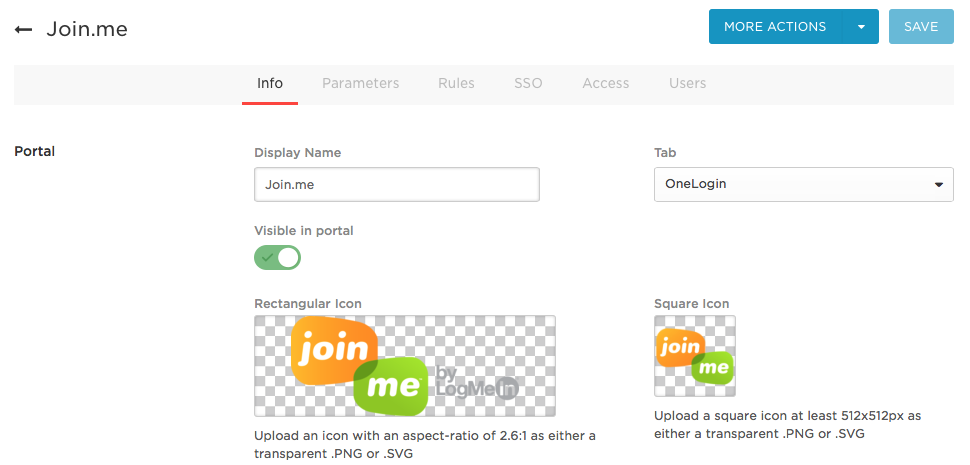
To upload an icon, double-click the icon box.
-
Click Save to add the Join.me app to your Company Apps and display additional configuration tabs.
-
On the Parameters tab, view the default settings used to map Join.me user attributes to OneLogin values. The OneLogin attribute values are passed to Join.me in the SAML assertion.
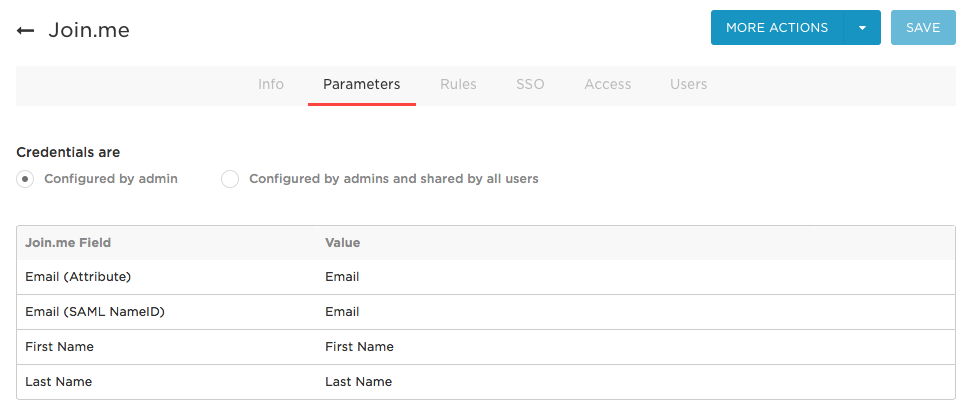
In a standard implementation, you should accept these defaults:
| Join.me Field |
OneLogin Value |
Notes |
| Email (Attribute) |
Email |
The attribute used as the address in a SAML assertion. |
| Email (SAML NameID) |
Email |
The attribute used as the subject in a SAML assertion. |
| First Name |
First Name |
|
| Last Name |
Last Name |
|
Note: The default Credentials are setting (Configured by admin) is almost always the right choice. To use Configured by admins and shared by all users, see Setting Credential Configuration Options.
-
On the Access tab, assign the OneLogin roles that have access to Join.me and provide any app security policy that you want to apply.
Roles dictate which users have access to Join.me. Policies determine if users are required to access the app from specific IP addresses and if they must provide secondary authentication factors (one-time passwords). On the Access tab, assign the OneLogin roles that have access to Join.me and provide any app security policy that you want to apply.
If you want to wait until you have configured the SAML SSO connection (in the next step) and tested that connection before you give users access to this app, you can accept the defaults and continue to the SSO tab.
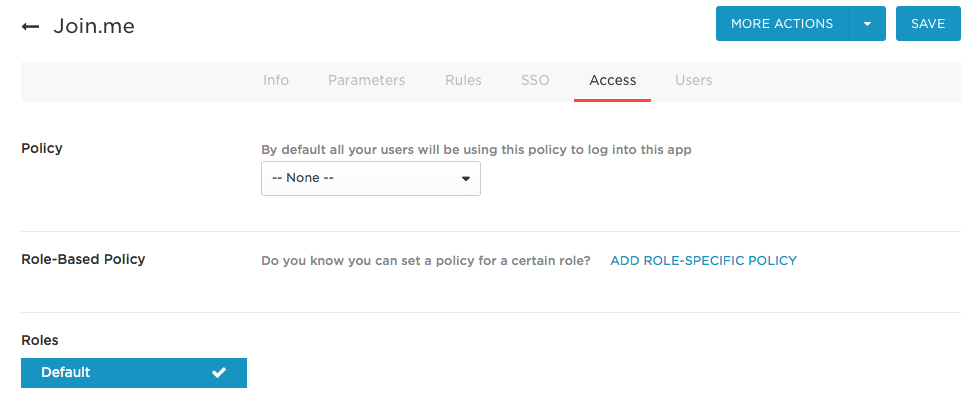
Note: You can also go to Users > All Users to add the Join.me app to individual user accounts, then return to this app configuration page to complete SSO configuration. For more information, see Assigning Apps to Users.
-
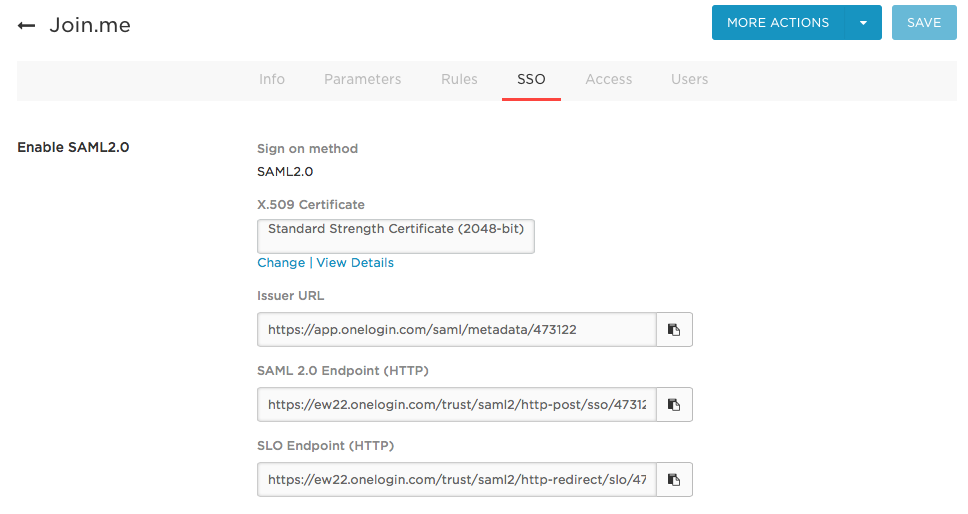
On the SSO tab, make note of the SAML settings that you will provide to the Join.me support team.
-
Click View Details. This displays the Certificate page.
-
Select X.509 PEM from the drop-down list and click Download.
Note: If you want a different certificate, click Change. Then select the new certificate and follow the above instructions. You can create new X.509 certificates for selection by going to Settings > Certificates and clicking New.
-
Contact the Join.me support team and provide them with the SAML HTTP Endpoint, Issuer URL, and X.509 certificate.
-
Test the SAML connection.
-
Confirm that Join.me support has added the SAML settings to your Join.me account.
-
Make sure you are logged out of Join.me.
-
Give yourself, or a OneLogin test account, access to the Join.me app in OneLogin.
-
Click the Join.me icon on your OneLogin dashboard.
-
If you are able to access Join.me, then SAML works.
|