This topic describes how to configure OneLogin to provide SSO for Symantec Mobility Suite using SAML.
-
Log into OneLogin as an admin and go to Apps > Add Apps.
-
Search for and select the Symantec Mobility Suite connector.
The initial Configuration tab appears.
-
Click Save to add the app to your Company Apps and display additional configuration tabs.
The Info tab appears.
-
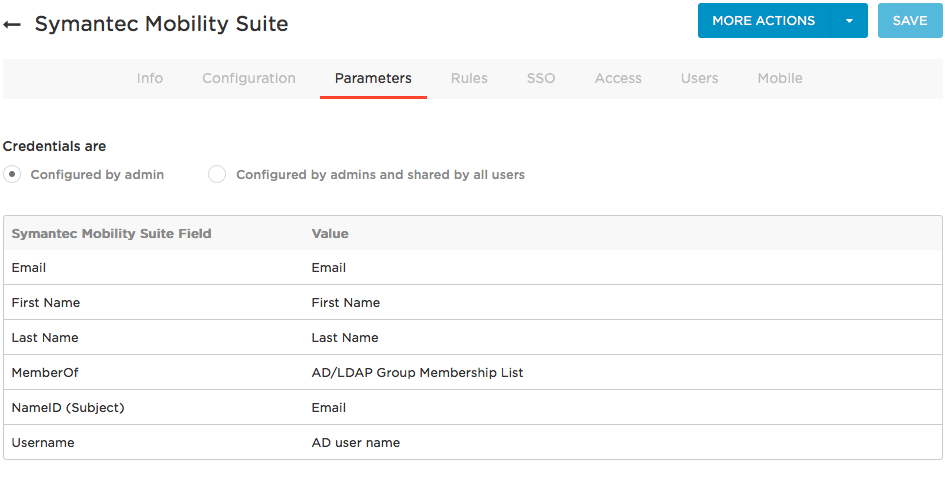
Go to the Parameters tab and map Symantec Mobility Suite attributes to OneLogin attributes.
In most cases, you should keep the Configured by admin default. For more information, see Setting Credential Configuration Options.
For most implementations, you can accept the default attribute mappings. Ensure that the Symantec Mobility Suite field NameID (Subject) is set to Email. To change the OneLogin value, click the parameter row to open the Edit Field dialog, and select the value from the drop-down. Click Save if you made any changes on the Parameters tab.
-
In a new browser window or tab, log into your Symantec Mobility Suite account as an admin.
-
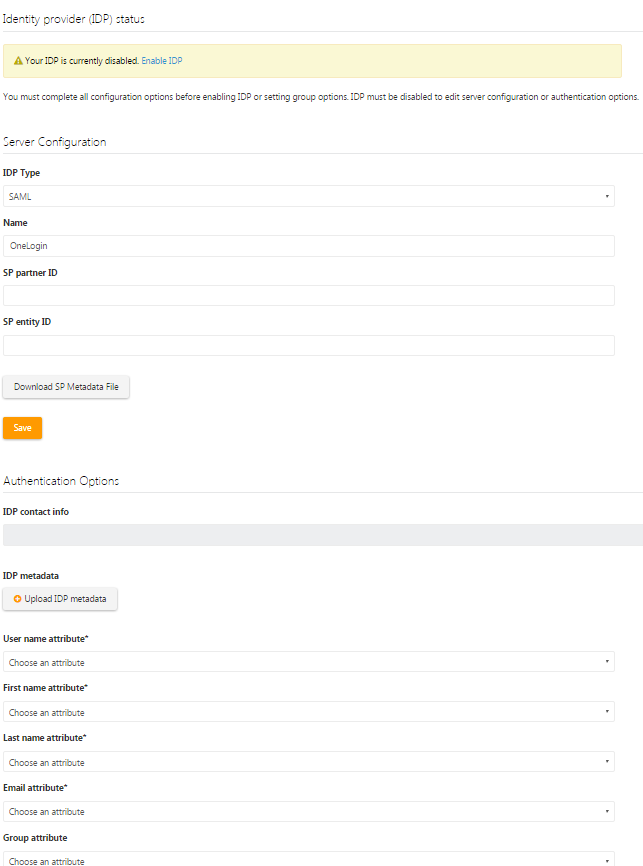
Navigate to Symantec's External Identity Provider settings page.
-
Enter any value in the SP Entity ID field and click Save.
-
Still on the External Identity Provider settings page in Symantec, locate and copy the consumer URL.
-
Click the Download SP Metadata File button and save the file locally.
-
Open the downloaded SP Metadata file, and find and copy the HTTP POST SSO URL
It is the URL that follows urn:oasis:names:tc:SAML:2.0:bindings:HTTP-POST.
-
In OneLogin, go to the Configuration tab and paste the SP Entity ID value from Symantec into the OneLogin field SAML audience.
-
Still in OneLogin, download the IdP Metadata file.
Go to the More Actions menu and select SAML Metadata.
-
Edit the IdP Metadata file and paste the following five saml:Attribute values directly after the three SingleSignOnService Binding URLs:
 <SingleSignOnService Binding="urn:oasis:names:tc:SAML:2.0:bindings:HTTP-Redirect" Location="https://app.onelogin.com/trust/saml2/http-post/sso/545547"/>
    <SingleSignOnService Binding="urn:oasis:names:tc:SAML:2.0:bindings:HTTP-POST" Location="https://app.onelogin.com/trust/saml2/http-post/sso/545547"/>
    <SingleSignOnService Binding="urn:oasis:names:tc:SAML:2.0:bindings:SOAP" Location="https://app.onelogin.com/trust/saml2/soap/sso/545547"/>
<saml:Attribute NameFormat="urn:oasis:names:tc:SAML:2.0:attrname-format:basic" Name="FirstName" xmlns:saml="urn:oasis:names:tc:SAML:2.0:assertion"/>
 <saml:Attribute NameFormat="urn:oasis:names:tc:SAML:2.0:attrname-format:basic" Name="LastName" xmlns:saml="urn:oasis:names:tc:SAML:2.0:assertion"/>
 <saml:Attribute NameFormat="urn:oasis:names:tc:SAML:2.0:attrname-format:basic" Name="EMailAddress" xmlns:saml="urn:oasis:names:tc:SAML:2.0:assertion"/>
 <saml:Attribute NameFormat="urn:oasis:names:tc:SAML:2.0:attrname-format:basic" Name="Username" xmlns:saml="urn:oasis:names:tc:SAML:2.0:assertion"/>
 <saml:Attribute NameFormat="urn:oasis:names:tc:SAML:2.0:attrname-format:basic" Name="memberOf" xmlns:saml="urn:oasis:names:tc:SAML:2.0:assertion"/>
-
Save the IdP Metadata file.
-
Return to the External Identity Provider settings page in Symantec and click the Upload IDP metadata button to upload the IdP Metadata file that you just modified to Symantec.
The IdP Metadata file will populate the attributes below the Upload IDP metadata button. All of the attributes will be selectable in drop-down lists in Symantec.
-
Select the appropriate attributes in Symantec.
-
Select Enable SAML at the bottom of the External Identity Provider settings page.
- Save your changes and exit the Symantec External Identity Provider settings page.
-
On the OneLogin Access tab, assign the OneLogin roles that should have access to Symantec Mobility Suite and provide any app security policy that you want to apply to Symantec Mobility Suite.
You can also go to Users > All Users to add the app to individual user accounts.
-
Click Save.
-
Test the SAML connection.
-
Ensure that you have user accounts in both OneLogin and Symantec Mobility Suite that use the same email as the username.
You can create a test user, or you can use your own account if you choose.
-
Make sure you are logged out of Symantec Mobility Suite.
-
Log in to OneLogin as an admin and give the test user access to the Symantec Mobility Suite app in OneLogin. (See step 14 above)
-
Log in to OneLogin as the test user.
-
Click the Symantec Mobility Suite icon on your OneLogin dashboard.
If you are able to access Symantec Mobility Suite, then SAML works.